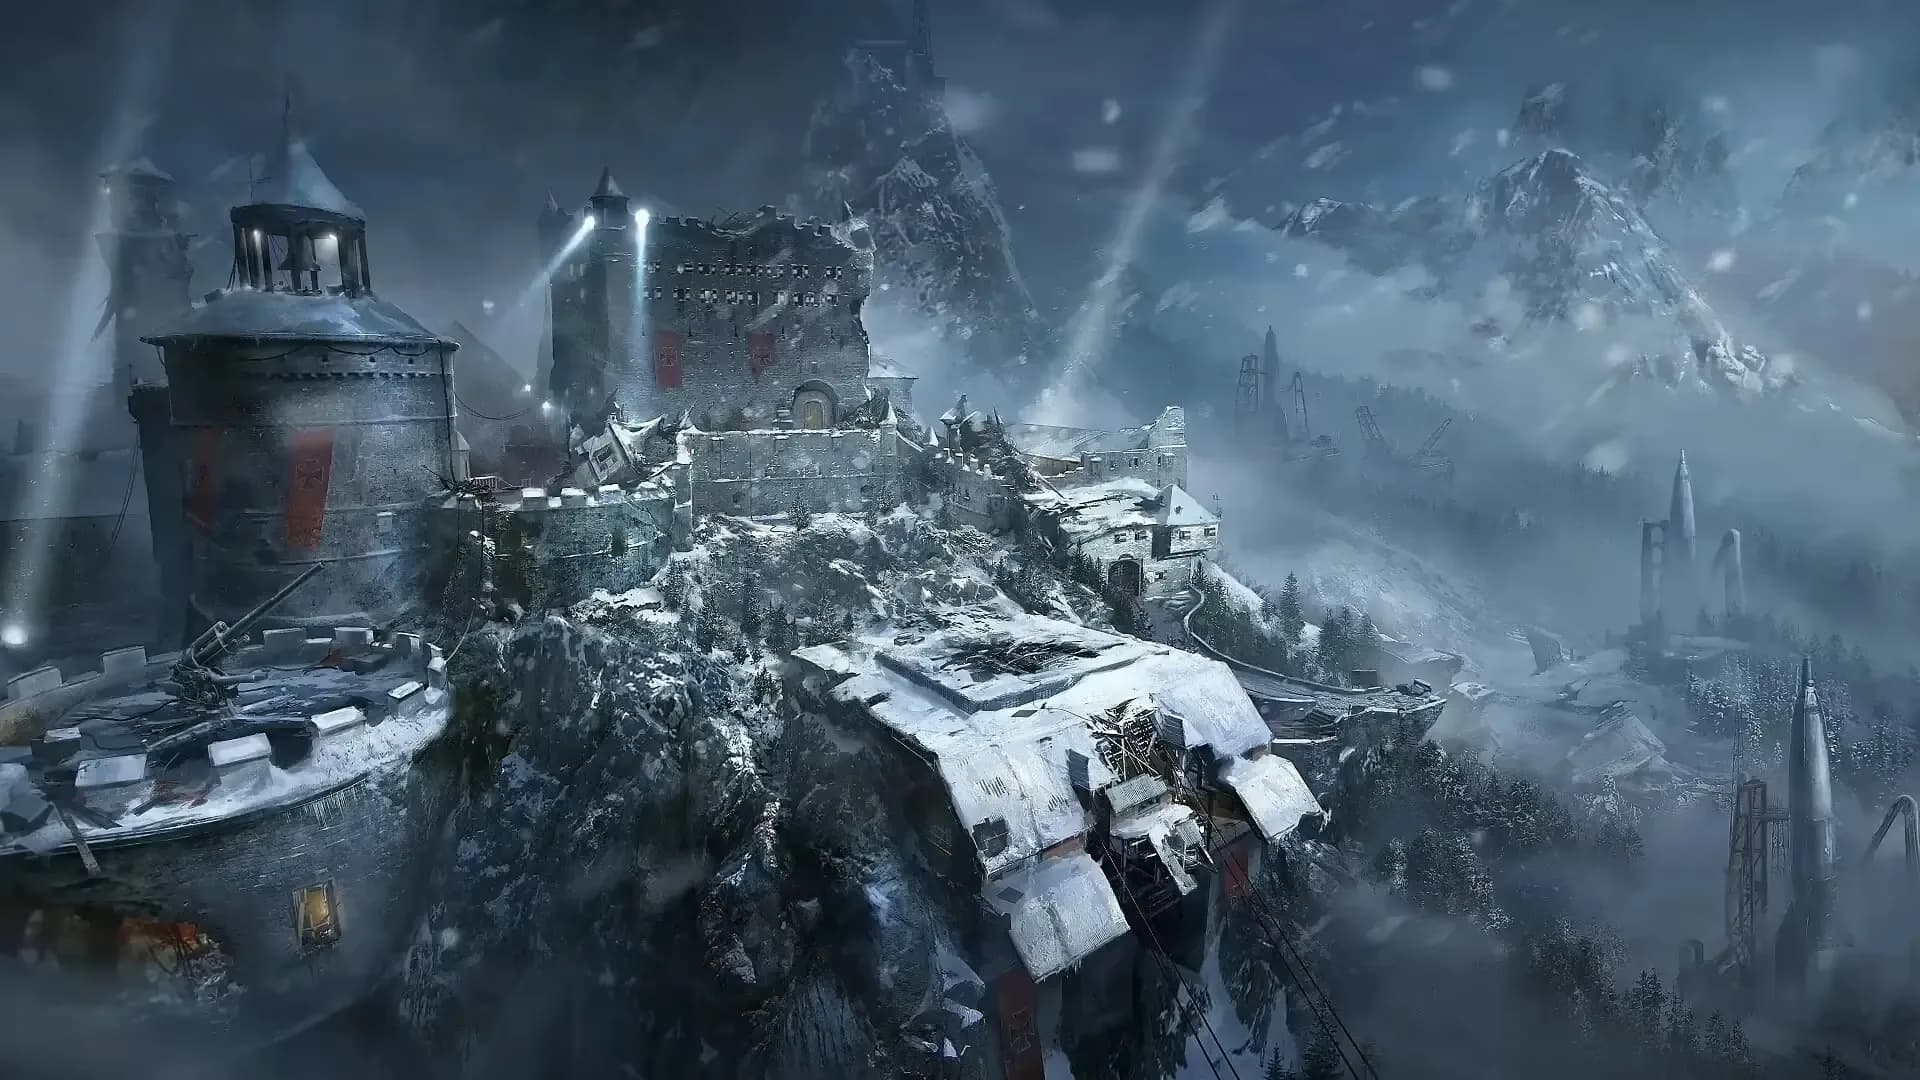
Der Eisendrache
My Brother's Keeper
The main quest for Der Eisendrache is called My Brother's Keeper. Our Primis crew's goal in this quest is to erase Ultimis "Tank" Dempsey and harvest his soul using the Summoning Key.
Requirements
This main quest can be done with any number of players; however, for each player in the game, a bow must be upgraded, meaning you only need to upgrade a single bow on solo. You'll also need to acquire the following items to complete this quest fully:
- Wrath of the Ancients
- Ragnarok DG-4s
- Activate Anti-Gravity (only required for the Storm and Wolf bows)
If you are playing a local game (meaning offline or unranked), you will always need to upgrade all four bows for the main quest.
Recommended Gobblegums
Step 1: Obtain the Wrath of the Ancients
To obtain the Wrath of the Ancients bow, you must feed three dragons around the map by killing zombies near them. When a dragon is fed fully, it will become stone and crumble. The locations of the three dragons are:


The dragons eat very slowly, you must wait for the dragon to finish eating a zombie before killing another for it to consume.
Once all three dragons have been fed, you can claim the Wrath of the Ancients from the Tomb room, which connects the Undercroft to the Mission Control/Church room.

Step 2: Upgrading the Wrath of the Ancients
Once you have acquired the Wrath of the Ancients, you must upgrade it to one of the four paths Storm, Fire, Wolf, or Void by claiming a broken elemental arrow. Once one of these bows has been claimed you can begin Step 3.
Storm Bow
Head to the death ray at the top of the castle, you must shoot the Weathercock with the Wrath of the Ancients causing it to spin around and break the lower wall revealing the broken storm arrow you can claim.
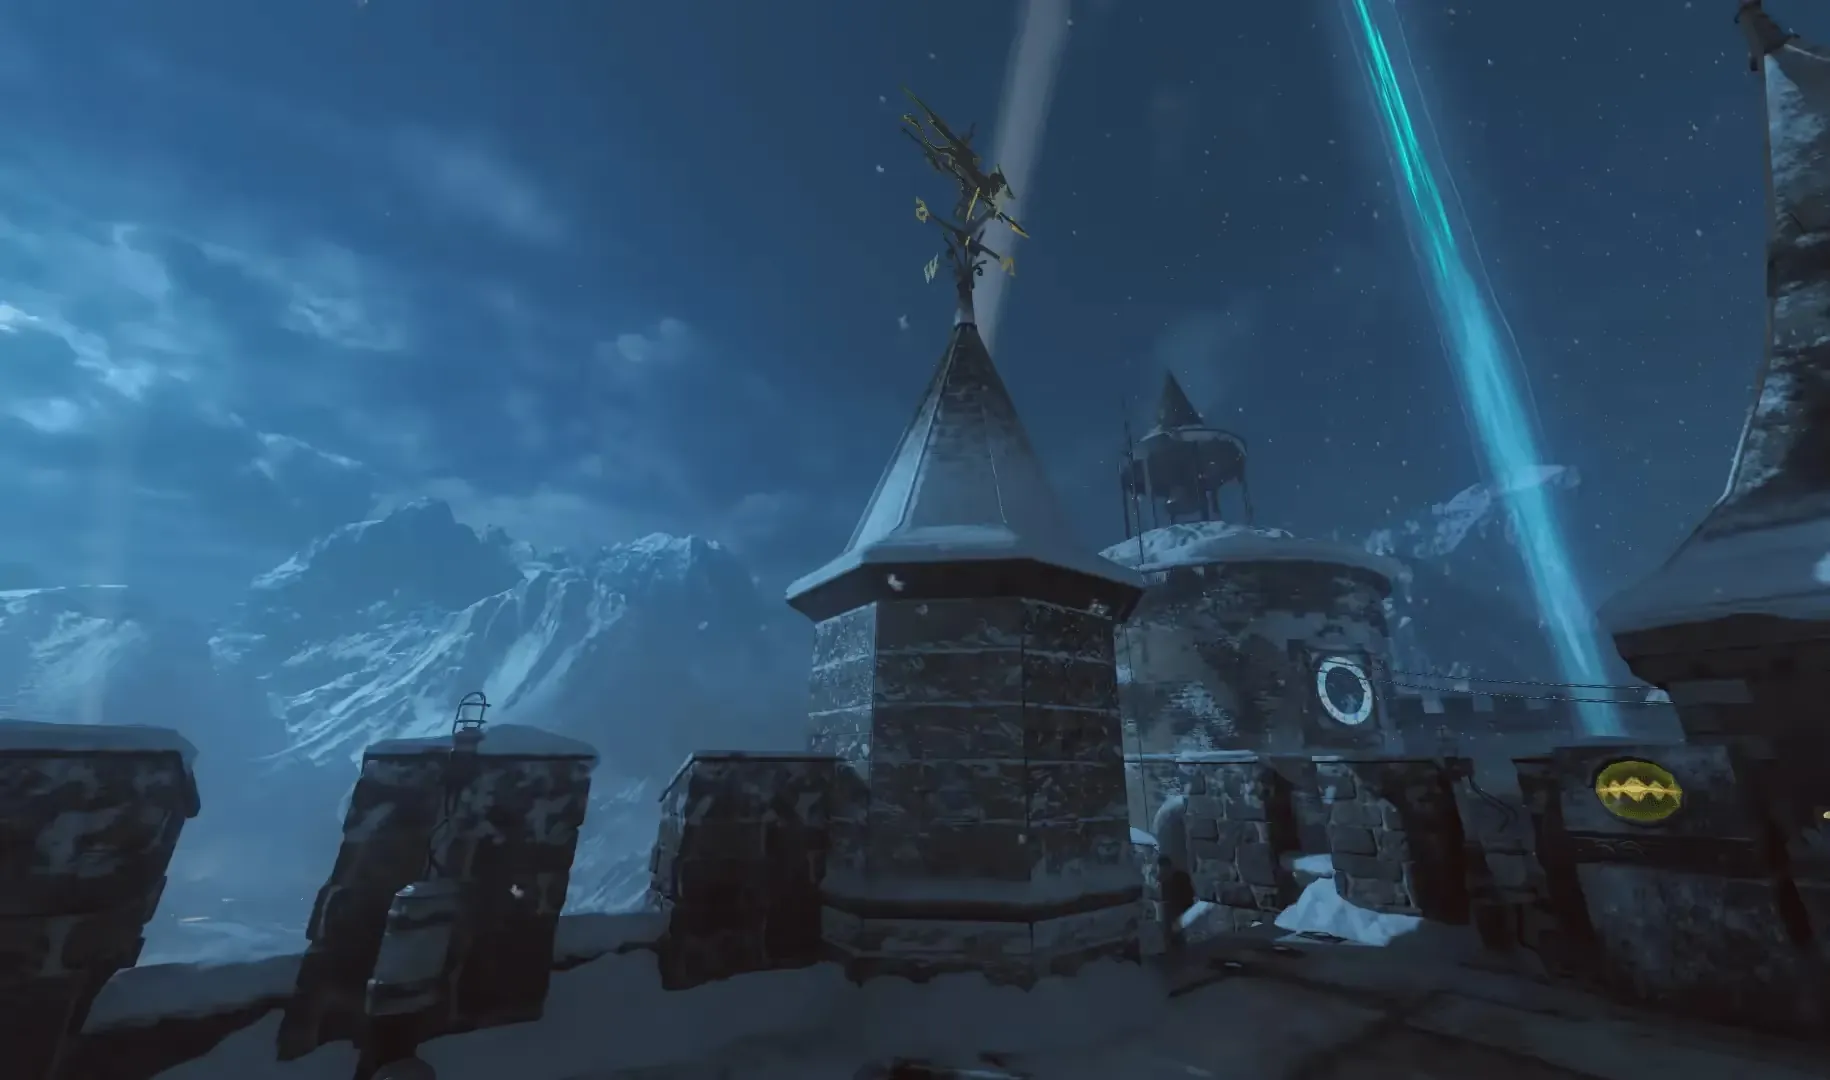
After picking up the broken arrow, you must ignite three bonfires around the map using the Wrath of the Ancients. If done successfully, you will see an increase in the progress of your arrow. The locations of the three bonfires are:

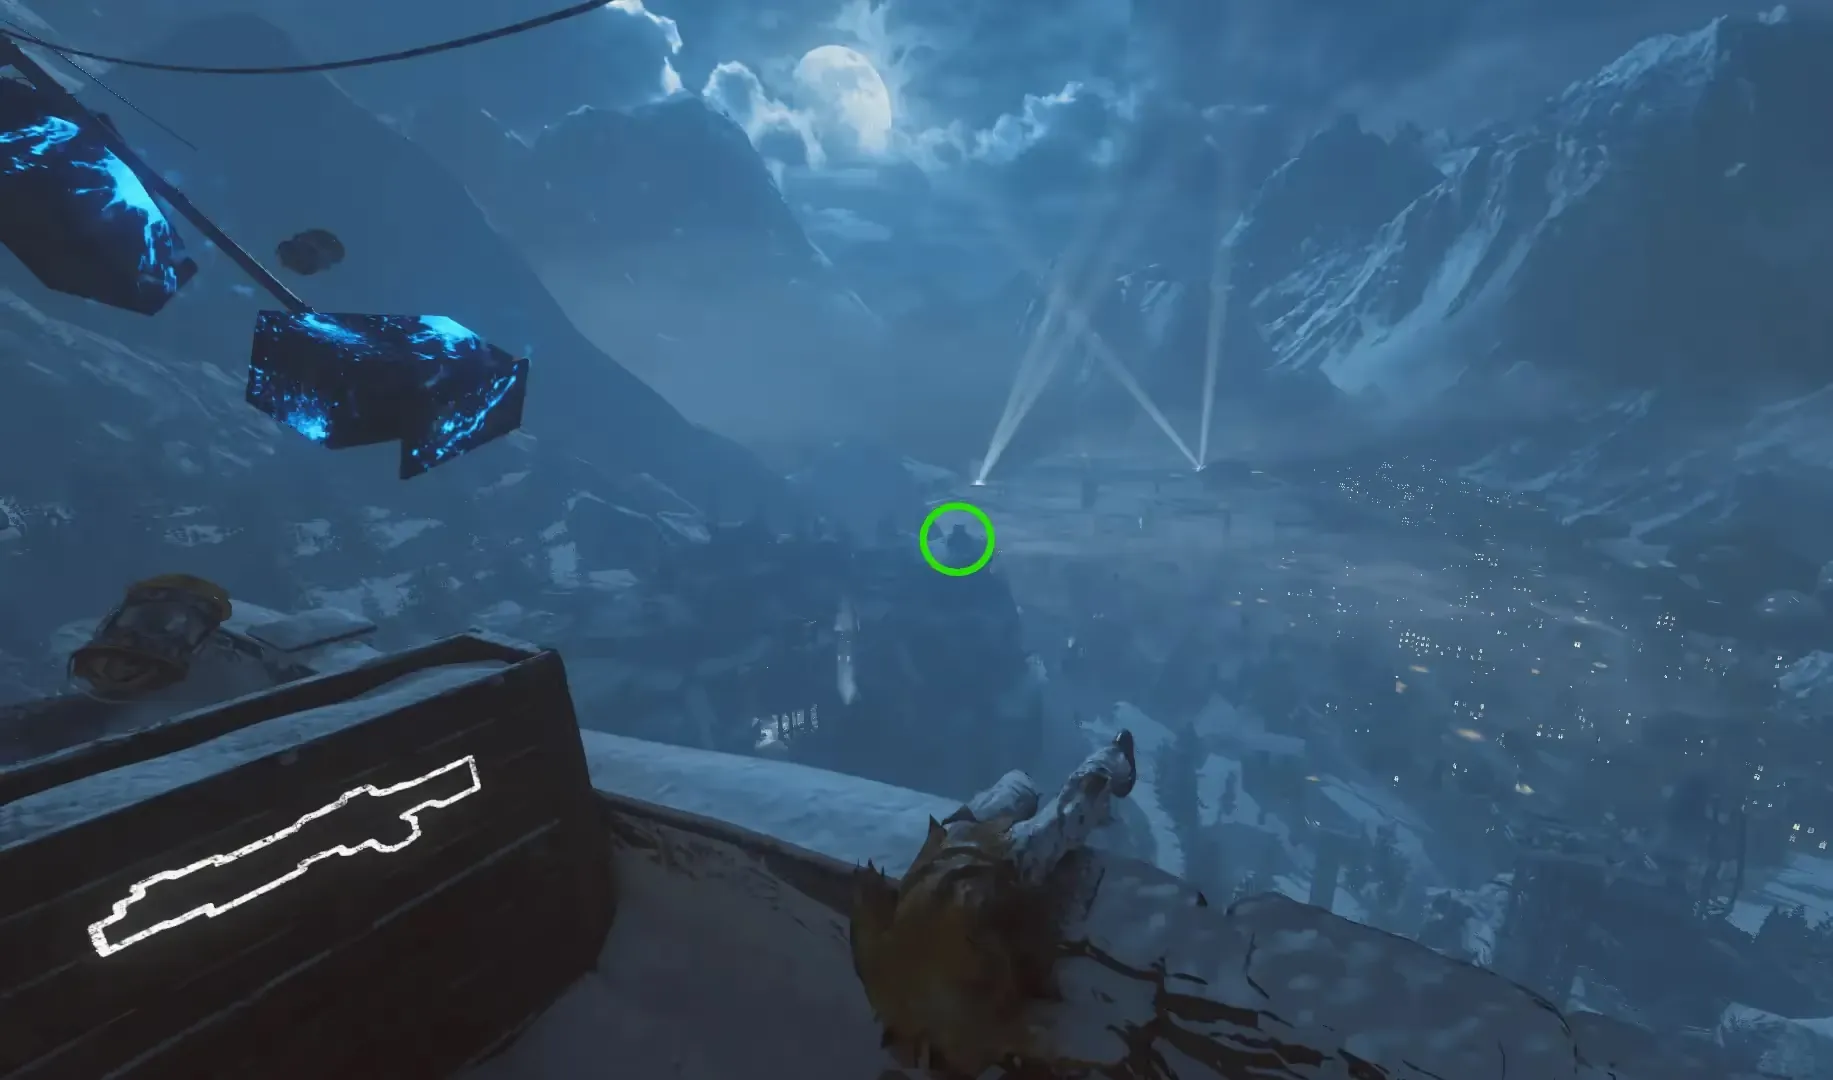
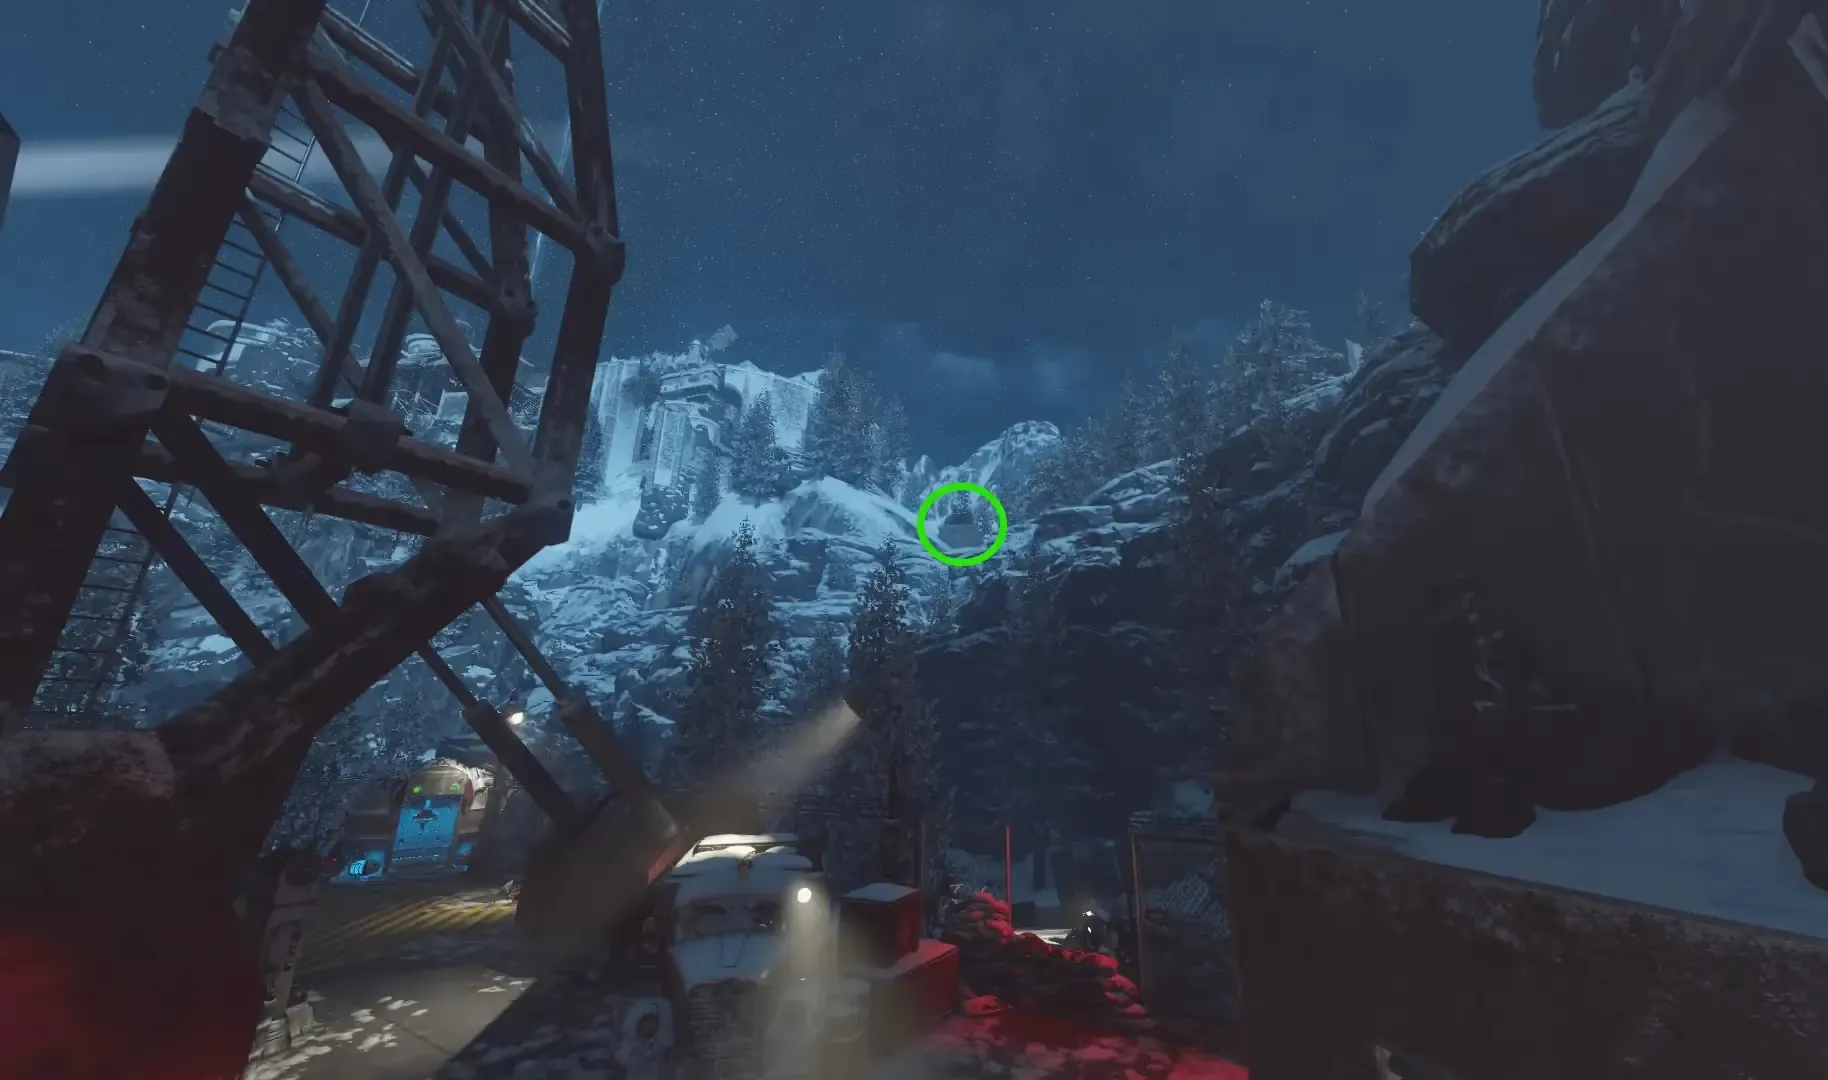
Once all three bonfires have been lit, head to the Undercroft where you must wait for the periodic Anti-Gravity to activate. Once it does, you must wall run across 5 panels marked by blue symbols without touching the ground. If done successfully, you will see an increase in the progress of your arrow.

Once all 5 panels have been activated, you must shoot the bonfires you have ignited with an electrified arrow. You can electrify your arrow by drawing your bow near a charged urn. There are three urns around the map that you must charge by killing six zombies near them. Their locations are:

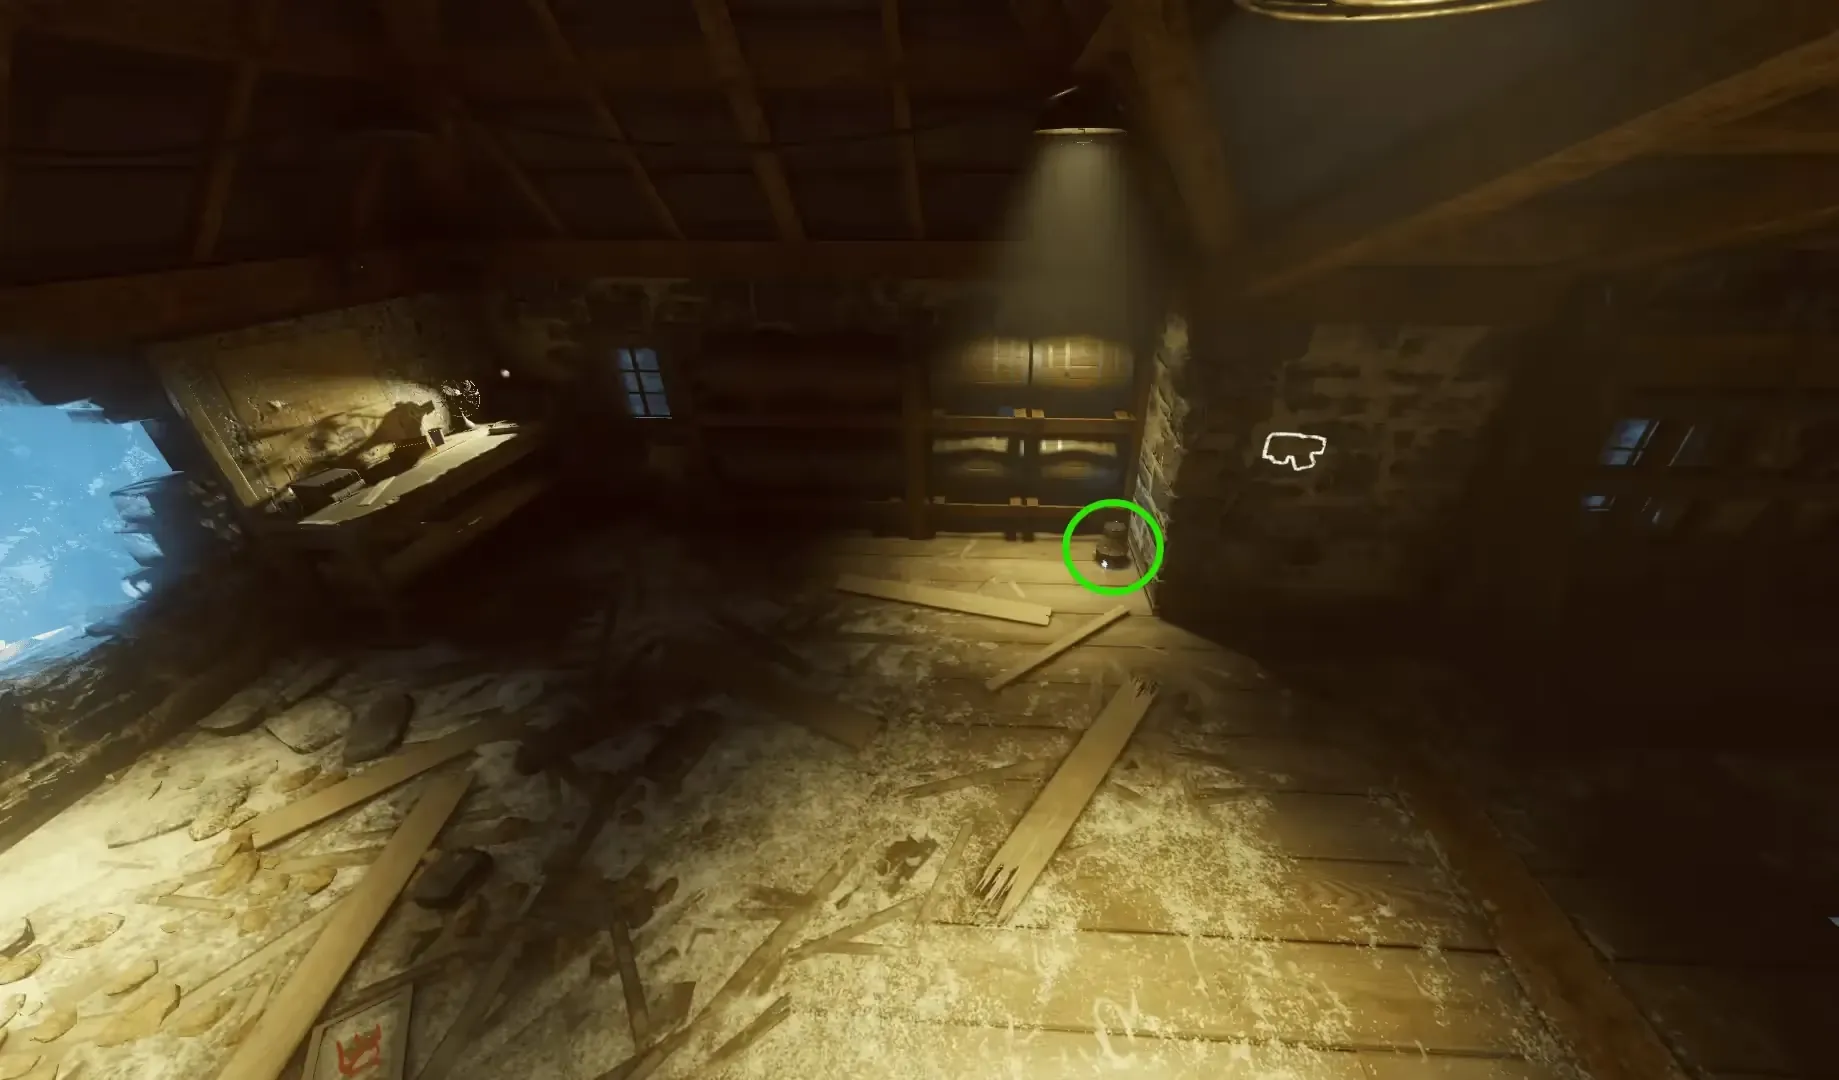
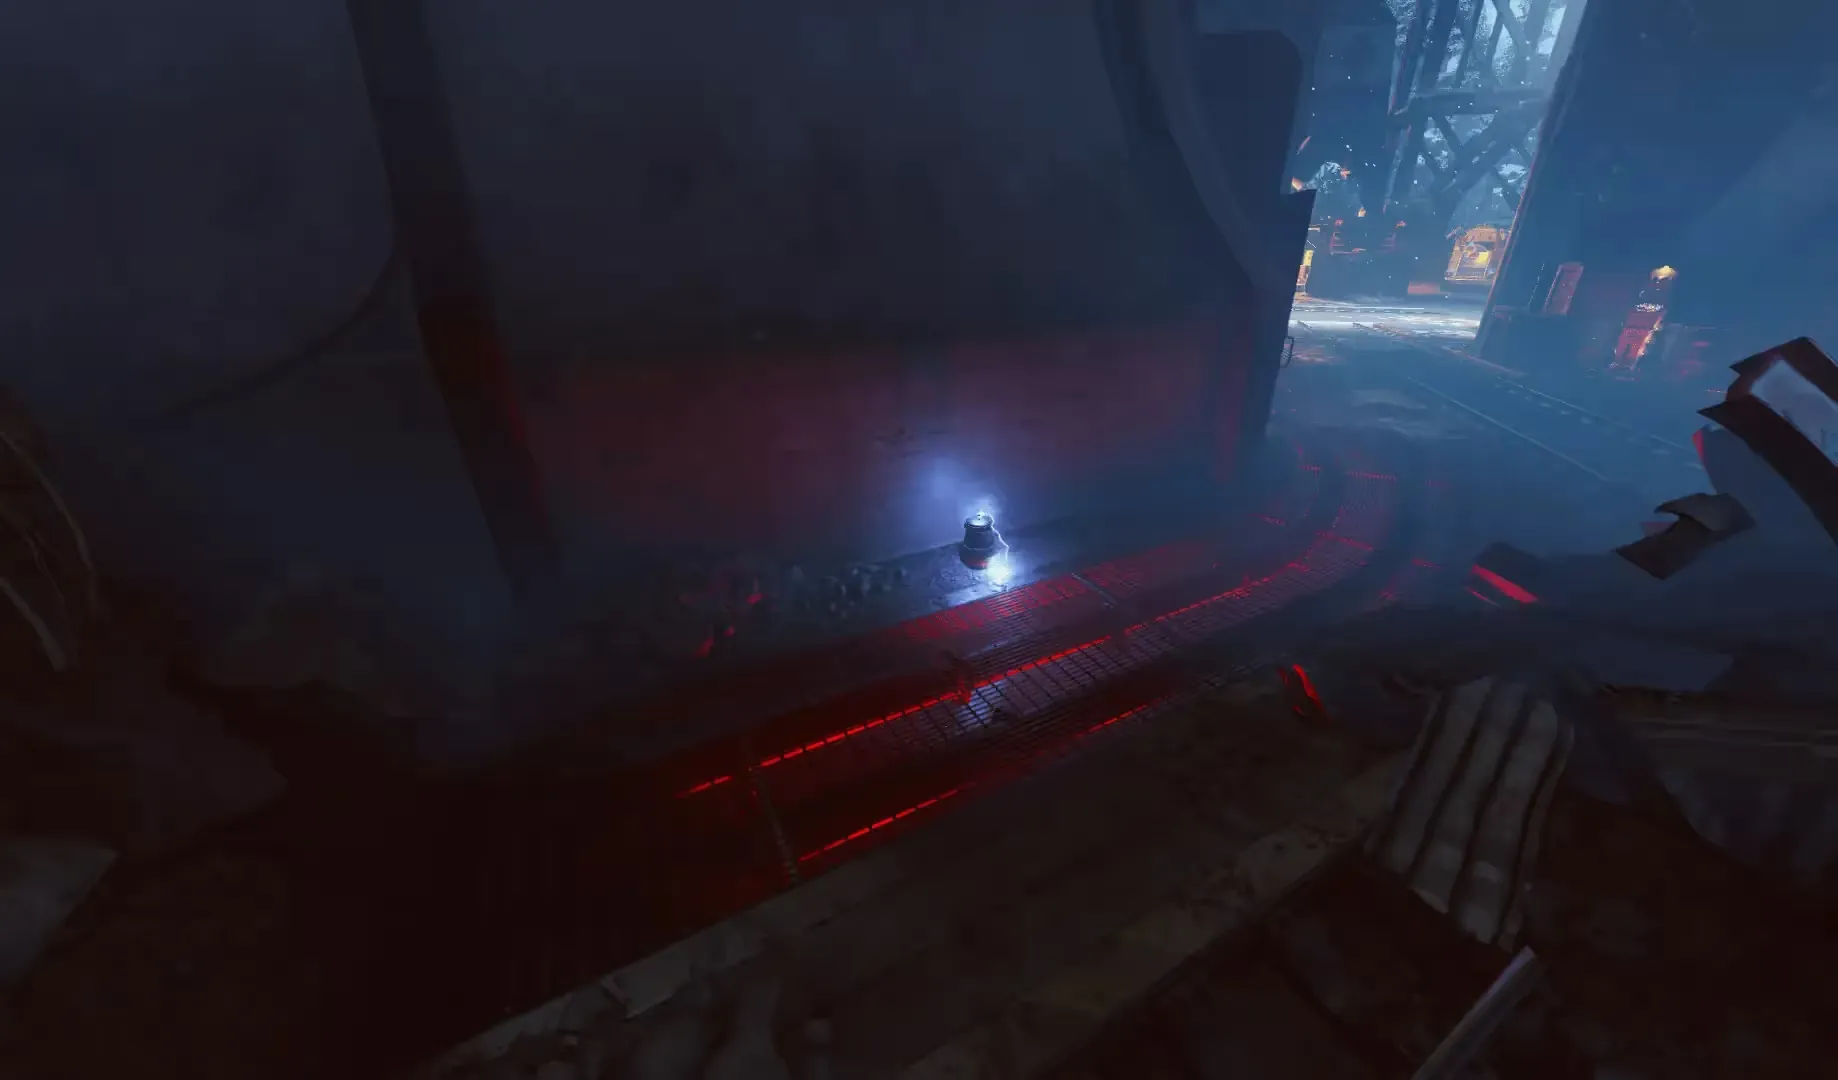
Once an urn has been charged, draw your bow to electrify your arrow and release the charged shot at the nearest bonfire electrifying the bonfire. If done successfully, you will see an increase in the progress of your arrow.
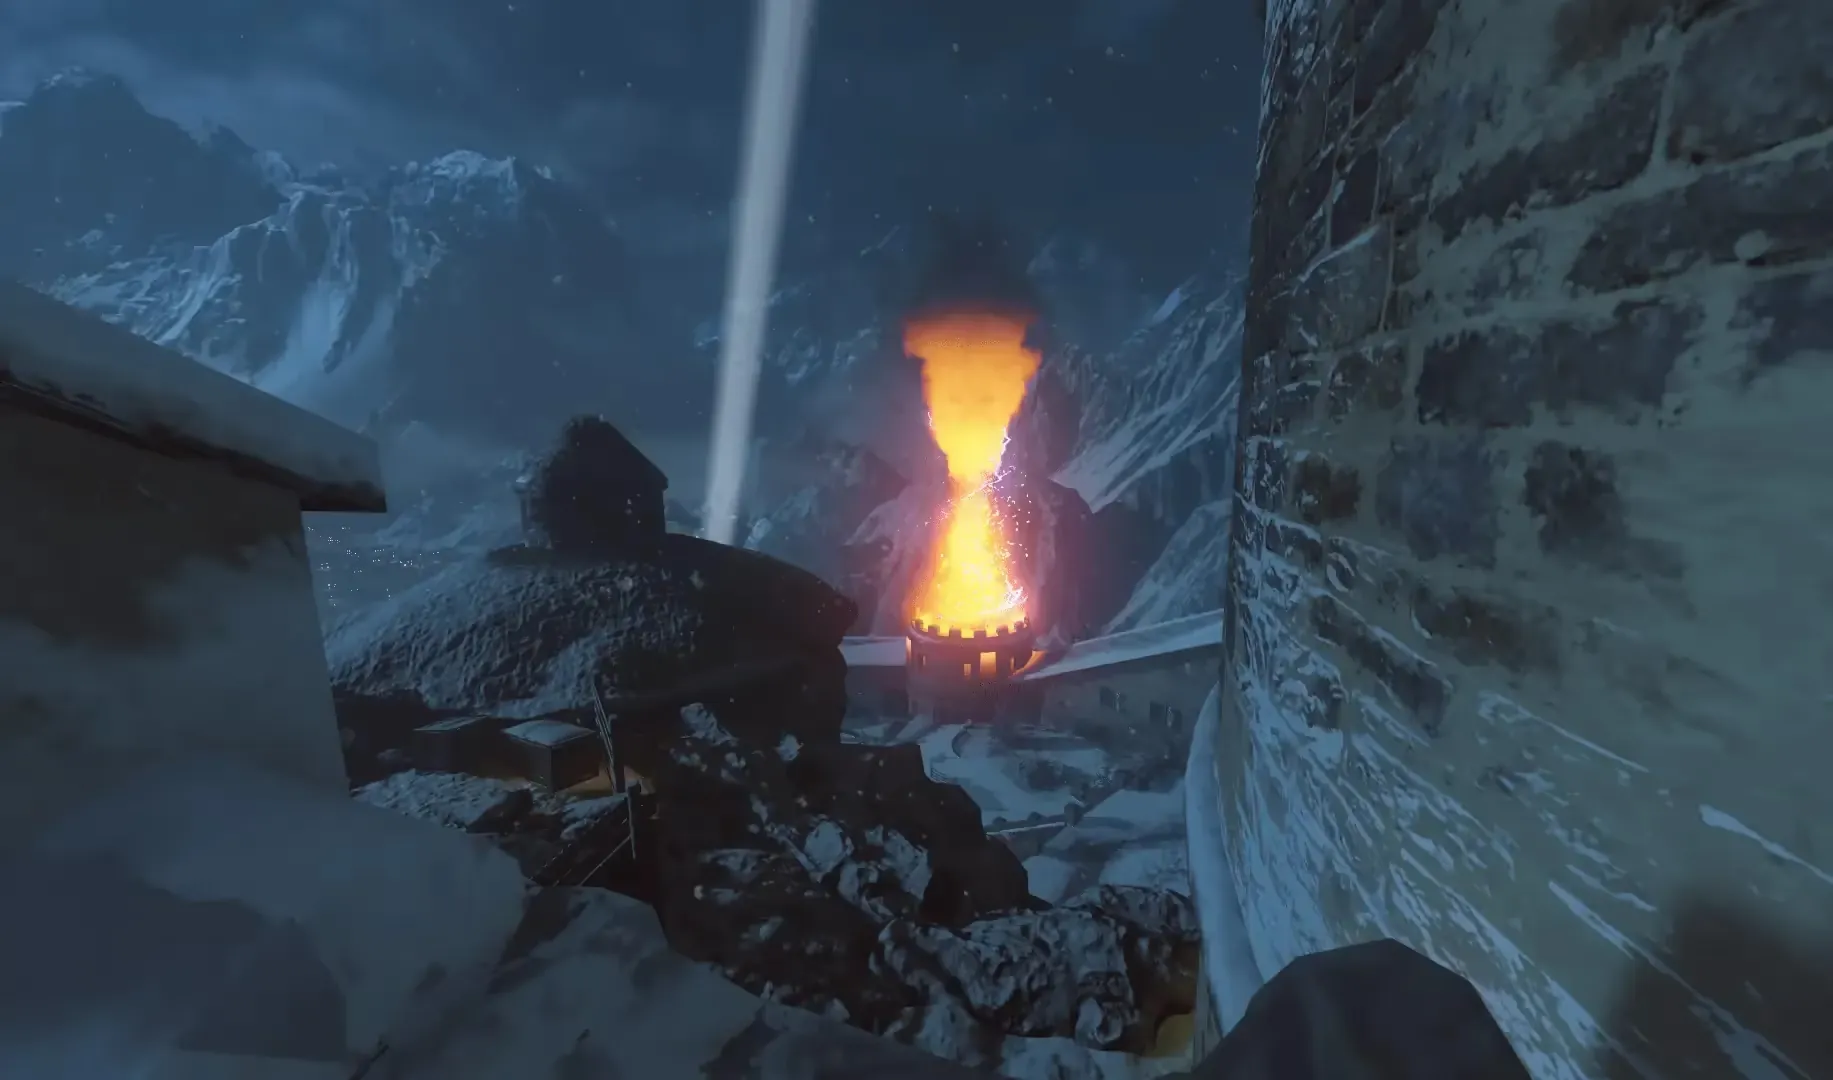
Finally, head back to the Weathercock where you picked up your broken arrow. There will be a blue cloud that you must interact with, repairing your broken arrow and presenting the reforged arrow that you must claim.
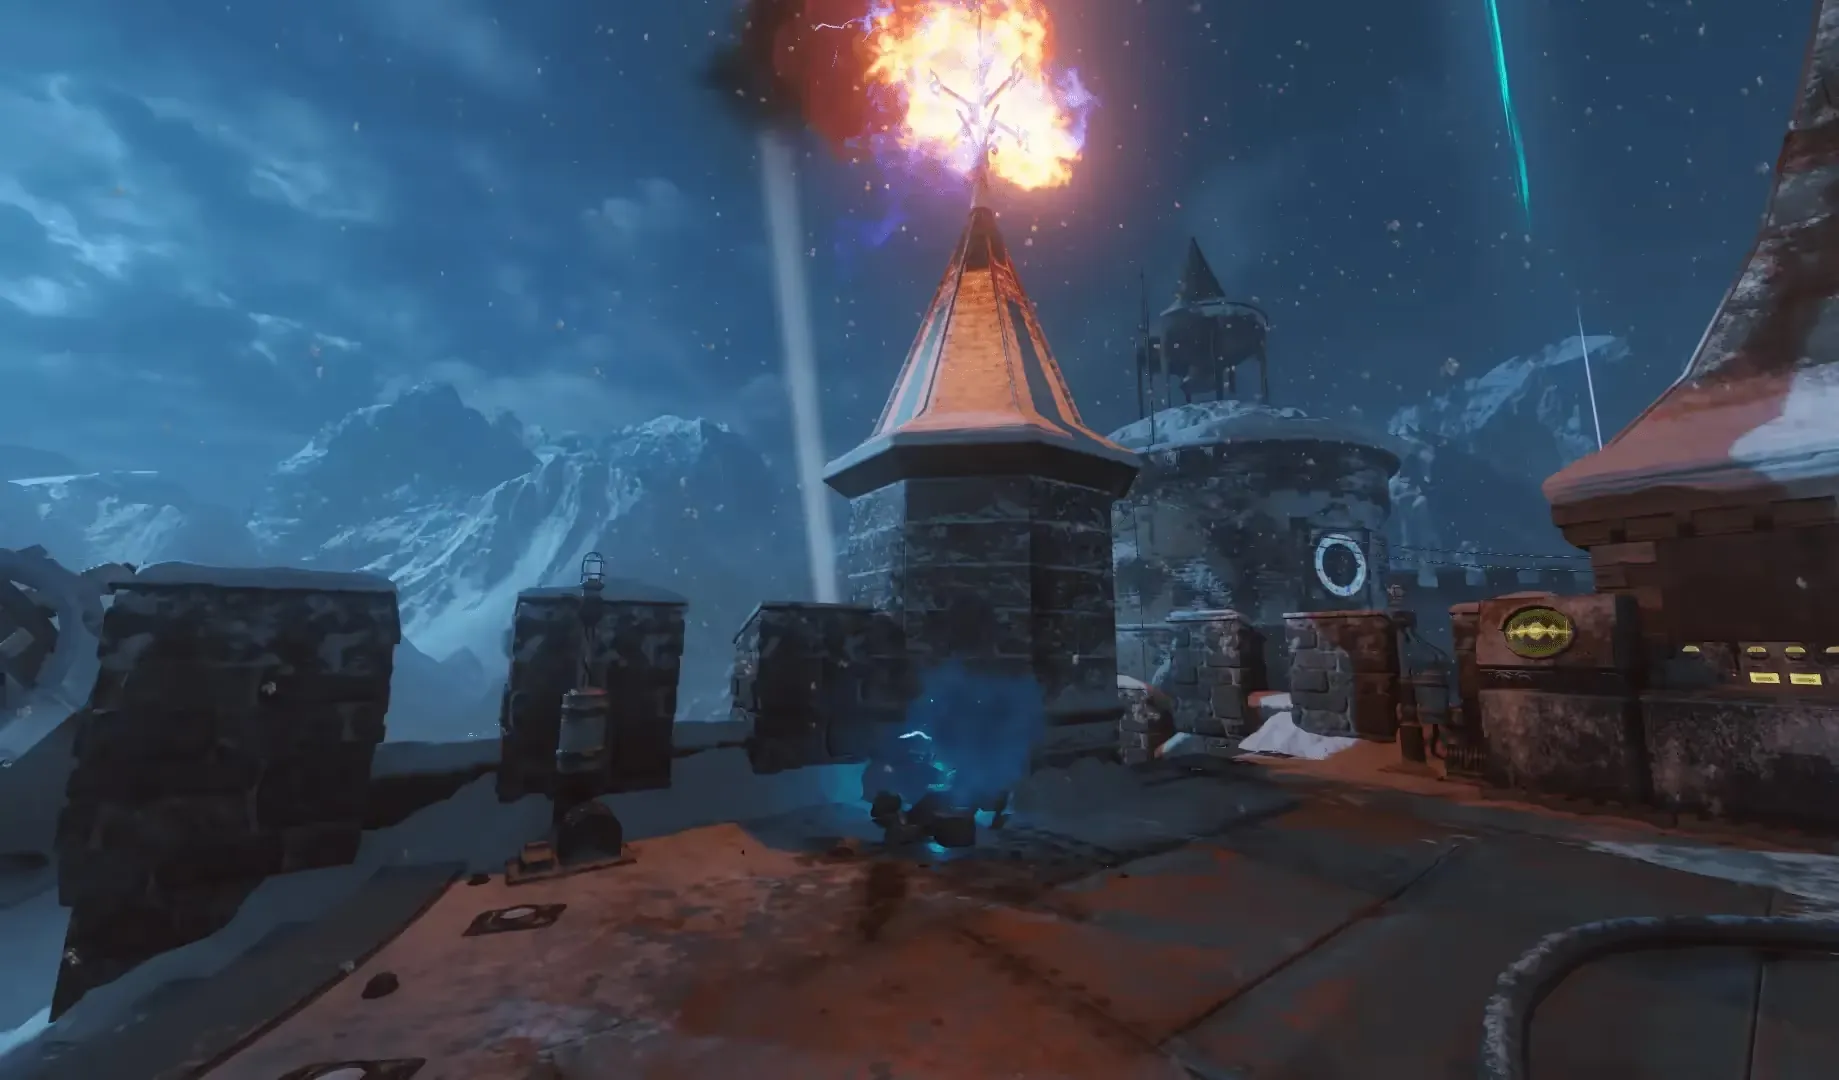
At this point, you have completed the Storm Bow upgrade path and can skip to Completing the Upgrade which is the same for all elemental bows.
Fire Bow
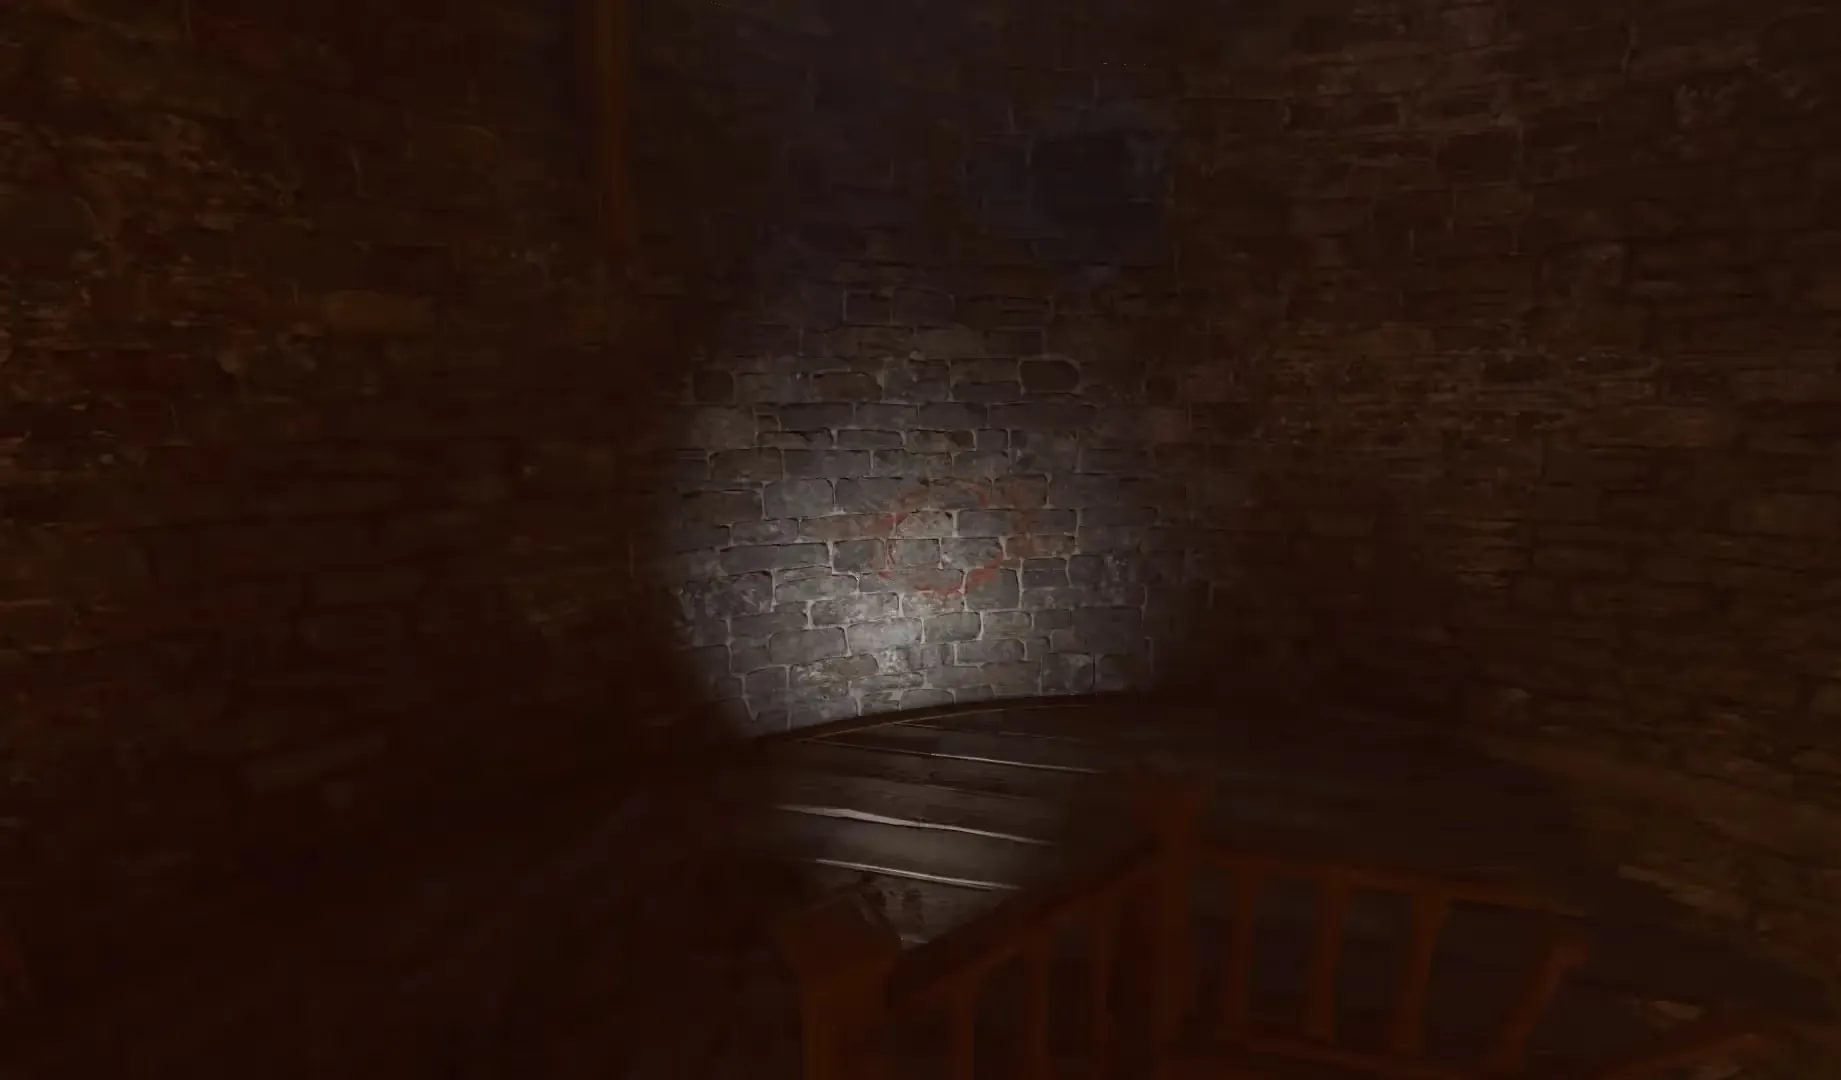
Head to the Clock Tower, upstairs on a wall will be a symbol that you must shoot with the Wrath of the Ancients revealing the broken arrow.
Once you have the broken arrow, head to the Rocket Pad, while at the pad, wait for a rocket test to finish, and as soon as the sealed doors open you must quickly charge your bow and shoot the orange glowing ball on a rock just to the right of the doors. If done successfully, you will see an increase in the progress of your arrow.
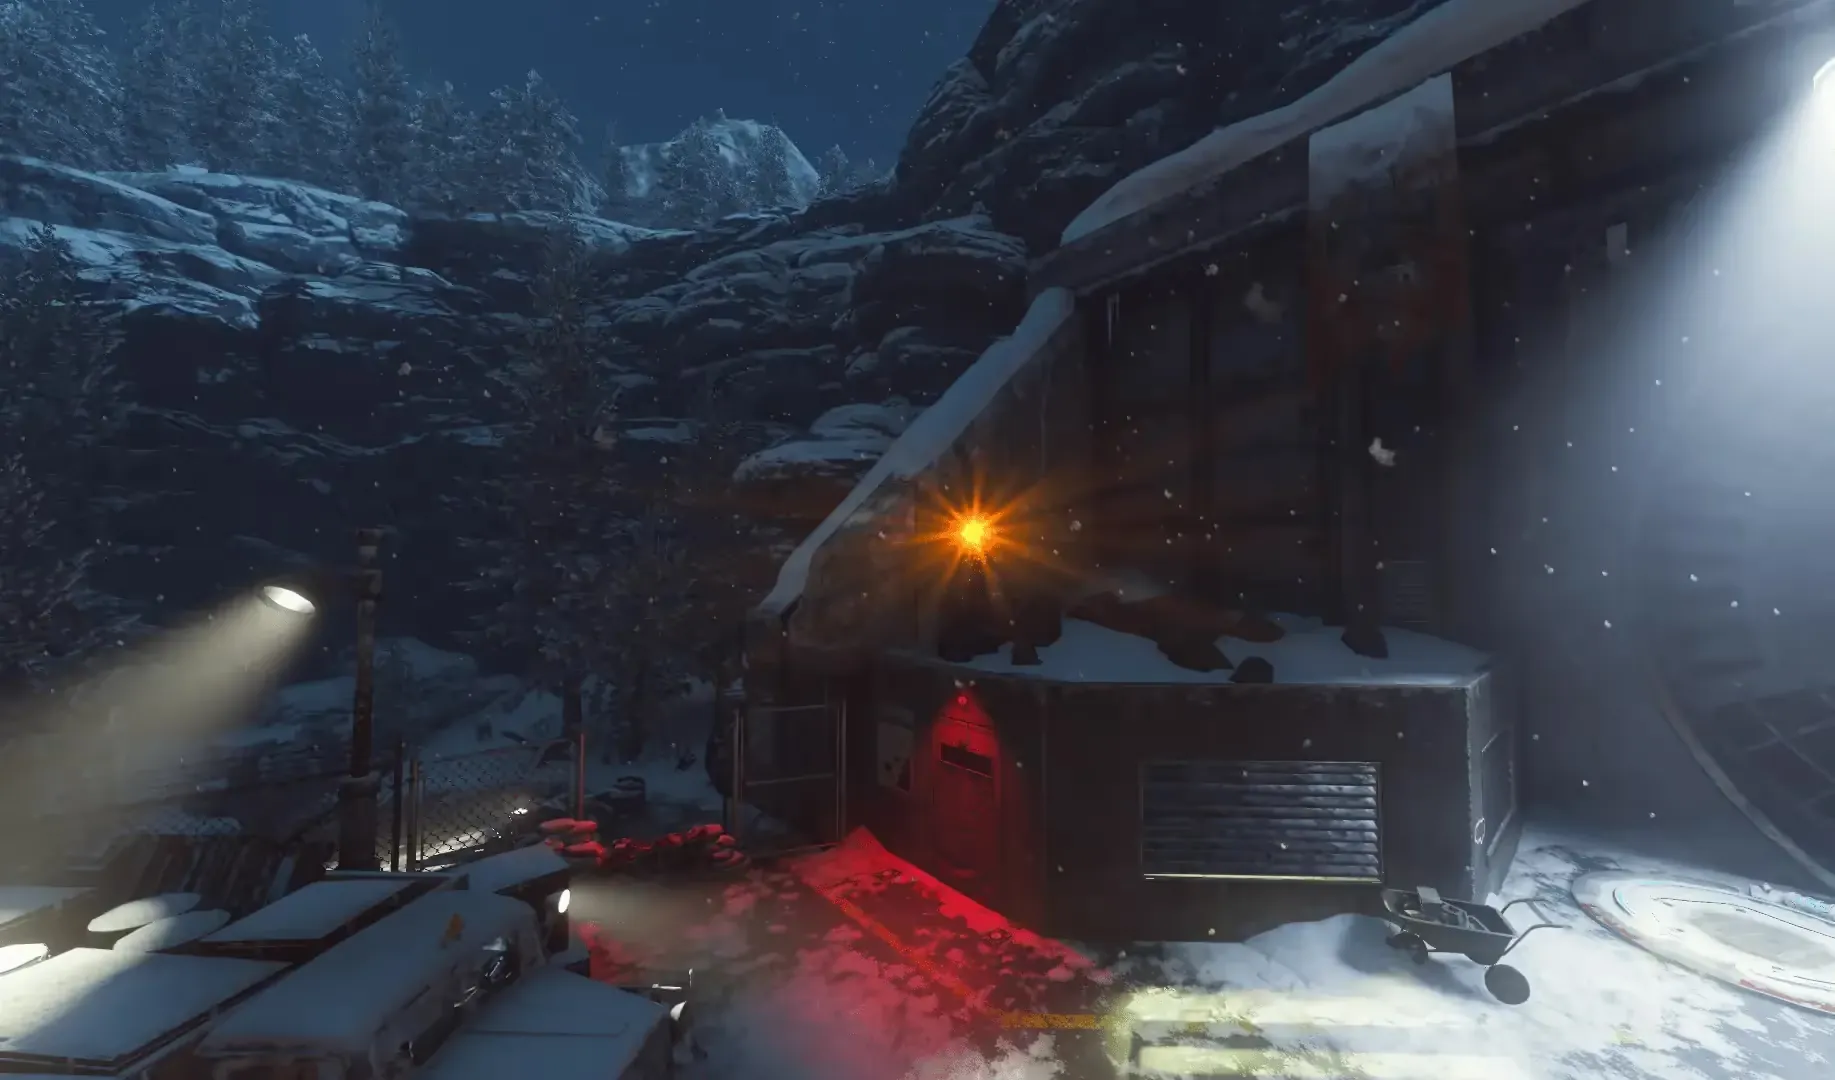
You have about 10 seconds to shoot this ball before it stops glowing, if you fail you must repeat the process until you shoot is successfully. You have enough time to run towards the front of the rock to get a clean shot on the ball which should increase your chance of success.
After shooting the glowing ball, you must shoot three glowing circles from mid-air using a Wundersphere. The locations of the three glowing circles are:
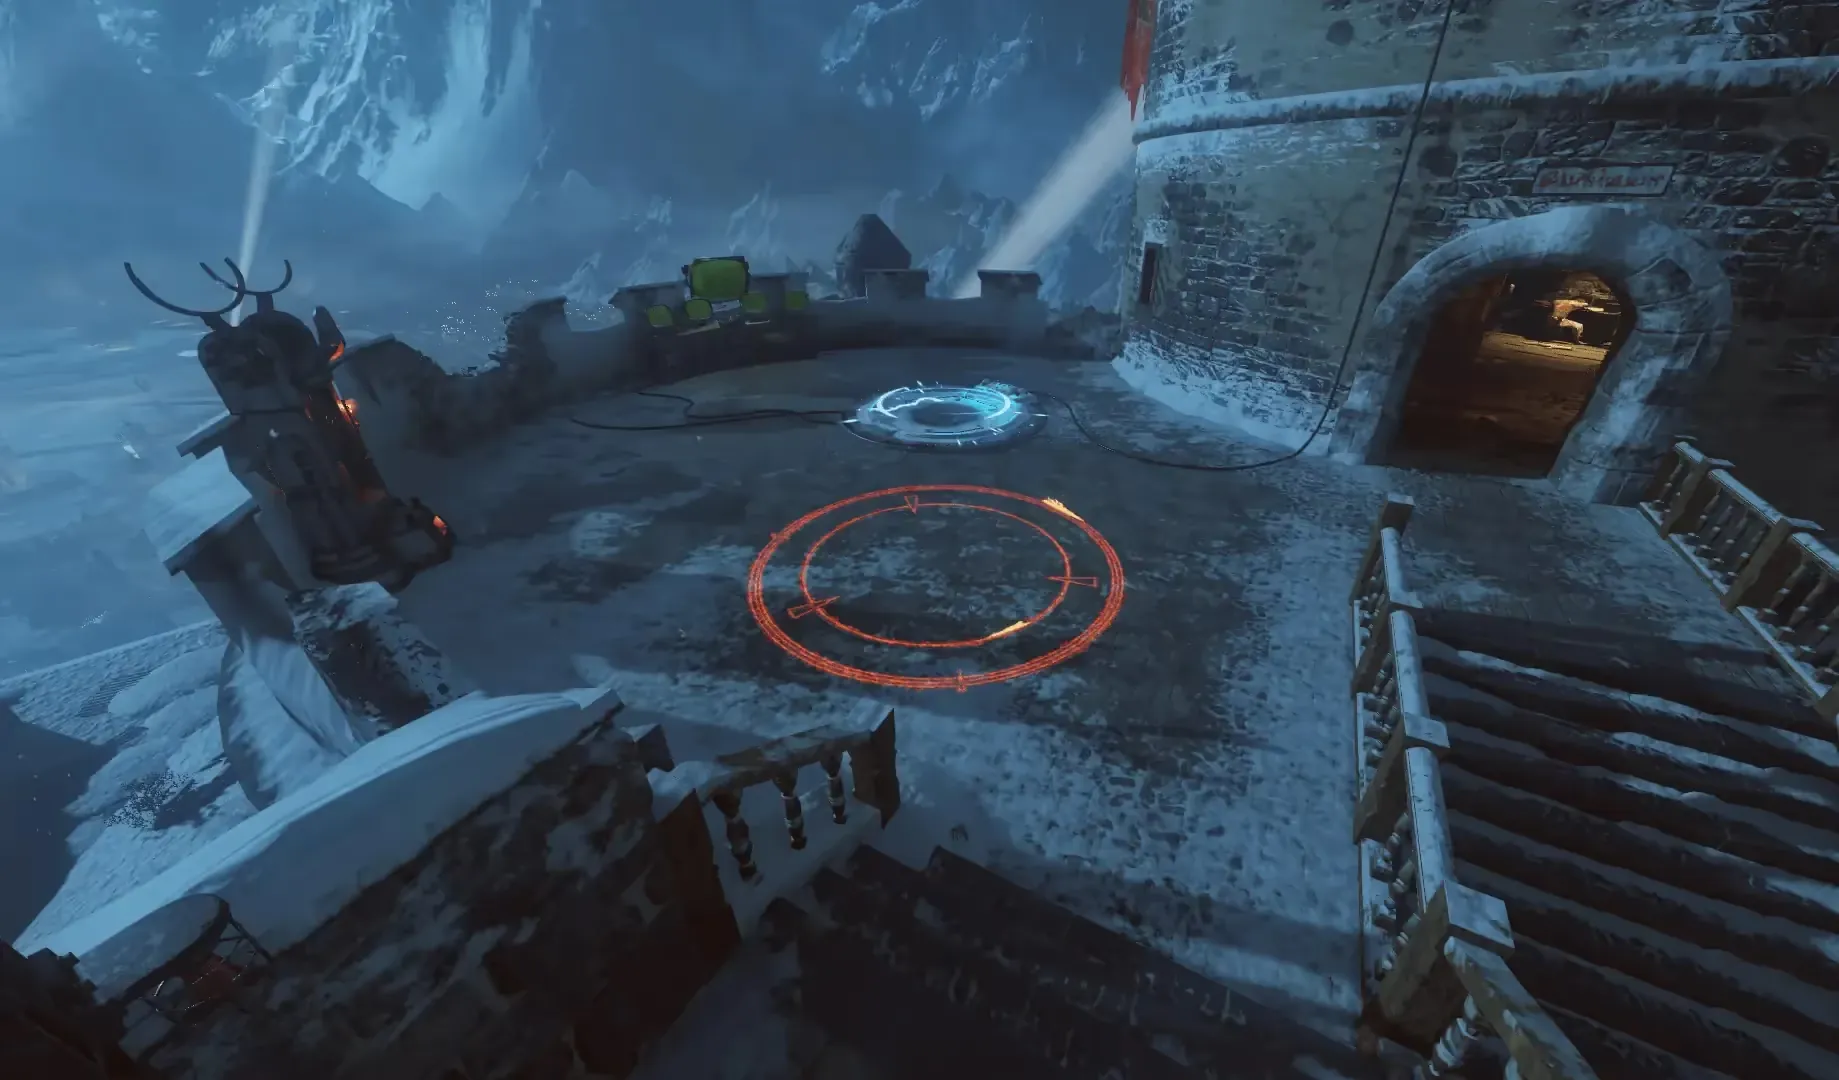

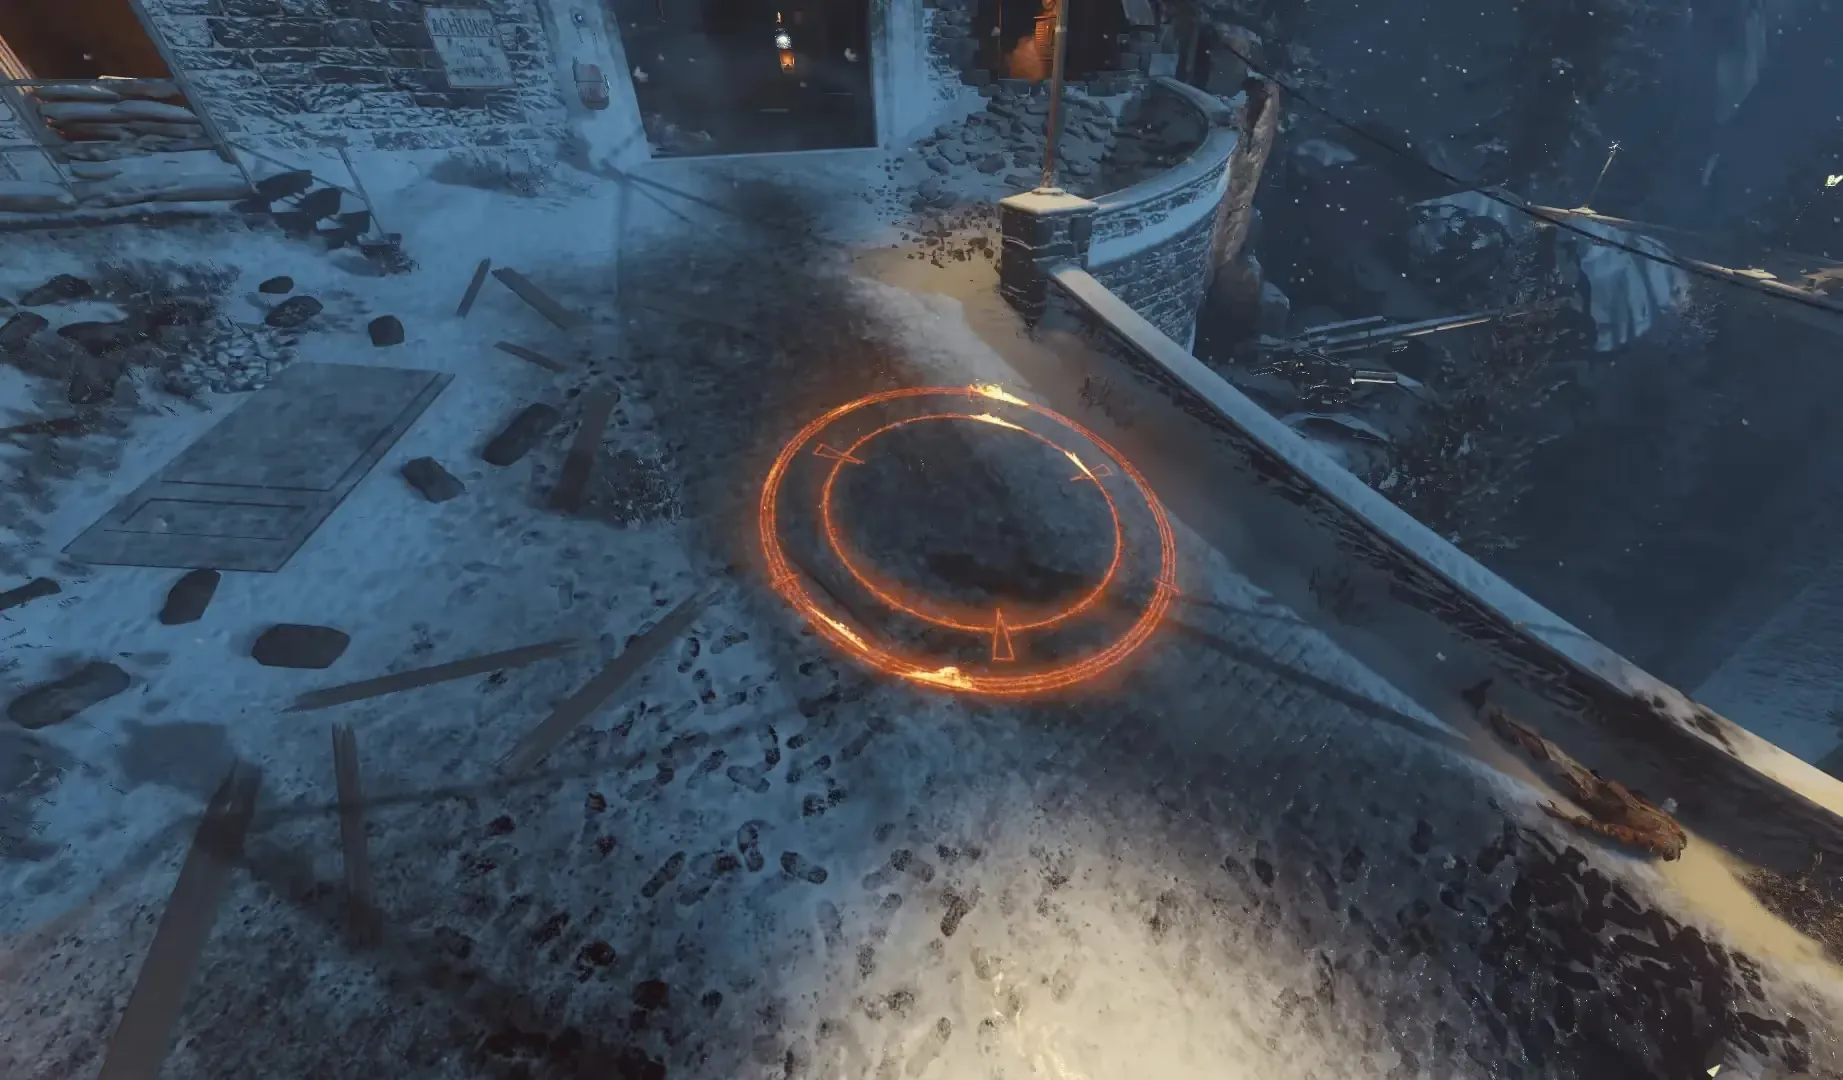
These circles will only glow while in mid-air until they have been hit successfully, afterward they will remain glowing even while grounded so you know you have hit them.
To easily complete this, head to the Wundersphere in the room above ![]() Double Tap. From this Wundersphere you can shoot all three circles,
for the Clock Tower circle, take the Wundersphere and shoot it just before you land, for the other two circles you can aim your crosshair in a certain position and
shoot your bow before launching in the Wundersphere so that the arrow lands while you are in mid-air.
Double Tap. From this Wundersphere you can shoot all three circles,
for the Clock Tower circle, take the Wundersphere and shoot it just before you land, for the other two circles you can aim your crosshair in a certain position and
shoot your bow before launching in the Wundersphere so that the arrow lands while you are in mid-air.

Aim at the metal piece in the image, then look as far as up as possible and fire a non-charged shot. This arrow takes about three-four seconds to land, so launch yourself two seconds after firing to ensure the arrow lands while you are in mid-air.
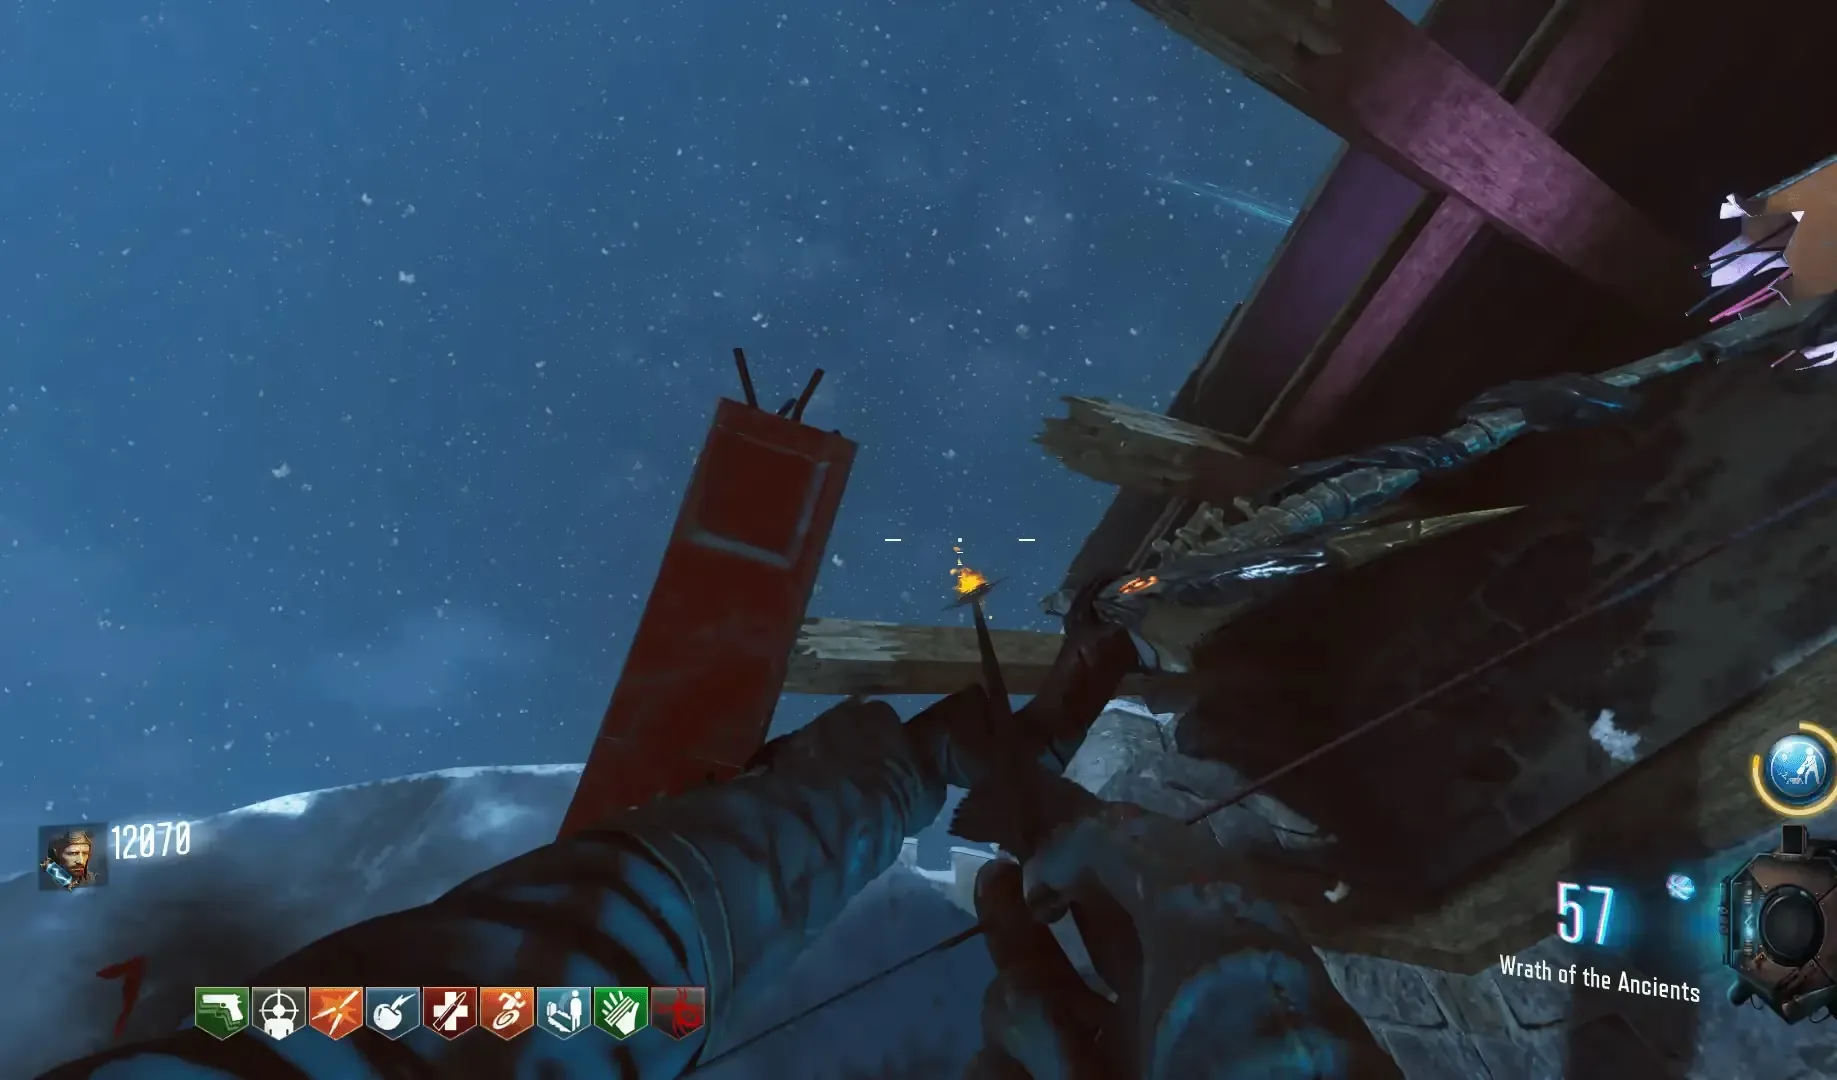
Aim as shown in the image and fire a non-charged shot, then immediately launch yourself.
Once you have successfully hit all three circles while in mid-air, you must kill zombies near each circle while standing within the circle. Your screen will have a red aura if you are standing within a circle. If done successfully, you will see an increase in the progress of your arrow.
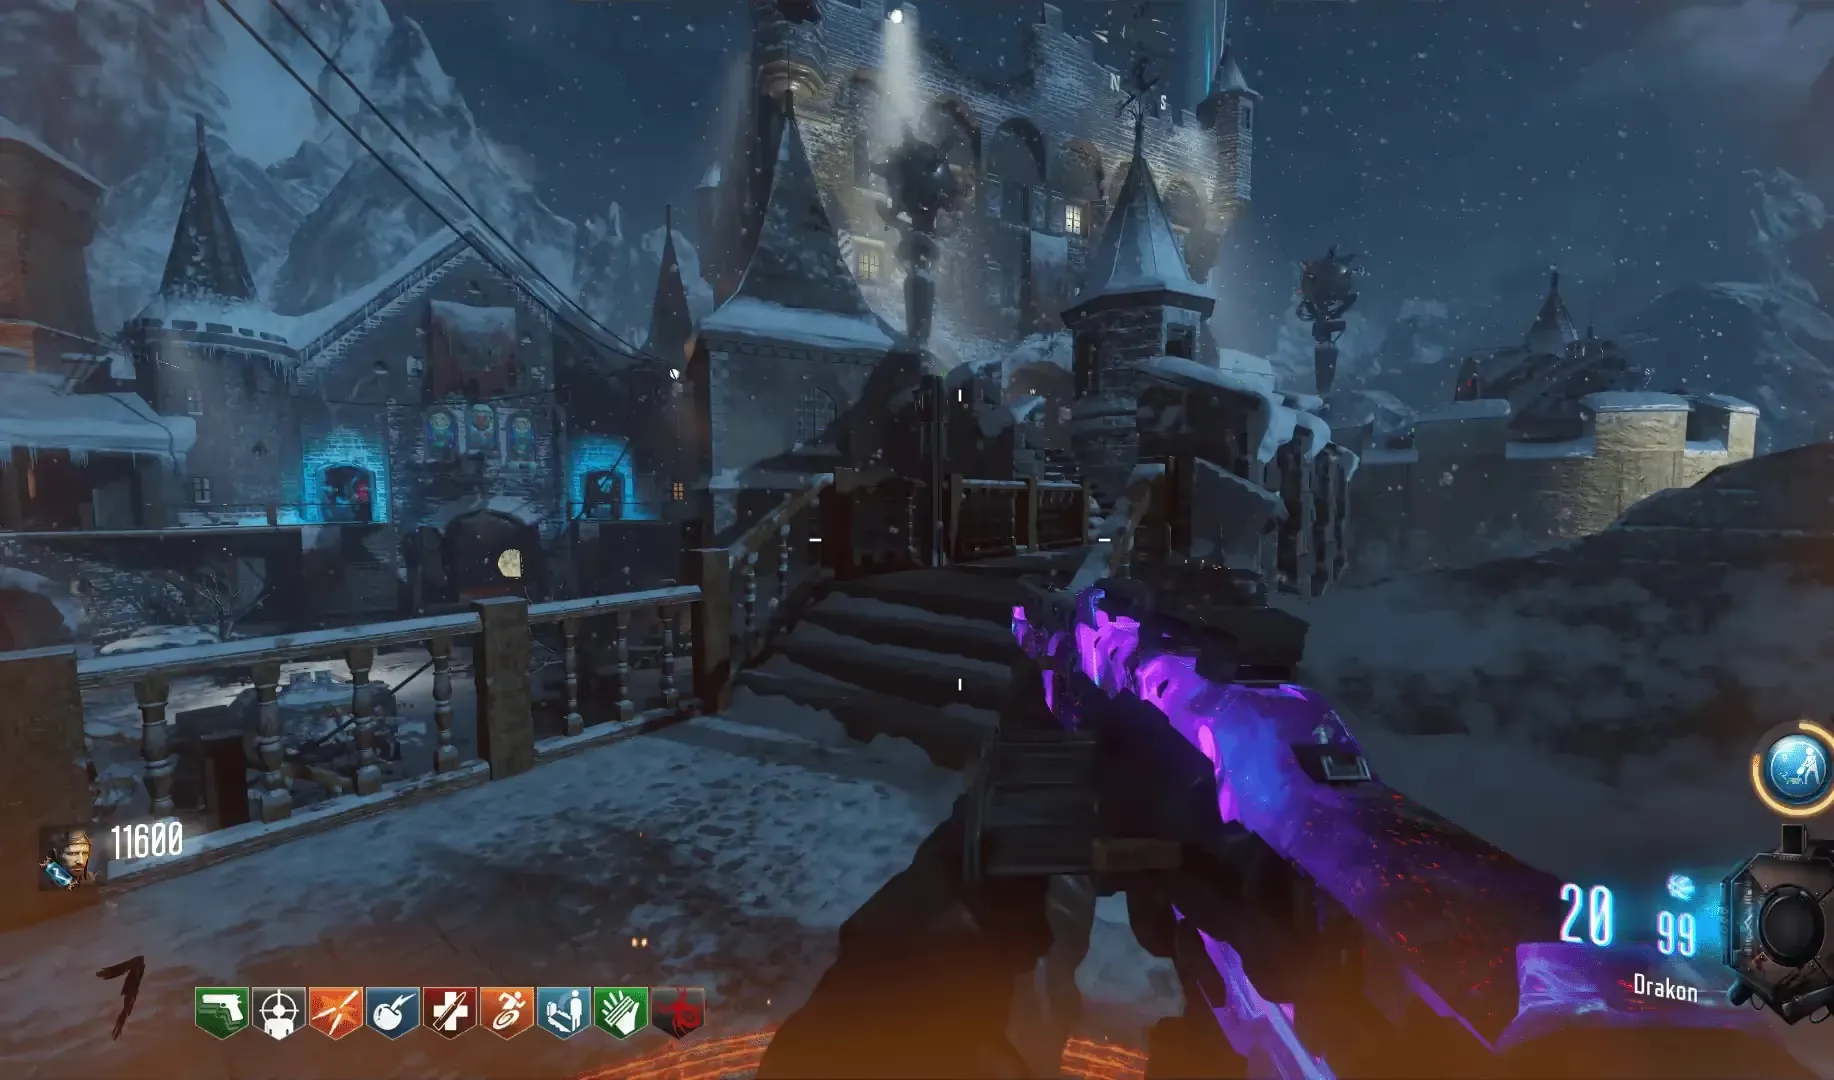
Once all three circles have been filled, head to the Clock Tower where you claimed your broken arrow. There will be an exposed cog that you must interact with revealing a symbol engraved in one of the three fireplaces around the map. The locations of the fireplaces are:


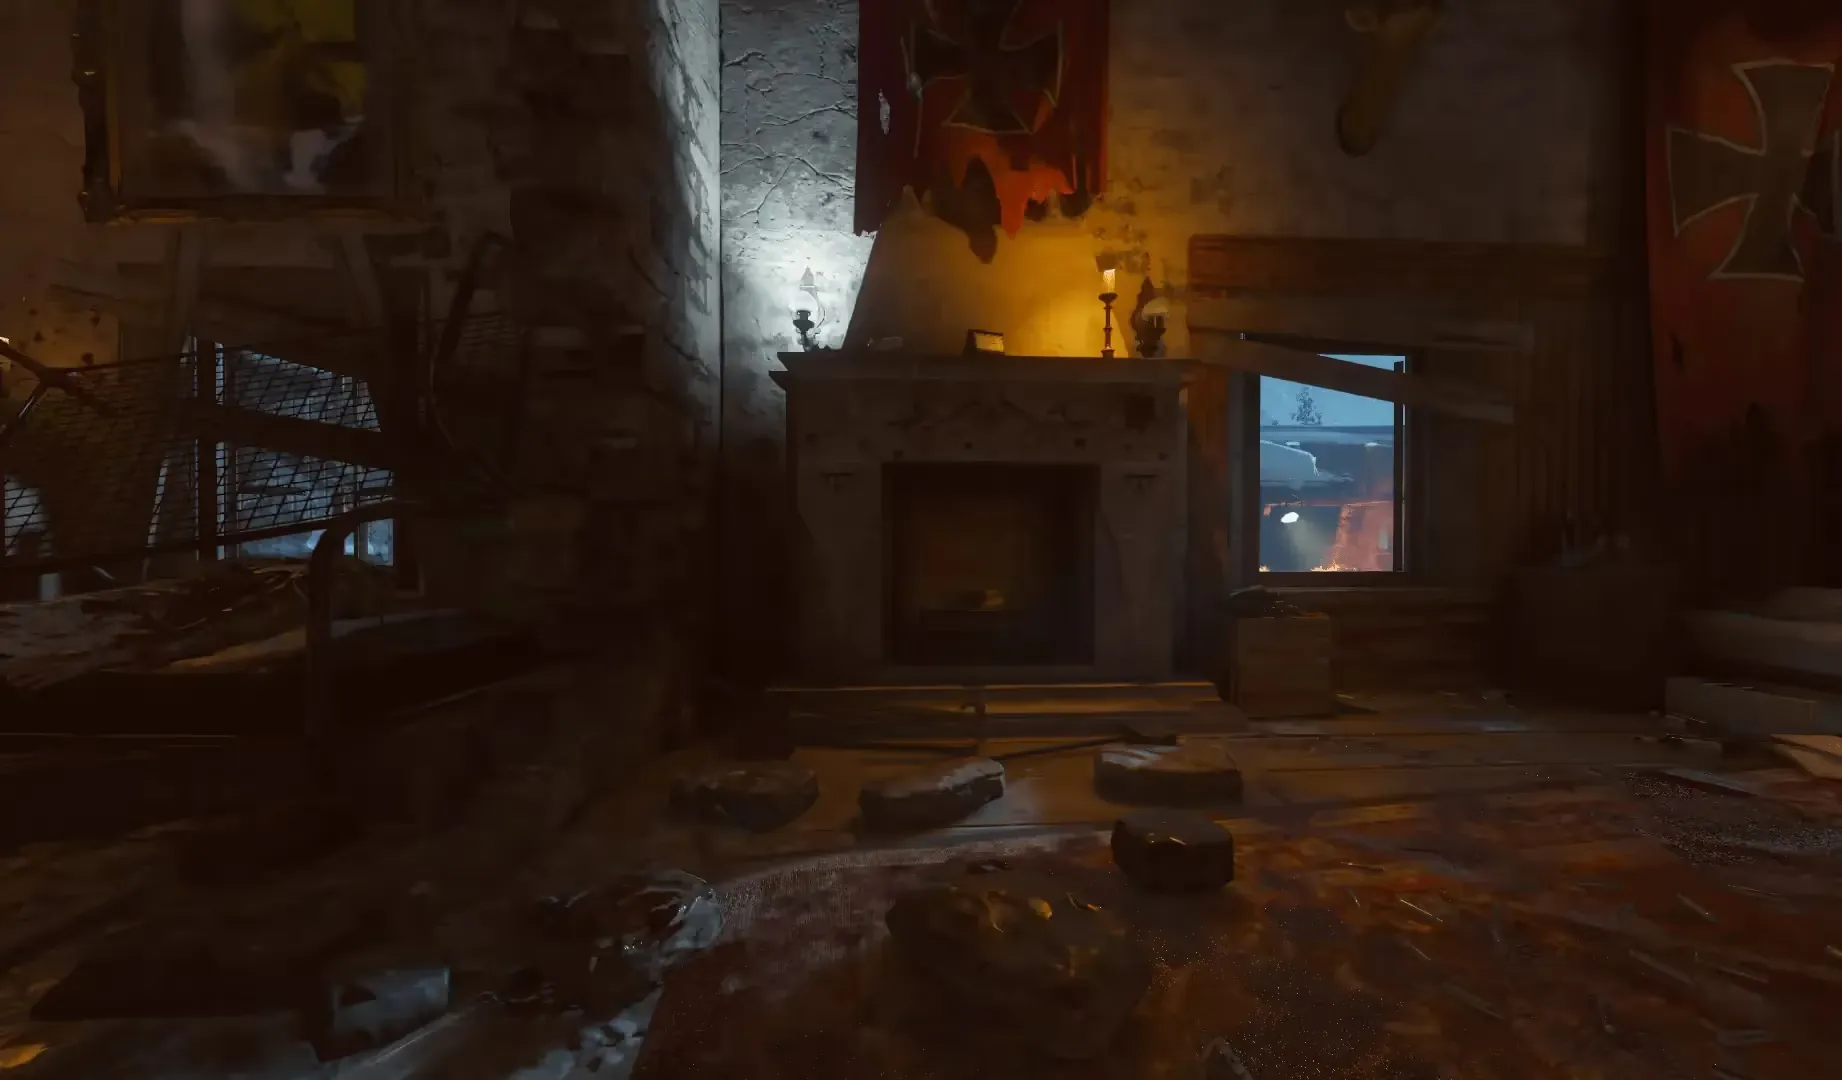
After the symbol is revealed one of the three circles will be lit, you must stand inside this circle and shoot a charged shot with the Wrath of the Ancients toward the correct fireplace spawning a volcanic rock. Each circle is linked to a certain fireplace:
- The circle near Clock Tower links to the Supply Room fireplace
- The circle at the top of the castle links to the fireplace in the Mission Control room/Church
- The circle near Double Tap on the bridge links to the fireplace near Samantha's Room
Once you know which circle is lit up, you know exactly which fireplace you must aim for since only one circle will be lit.
In four shots you must bring the volcanic rock to the correct fireplace, the first shot made from the circle will spawn the rock, and all following shots must be made near the volcanic rock while there is a red aura on your screen, shoot an arrow into the fireplace while you have this aura. If done successfully, you will see an increase in the progress of your arrow after interacting with the fire and picking up the broken arrow.

Finally, head to the top of the castle and interact with the "sun", repairing your broken arrow and presenting your reforged arrow in a dramatic, explosive fashion that you must claim.
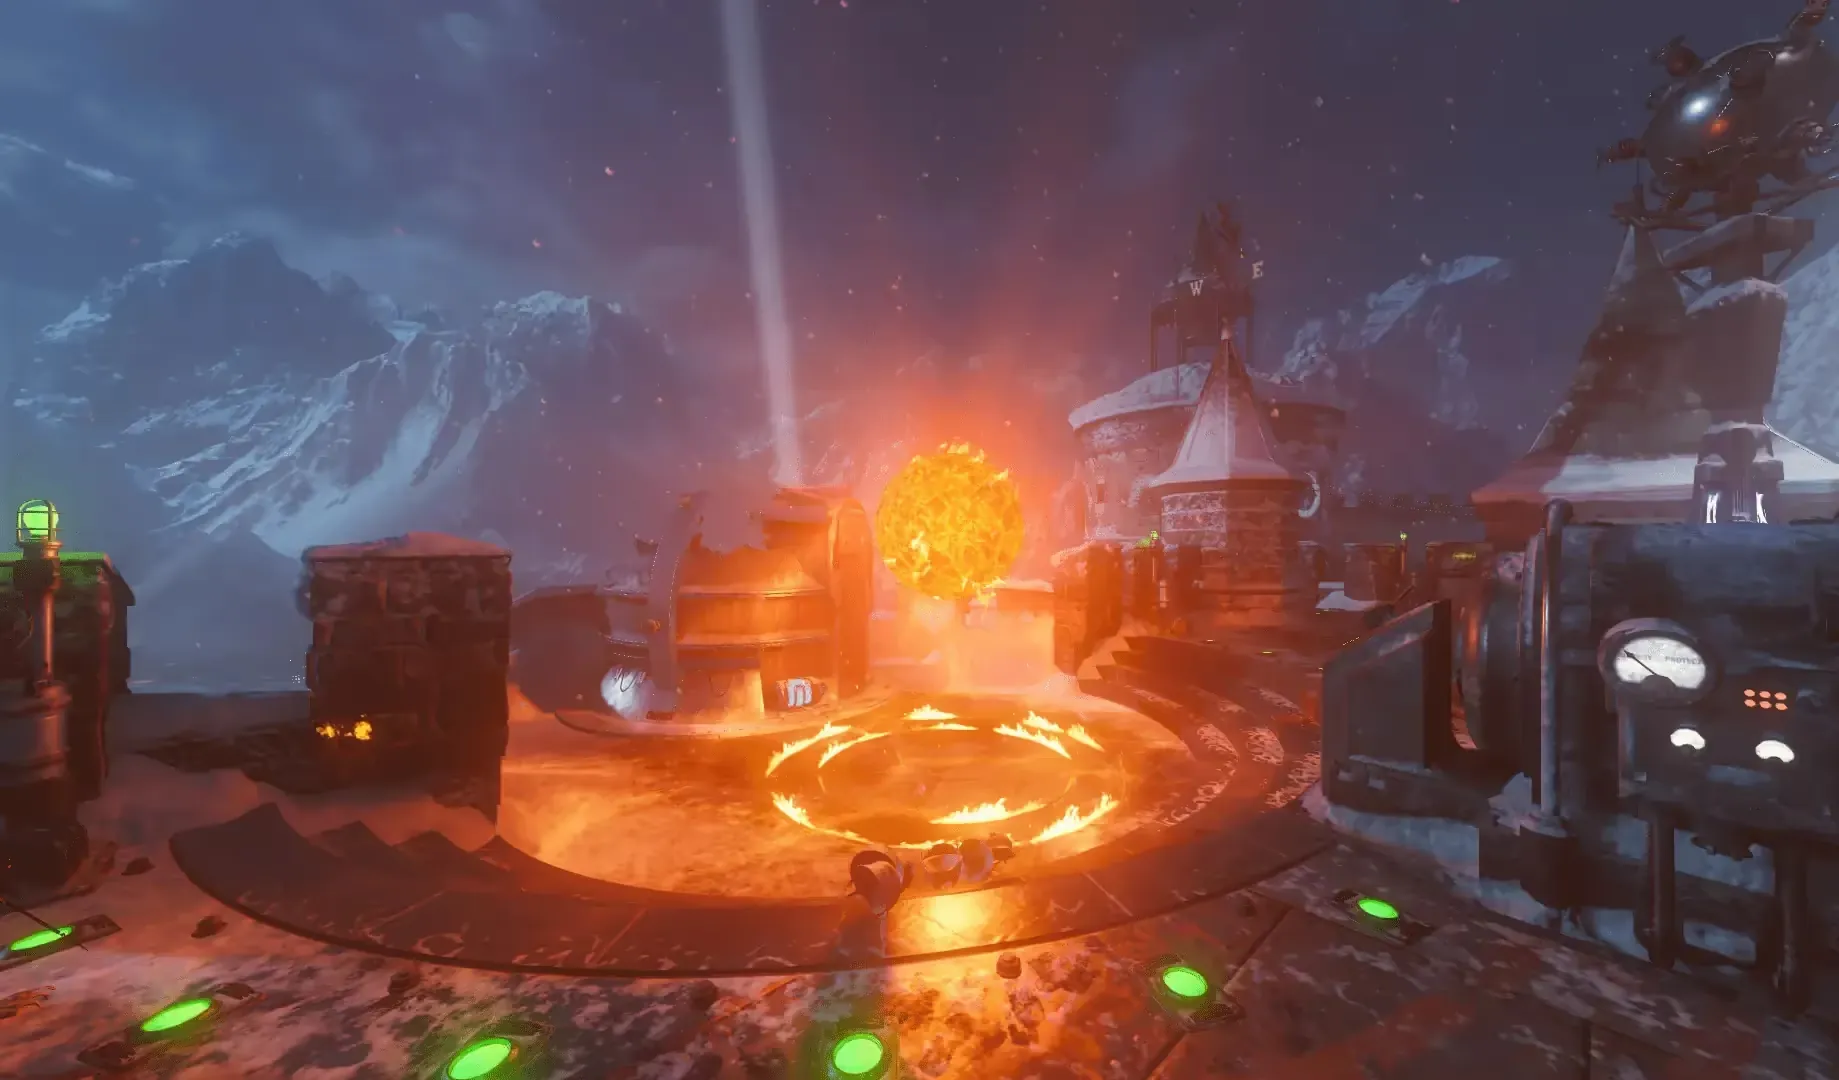
At this point, you have completed the Fire Bow upgrade path and can skip to Completing the Upgrade which is the same for all elemental bows.
Wolf Bow
You must interact with four paintings around the map in a specific order telling the story of the Wolf King. The order of the paintings will always be:
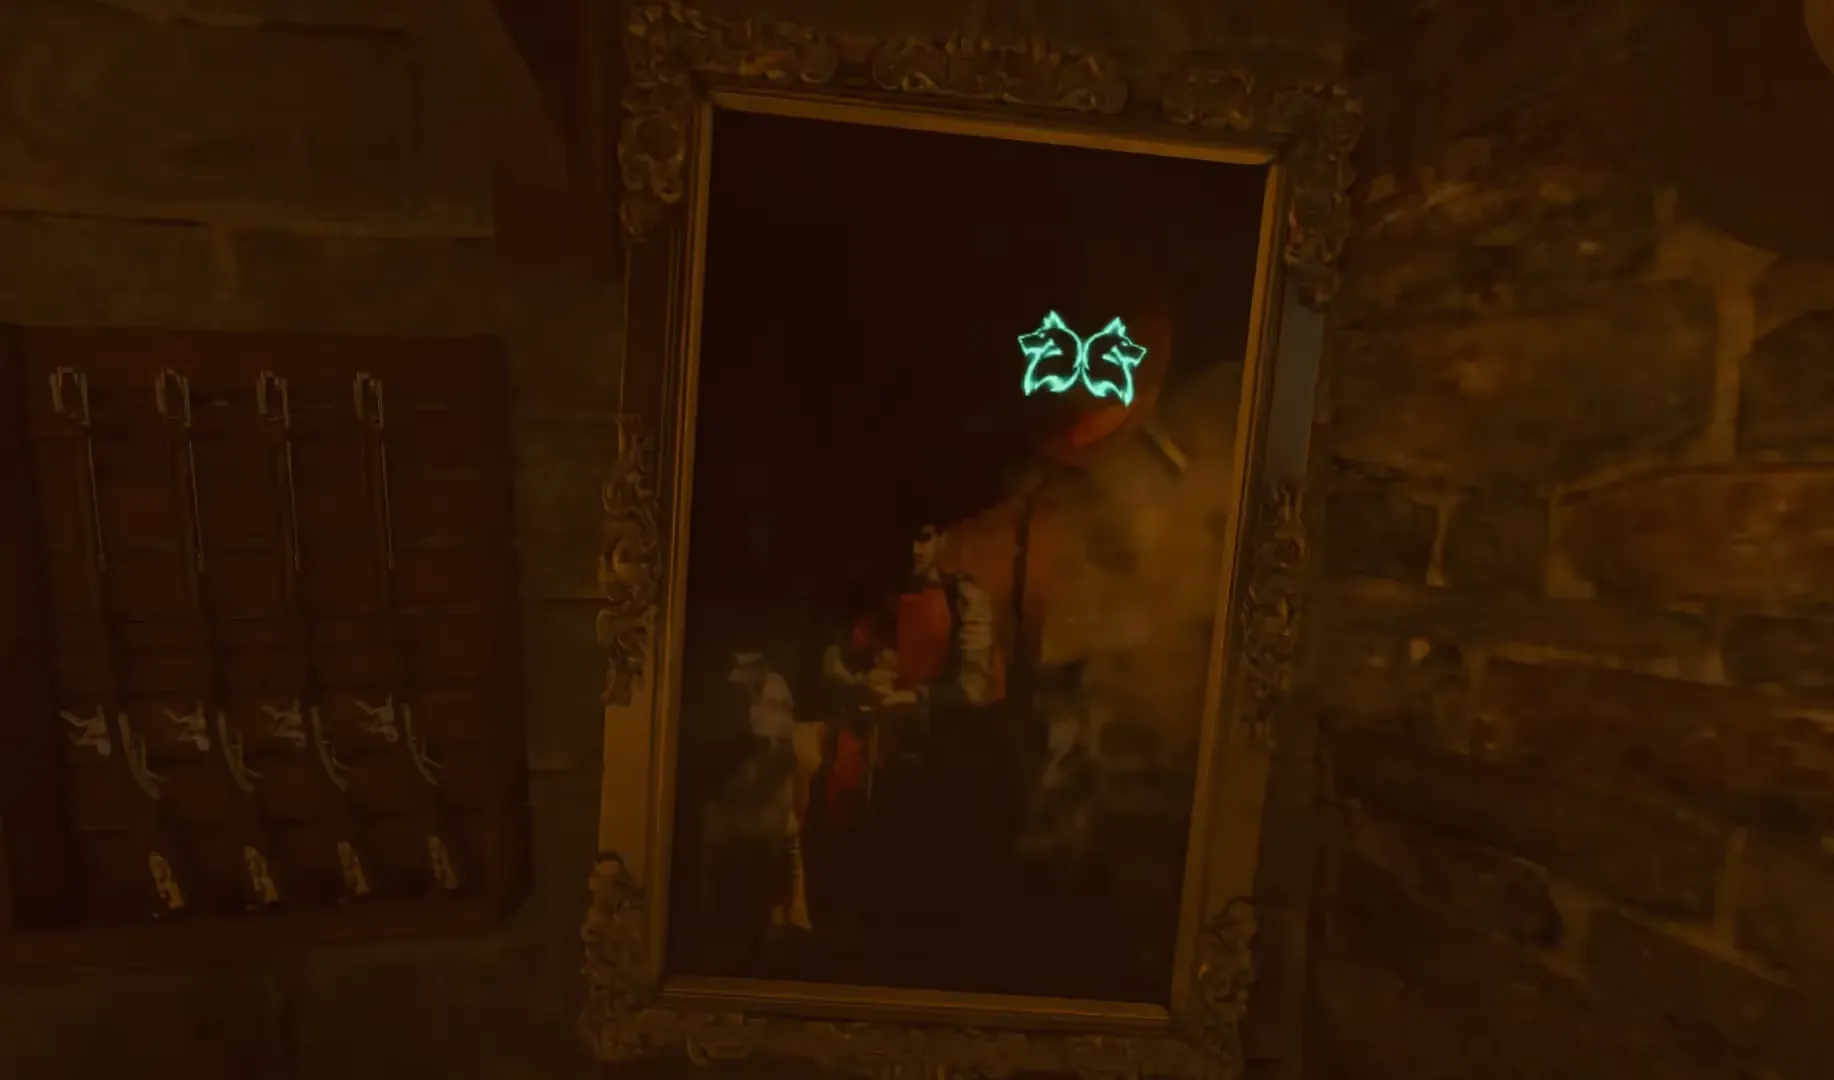

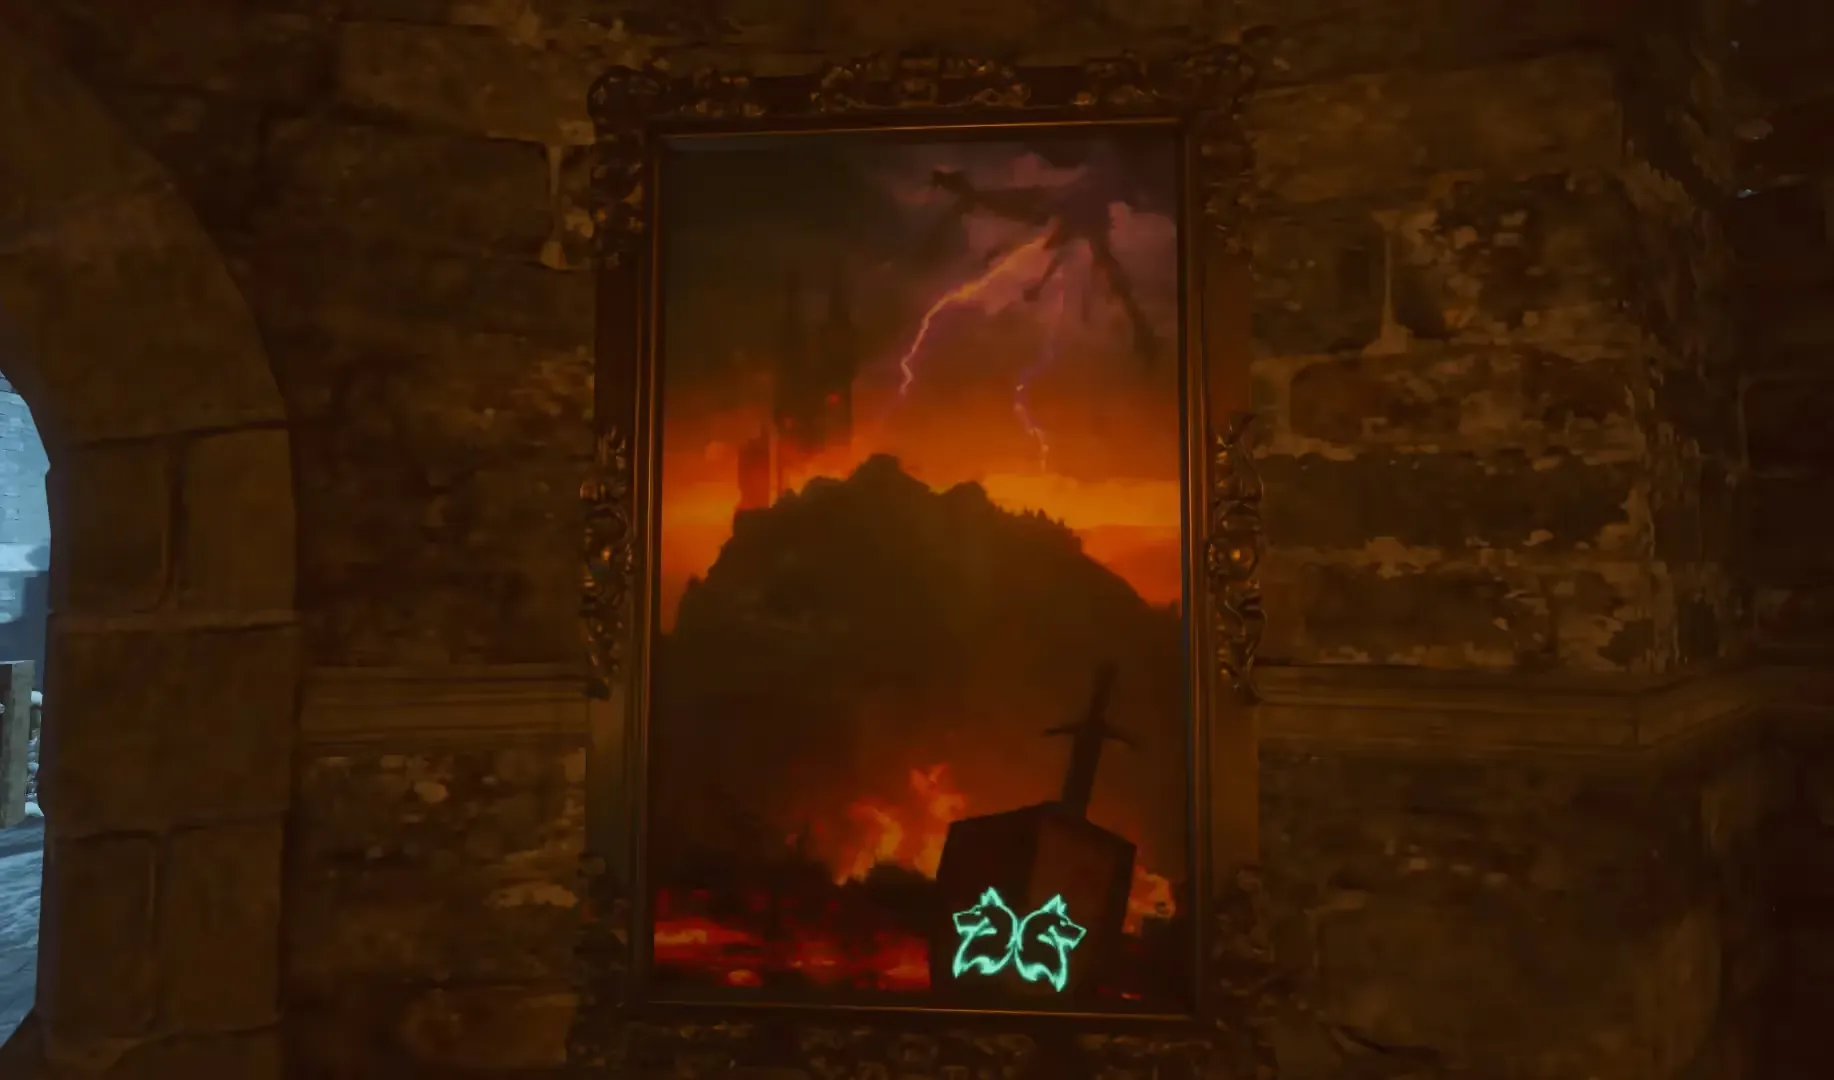
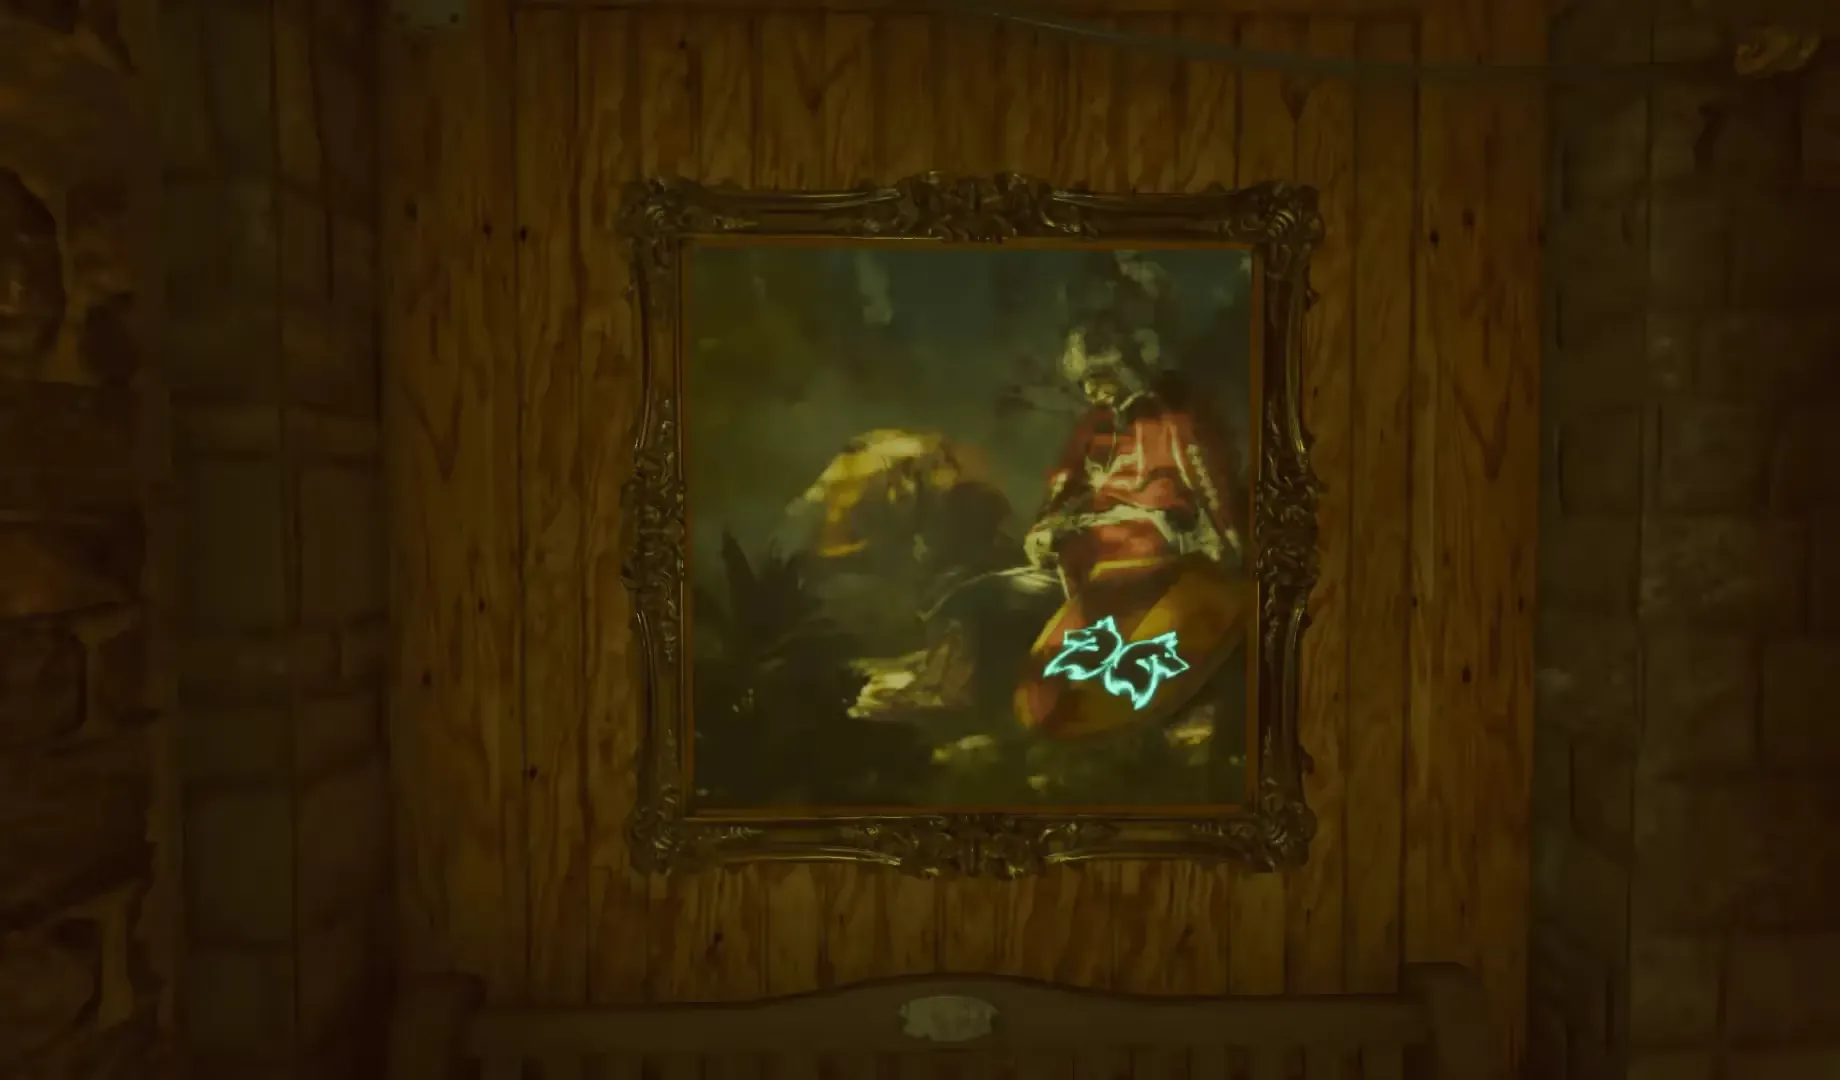
The four paintings will always spawn in the same locations, however, which painting appears in each location is different in every game. The four painting locations are:
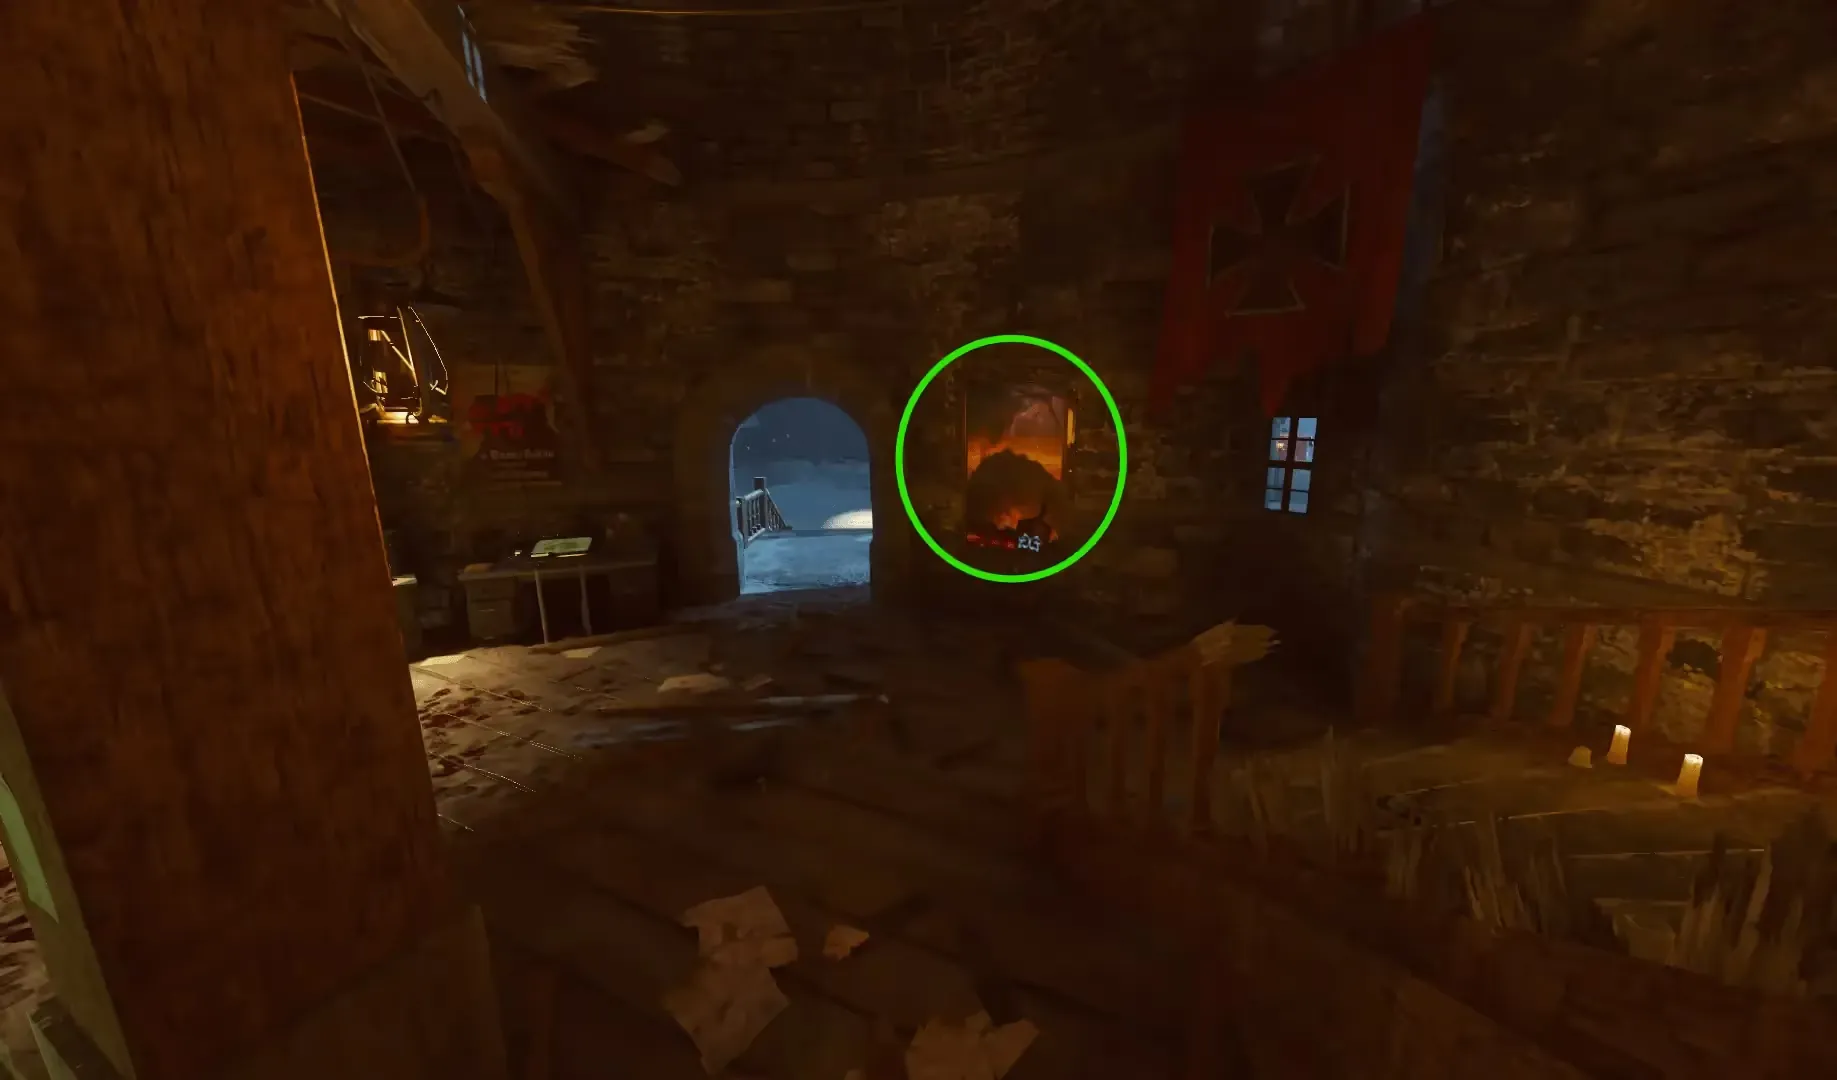

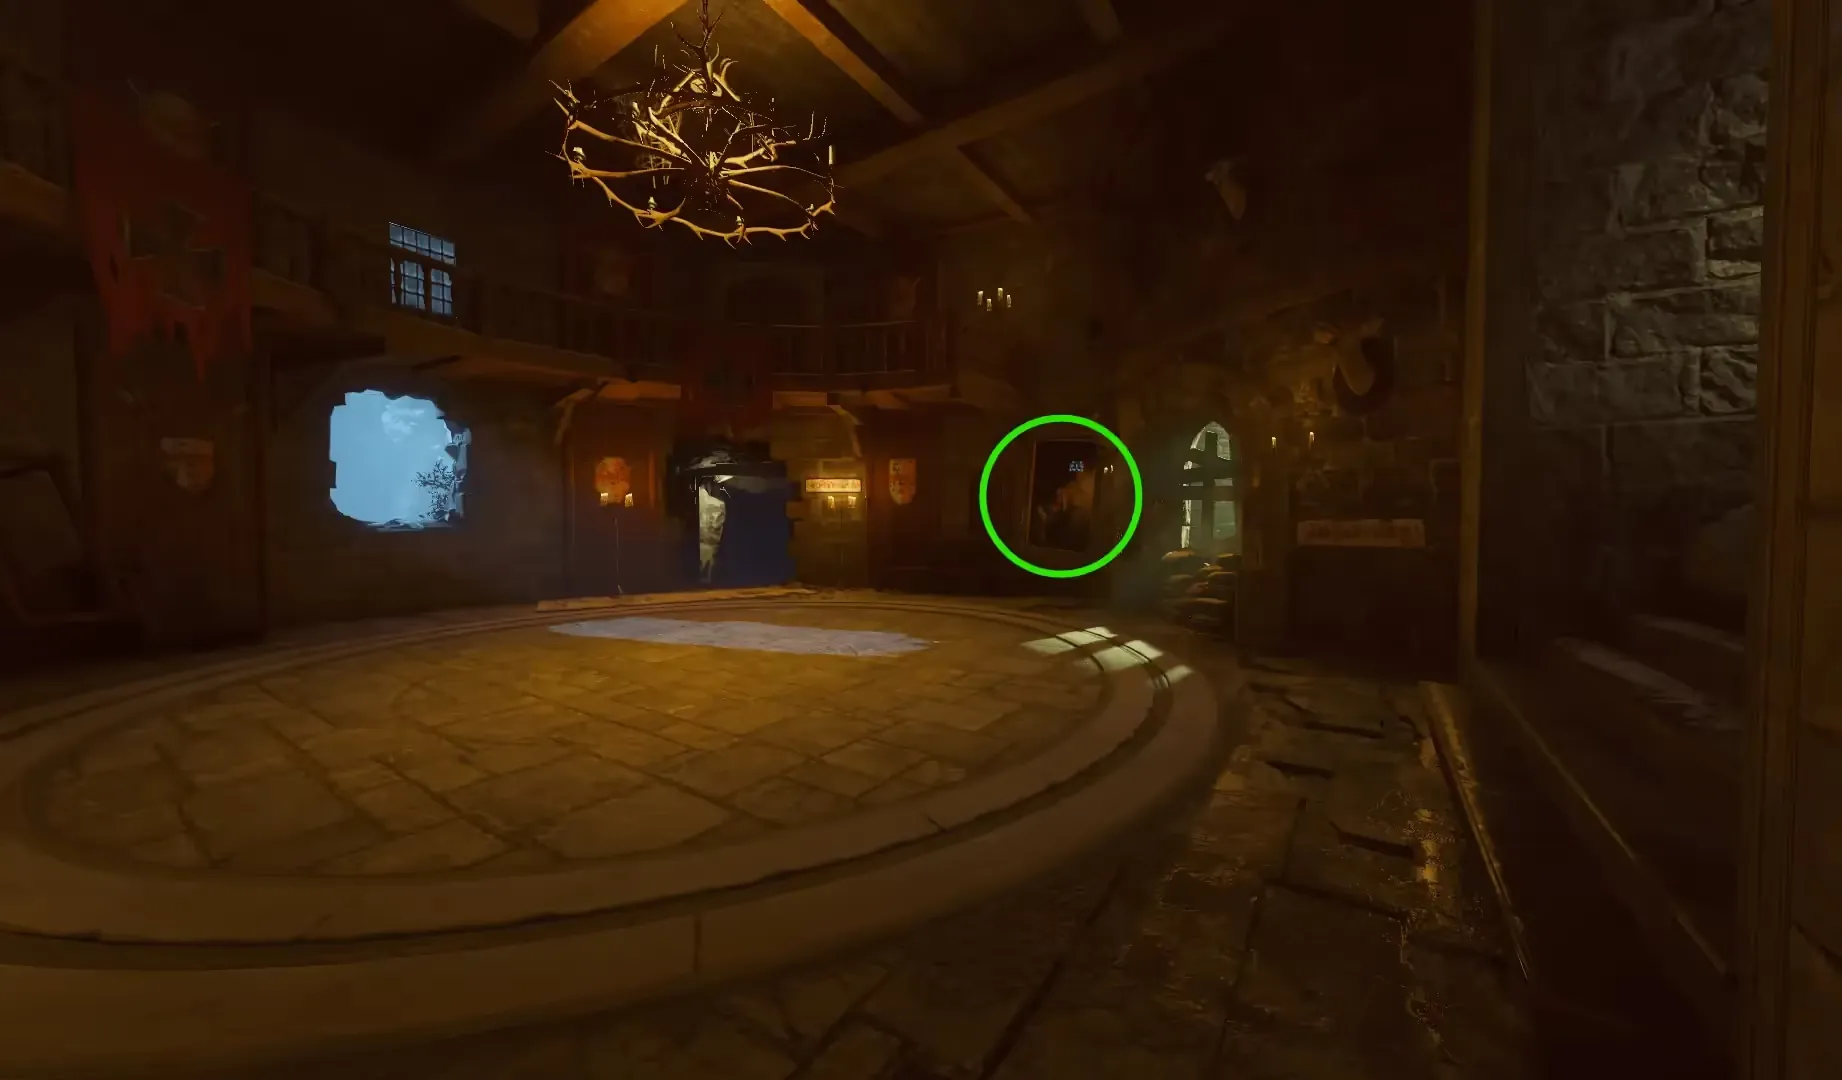

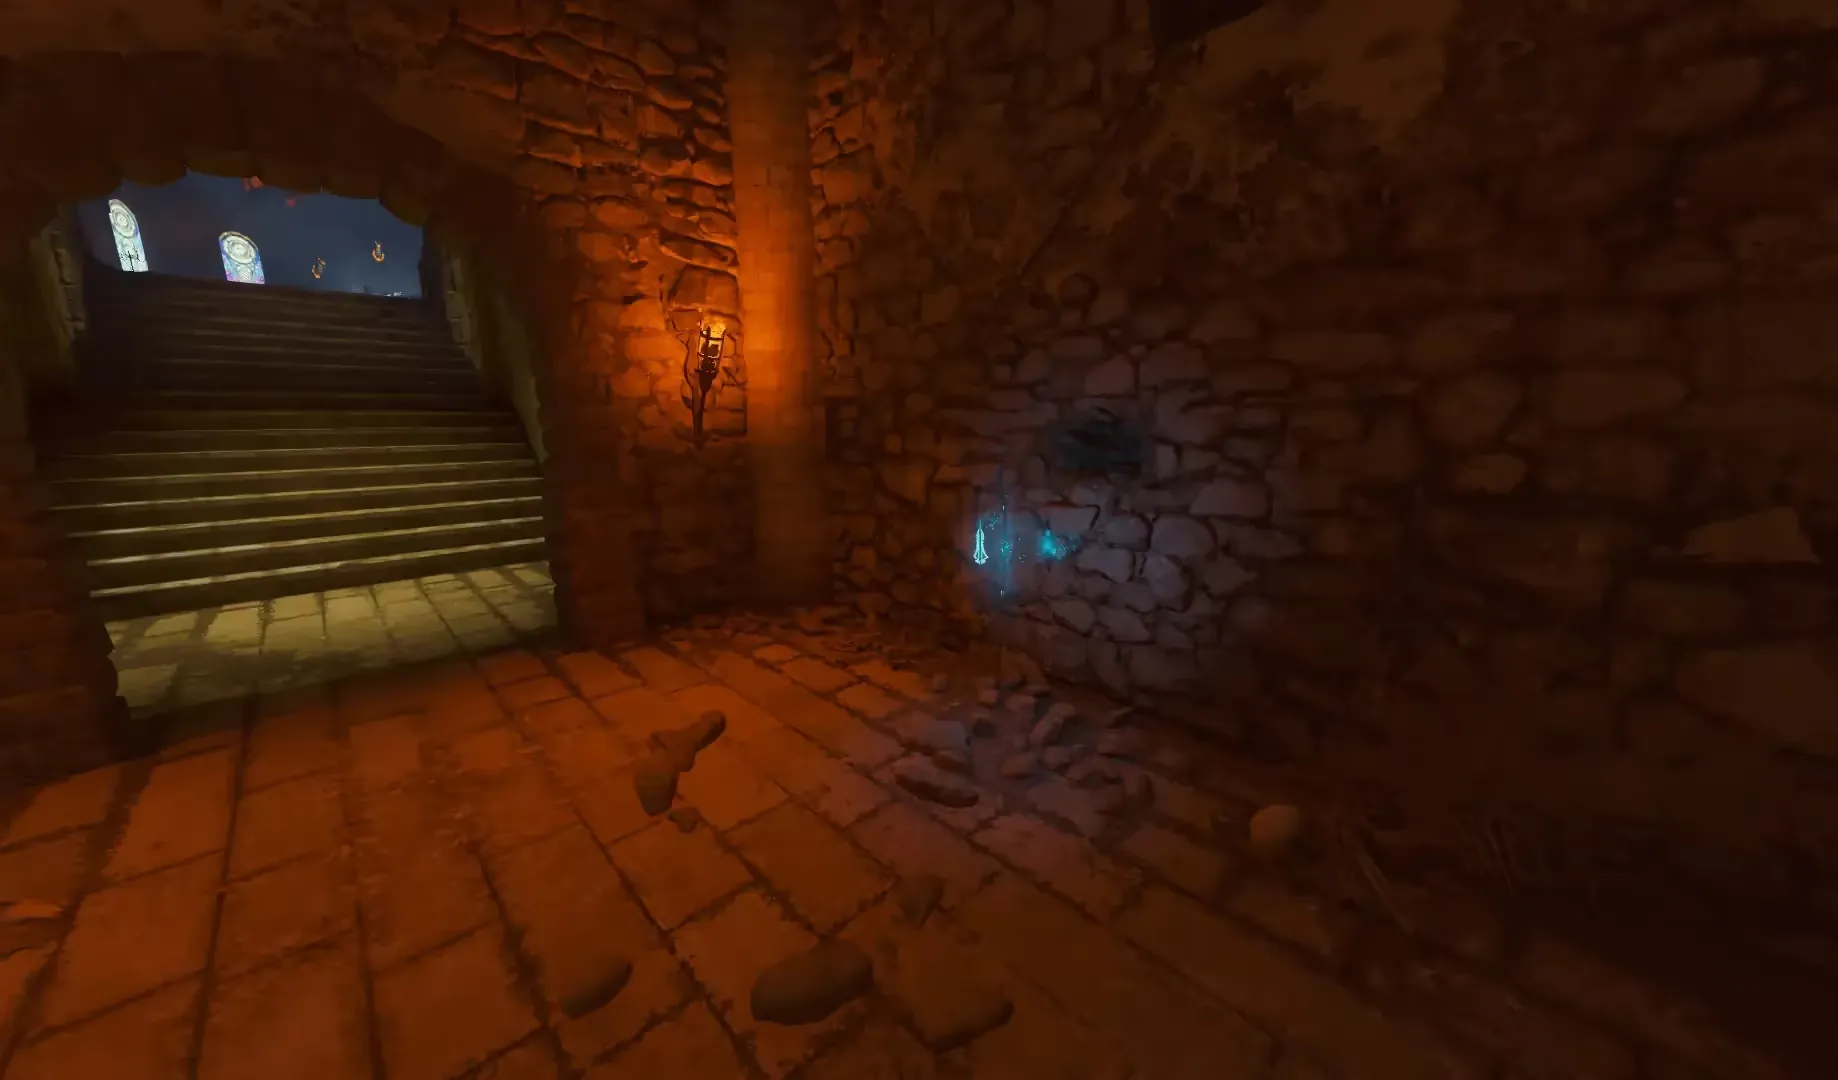
Once you have interacted with the four paintings in the correct order, head to the Undercroft to find the broken arrow revealed from a wall and on the floor in front of the stairs leading to the Mission Control room/Church.
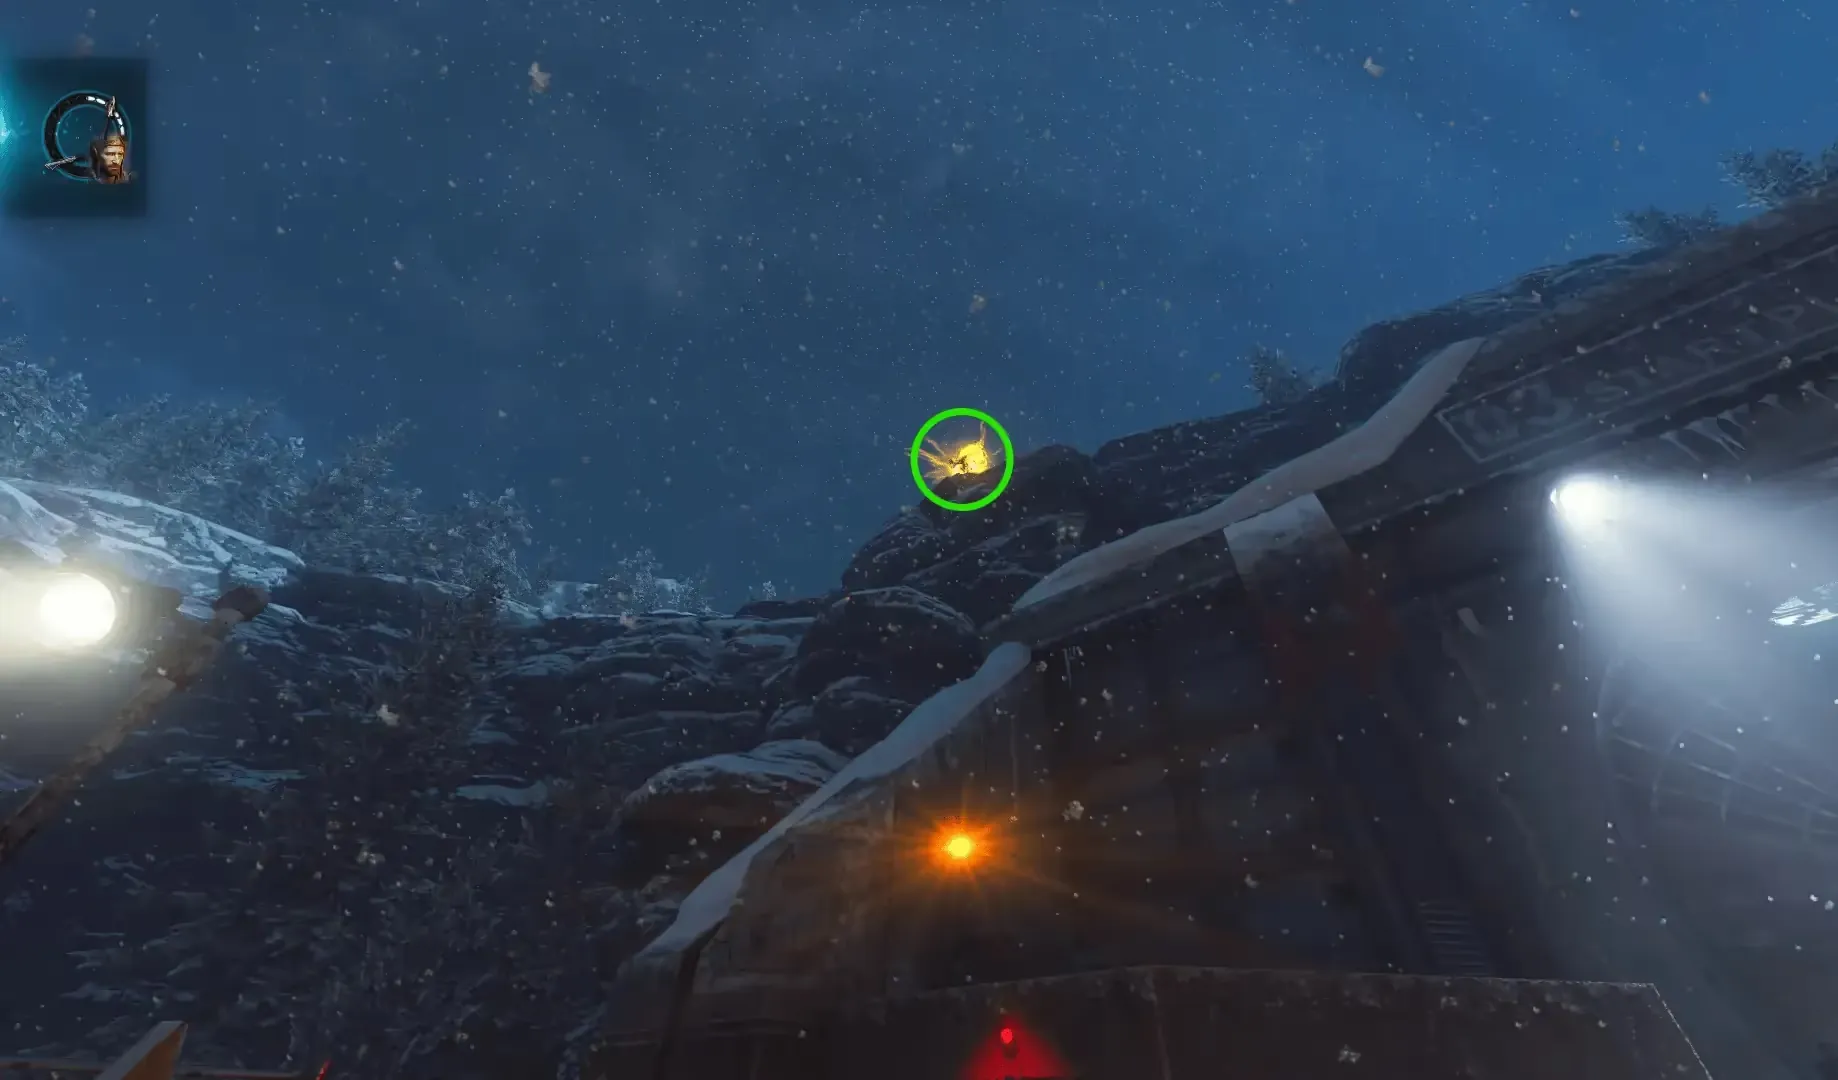
Once you have the broken arrow, head to the Rocket Test Site where with the Wrath of the Ancients you must shoot a flag atop the mountain above the entrance to the tunnel, releasing a glowing wolf skull that you must pick up. If done successfully, you will see an increase in the progress of your arrow.
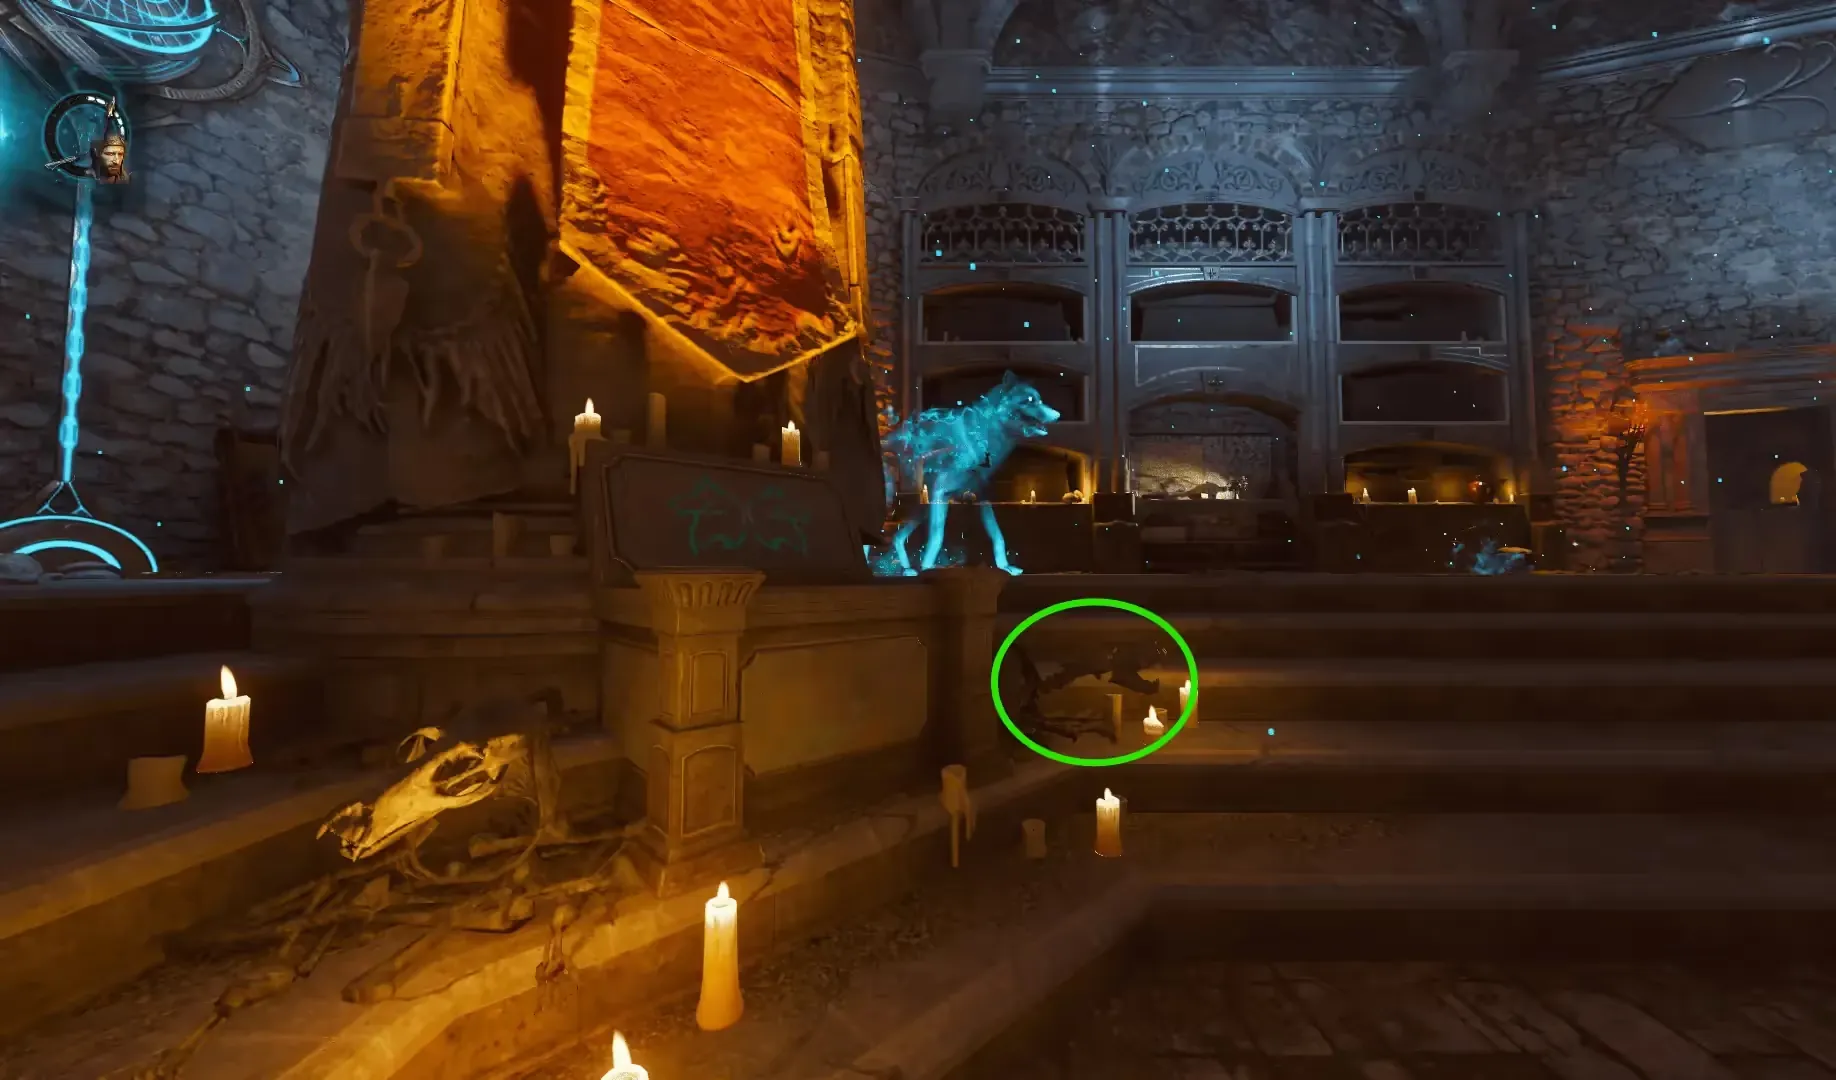
After picking up the skull, head back to the Undercroft where you must place the skull on the wolf's skeleton to the right of the Wolf Bow altar near the pyramid spawning a Spectral Wolf. If done successfully, you will see an increase in the progress of your arrow.

You must follow the Spectral Wolf until he stops revealing a digsite that you must kill zombies near. Once you have killed enough zombies the Spectral Wolf will begin to scratch the digsite revealing a piece you must pick up before continuing. You must do this two more times, If done successfully, you will see an increase in the progress of your arrow.
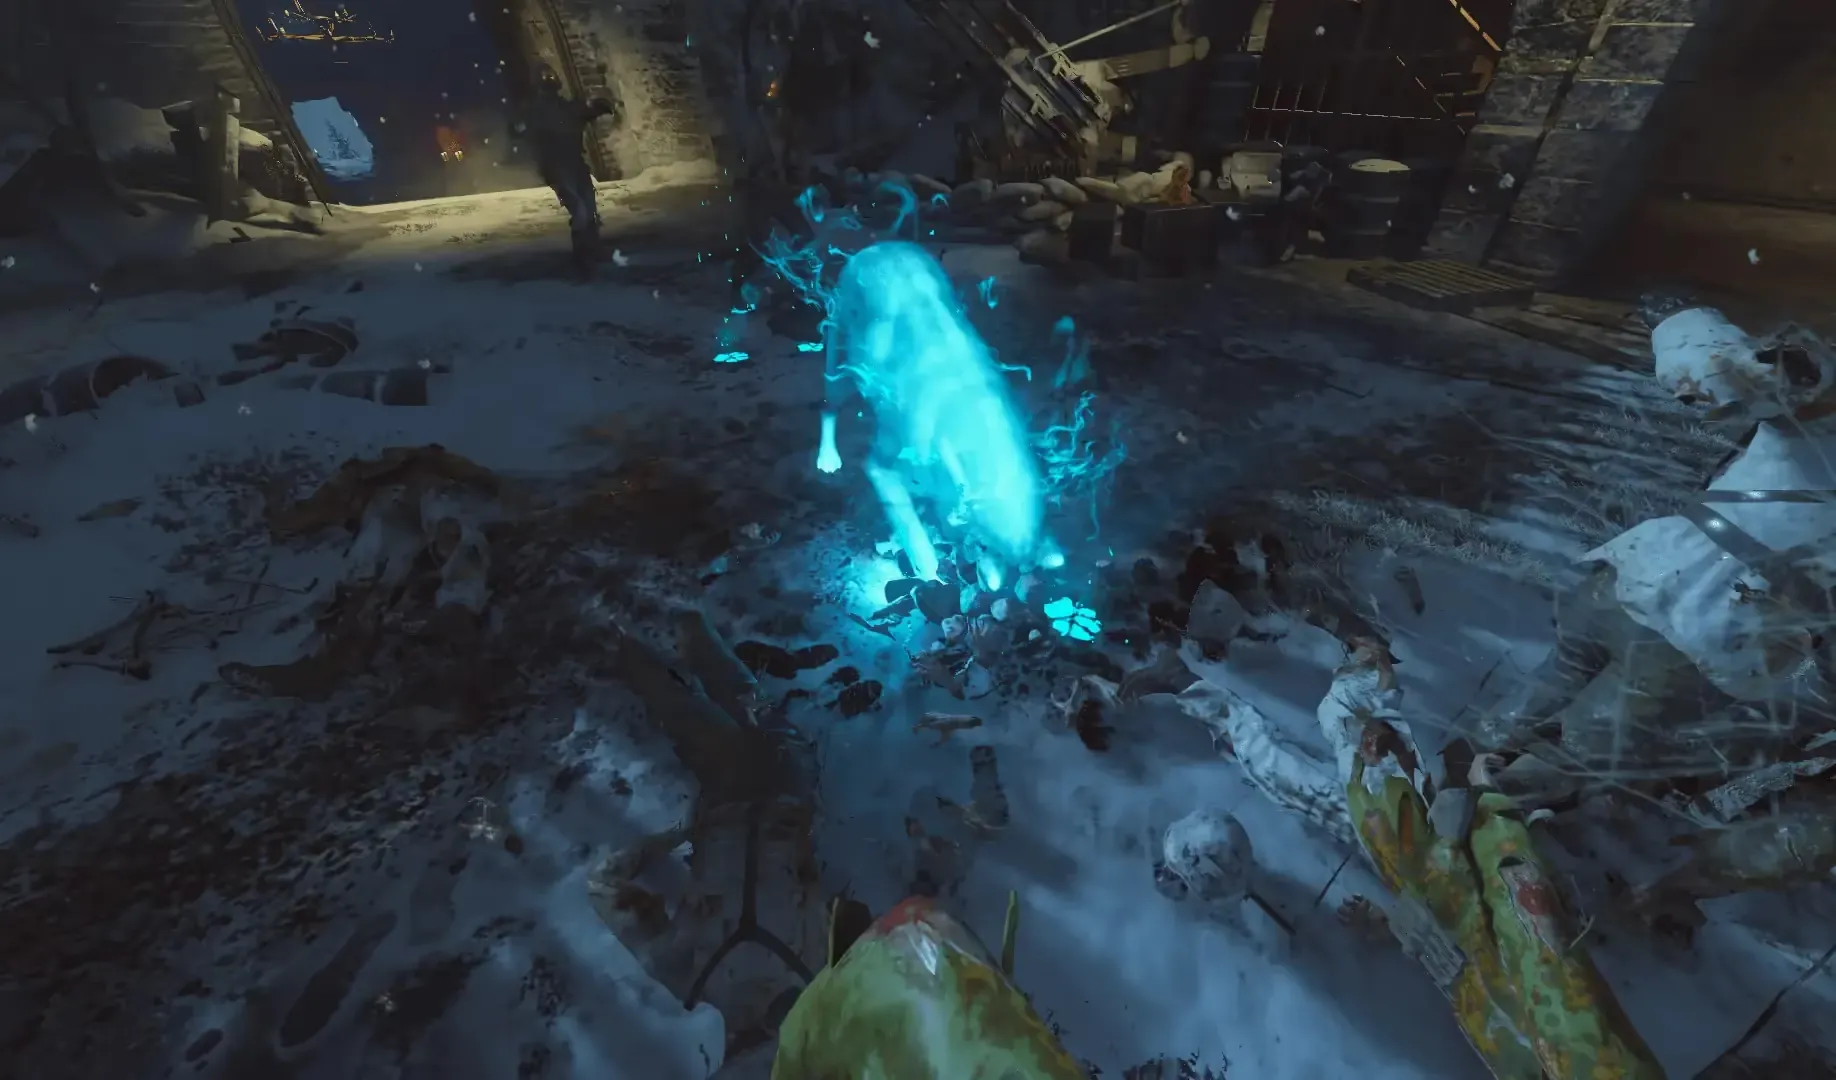
Finally, the Spectral Wolf will sit against a wall in the Undercroft. On this wall is a large hole, you must wait for Anti-Gravity then wall run until the symbol of a double wolf head appears above the hole, and then while wall running near the hole shoot the Wrath of the Ancients into the hole.
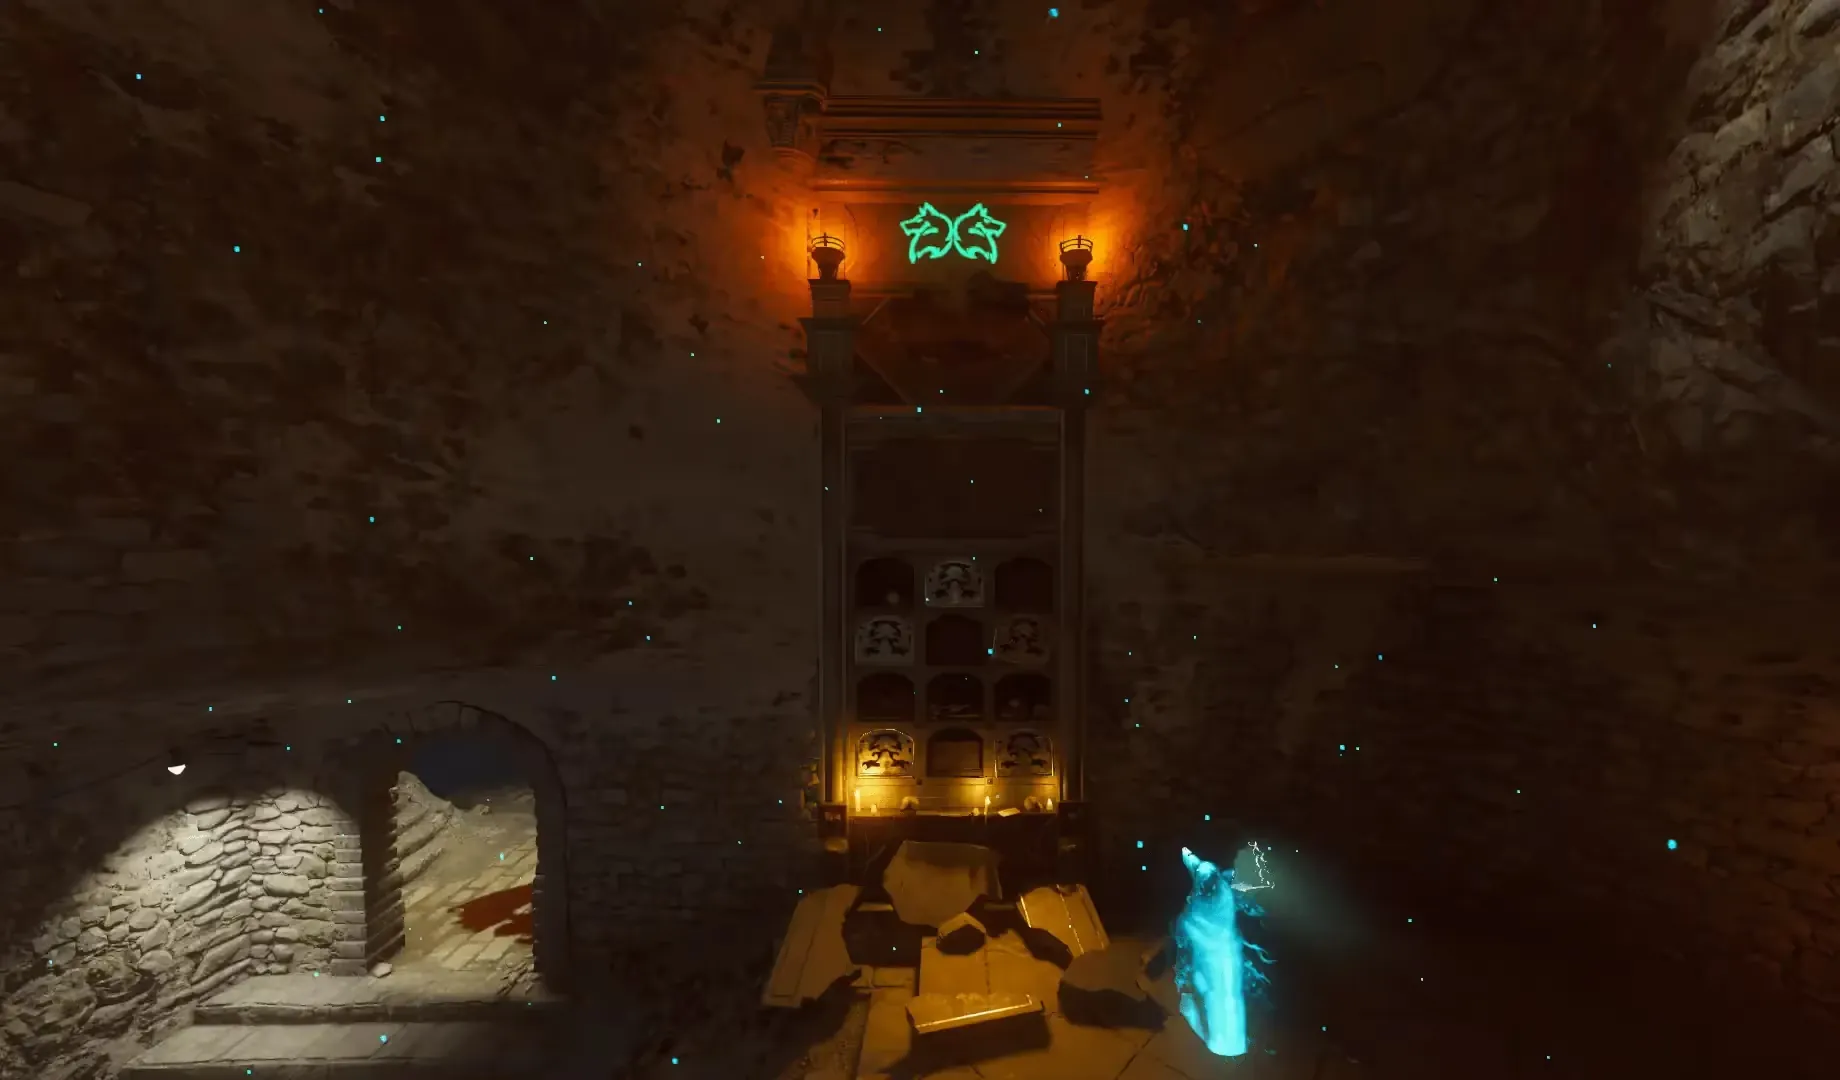
While this hole appears large, the hitbox for an arrow to go into it is actually smaller than you'd expect so you have to be a bit precise with your shots making this step slightly harder than originally perceived.
If done successfully, a platform will form allowing you to stand in front of the hole where you must interact with the coffin in the hole revealing the reforged arrow that you must claim.
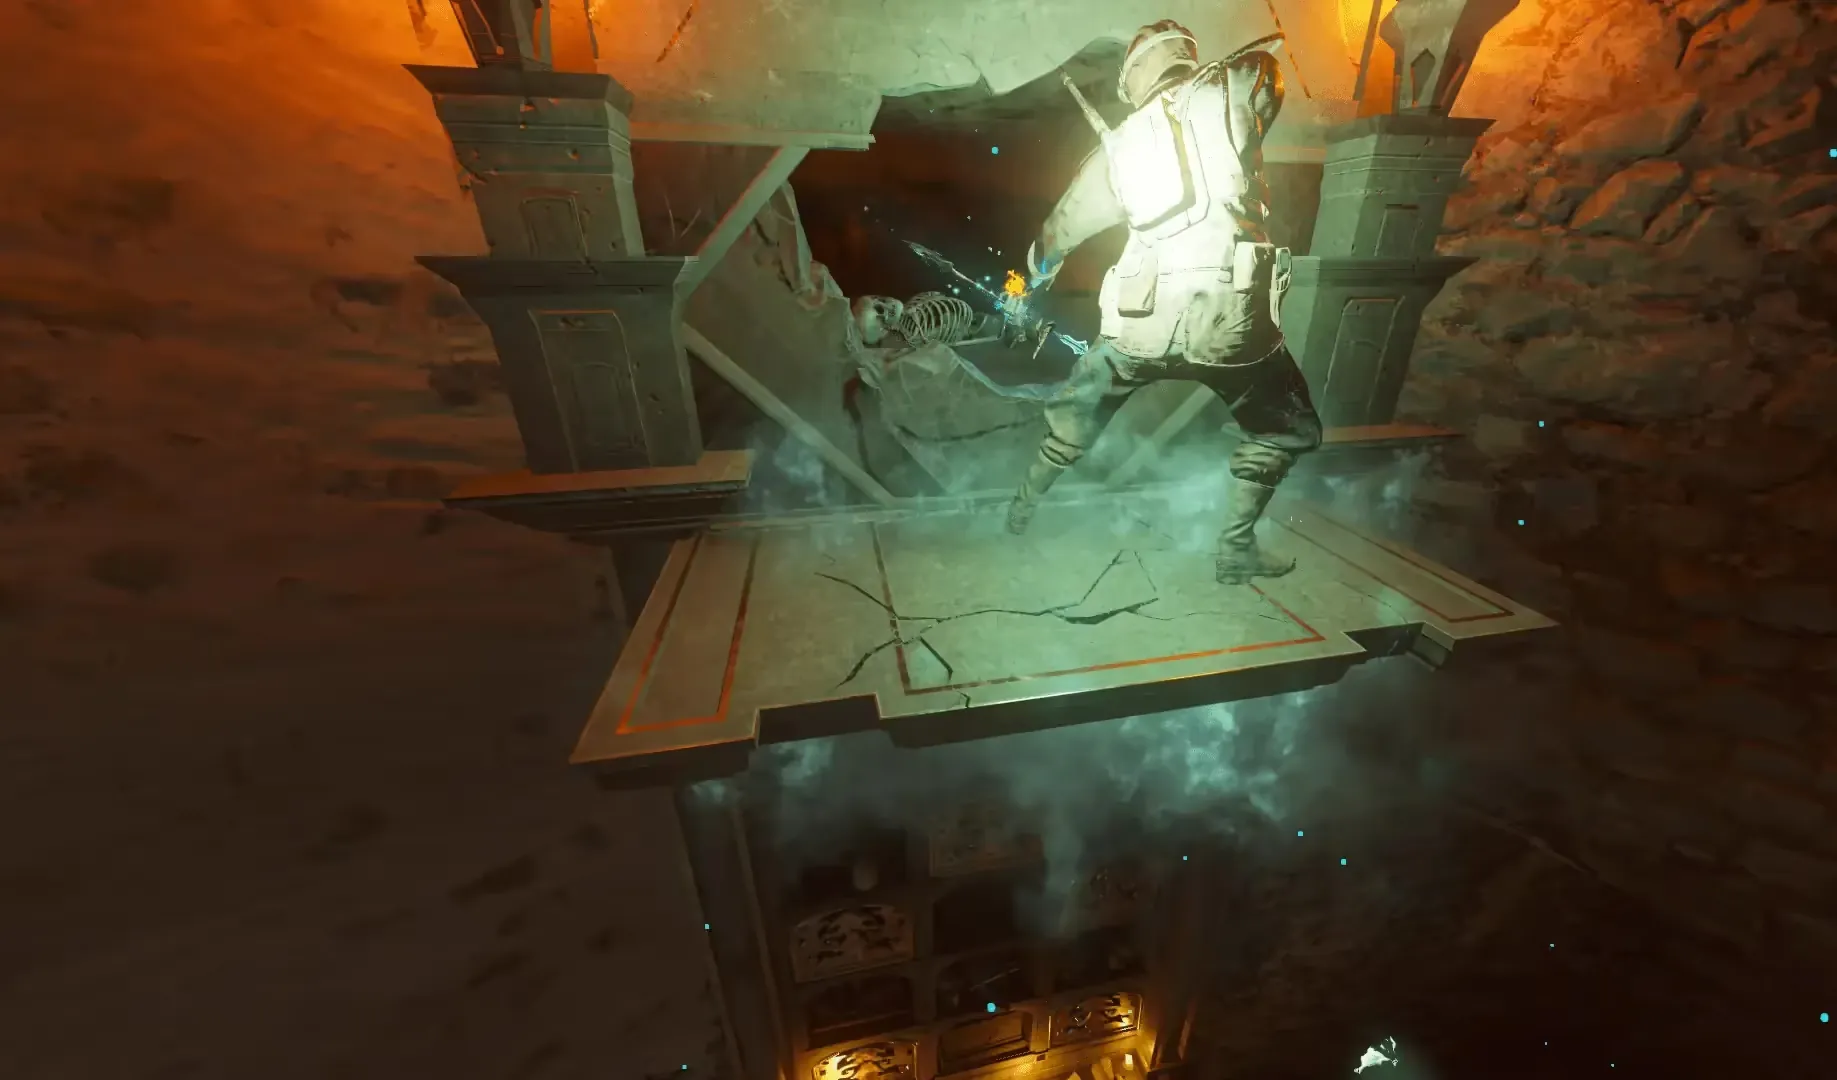
At this point, you have completed the Wolf Bow upgrade path and can skip to Completing the Upgrade, which is the same for all elemental bows.
Void Bow
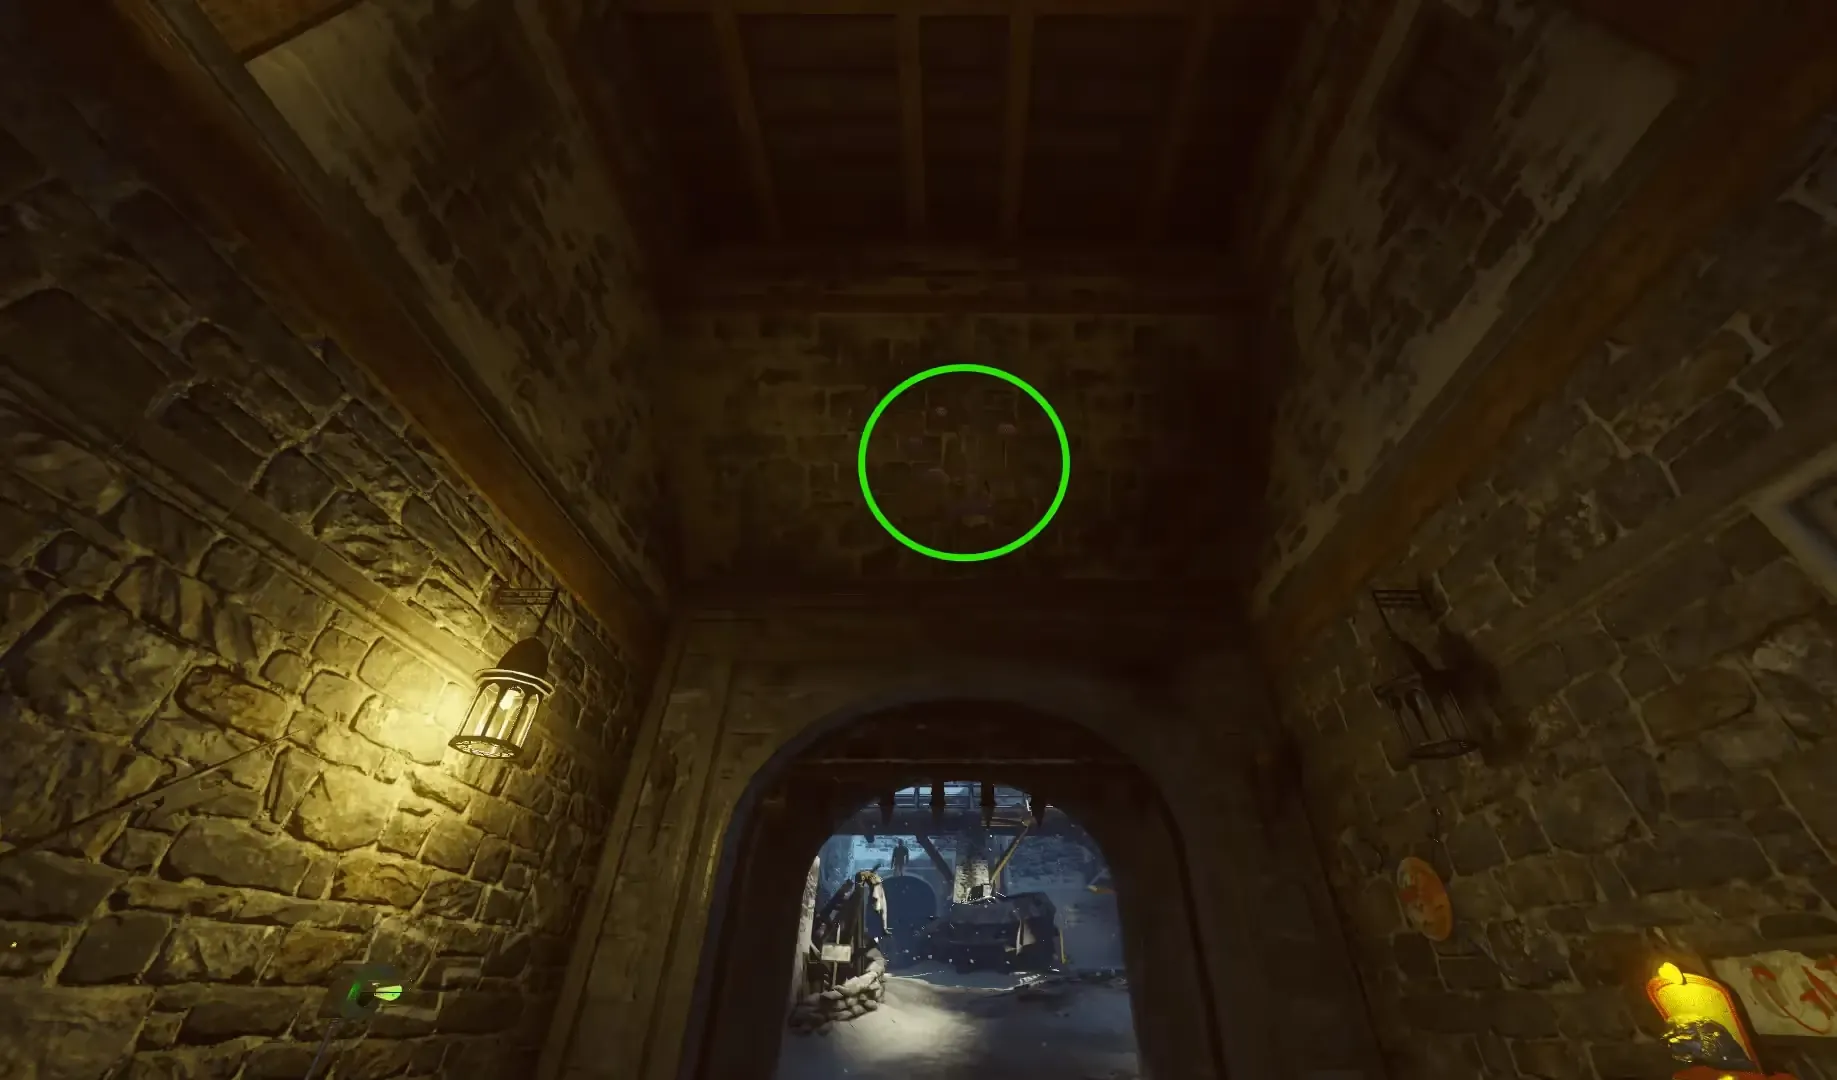
Head to the gate passage near ![]() Double Tap leading to the Courtyard dragon, on the roof of the passage will be a symbol that you must shoot
with the Wrath of the Ancients revealing the broken arrow.
Double Tap leading to the Courtyard dragon, on the roof of the passage will be a symbol that you must shoot
with the Wrath of the Ancients revealing the broken arrow.
Once you have the broken arrow, head to the Trophy room beneath the Clock Tower. There will be a purple square on the ground that you must melee kill a zombie over revealing an urn you must interact with to release it. If done successfully, you will see an increase in the progress of your arrow.
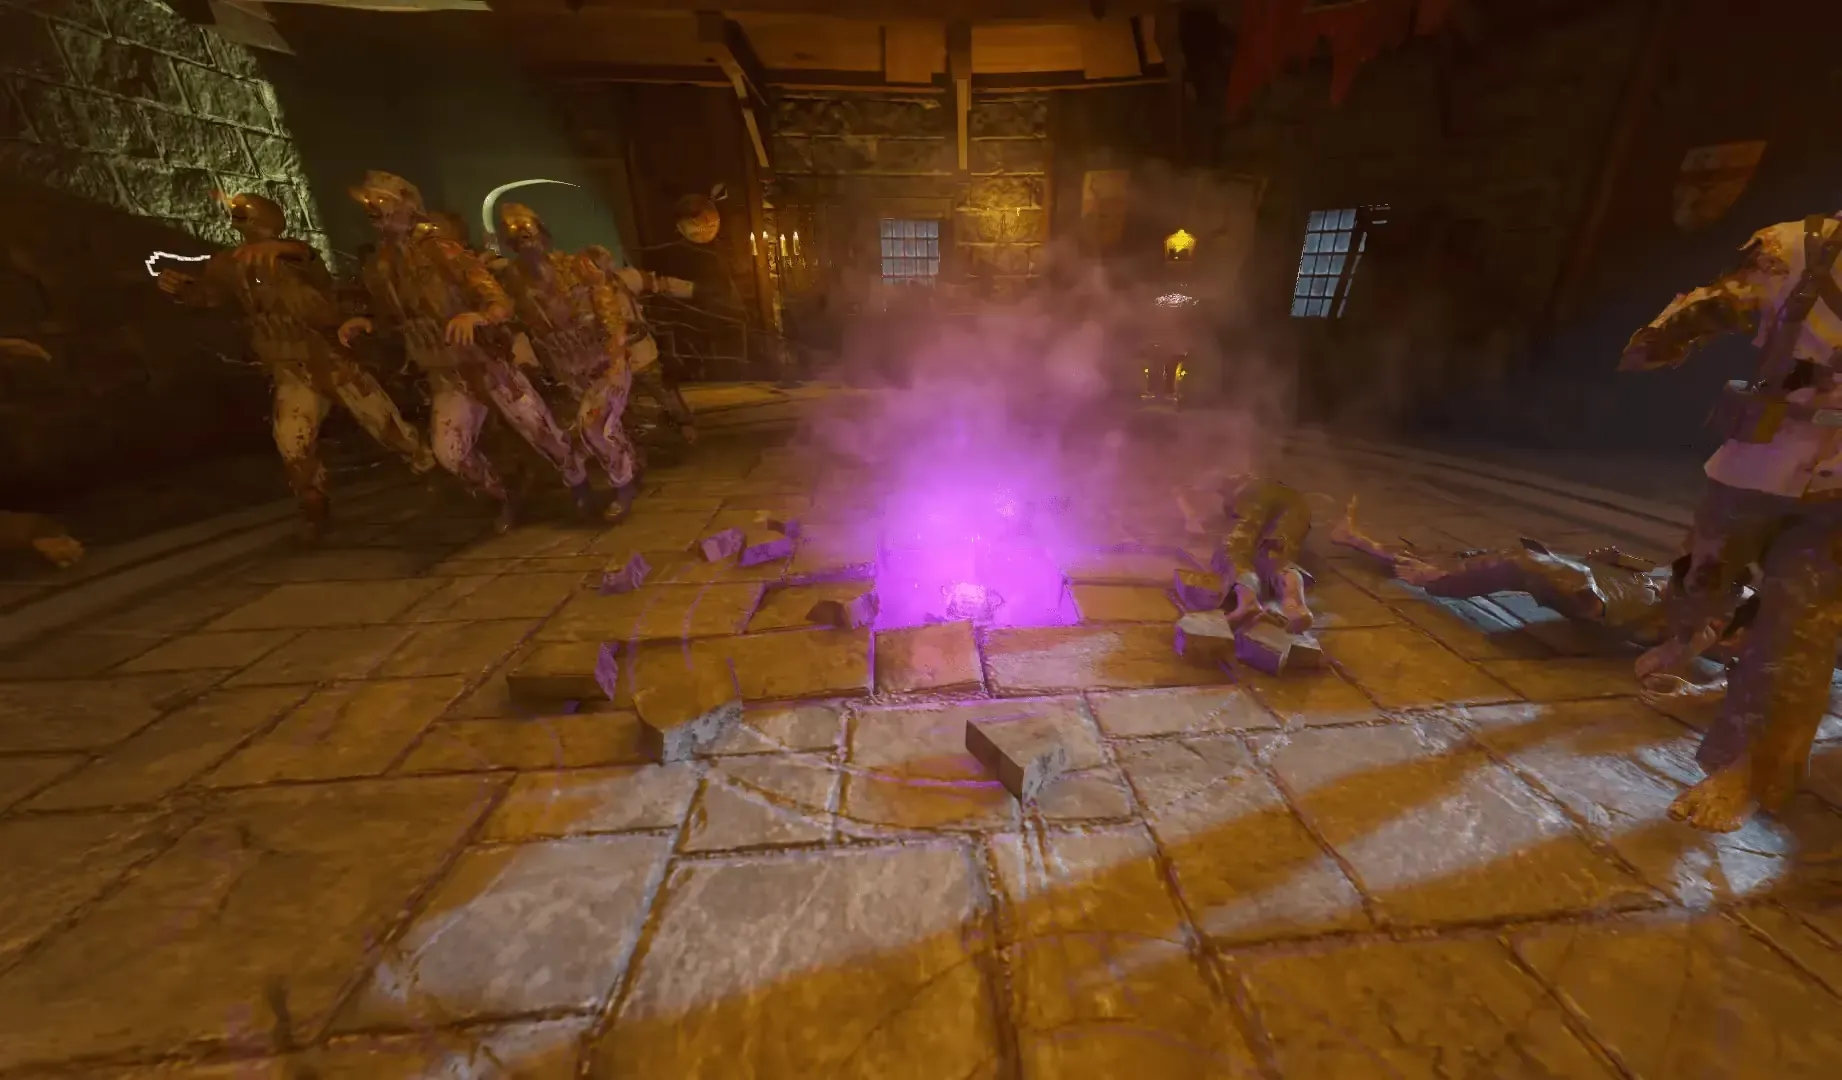
After releasing the urn, you must find and interact with six skulls around the map. If done successfully, you will see an increase in the progress of your arrow. The skulls are located:

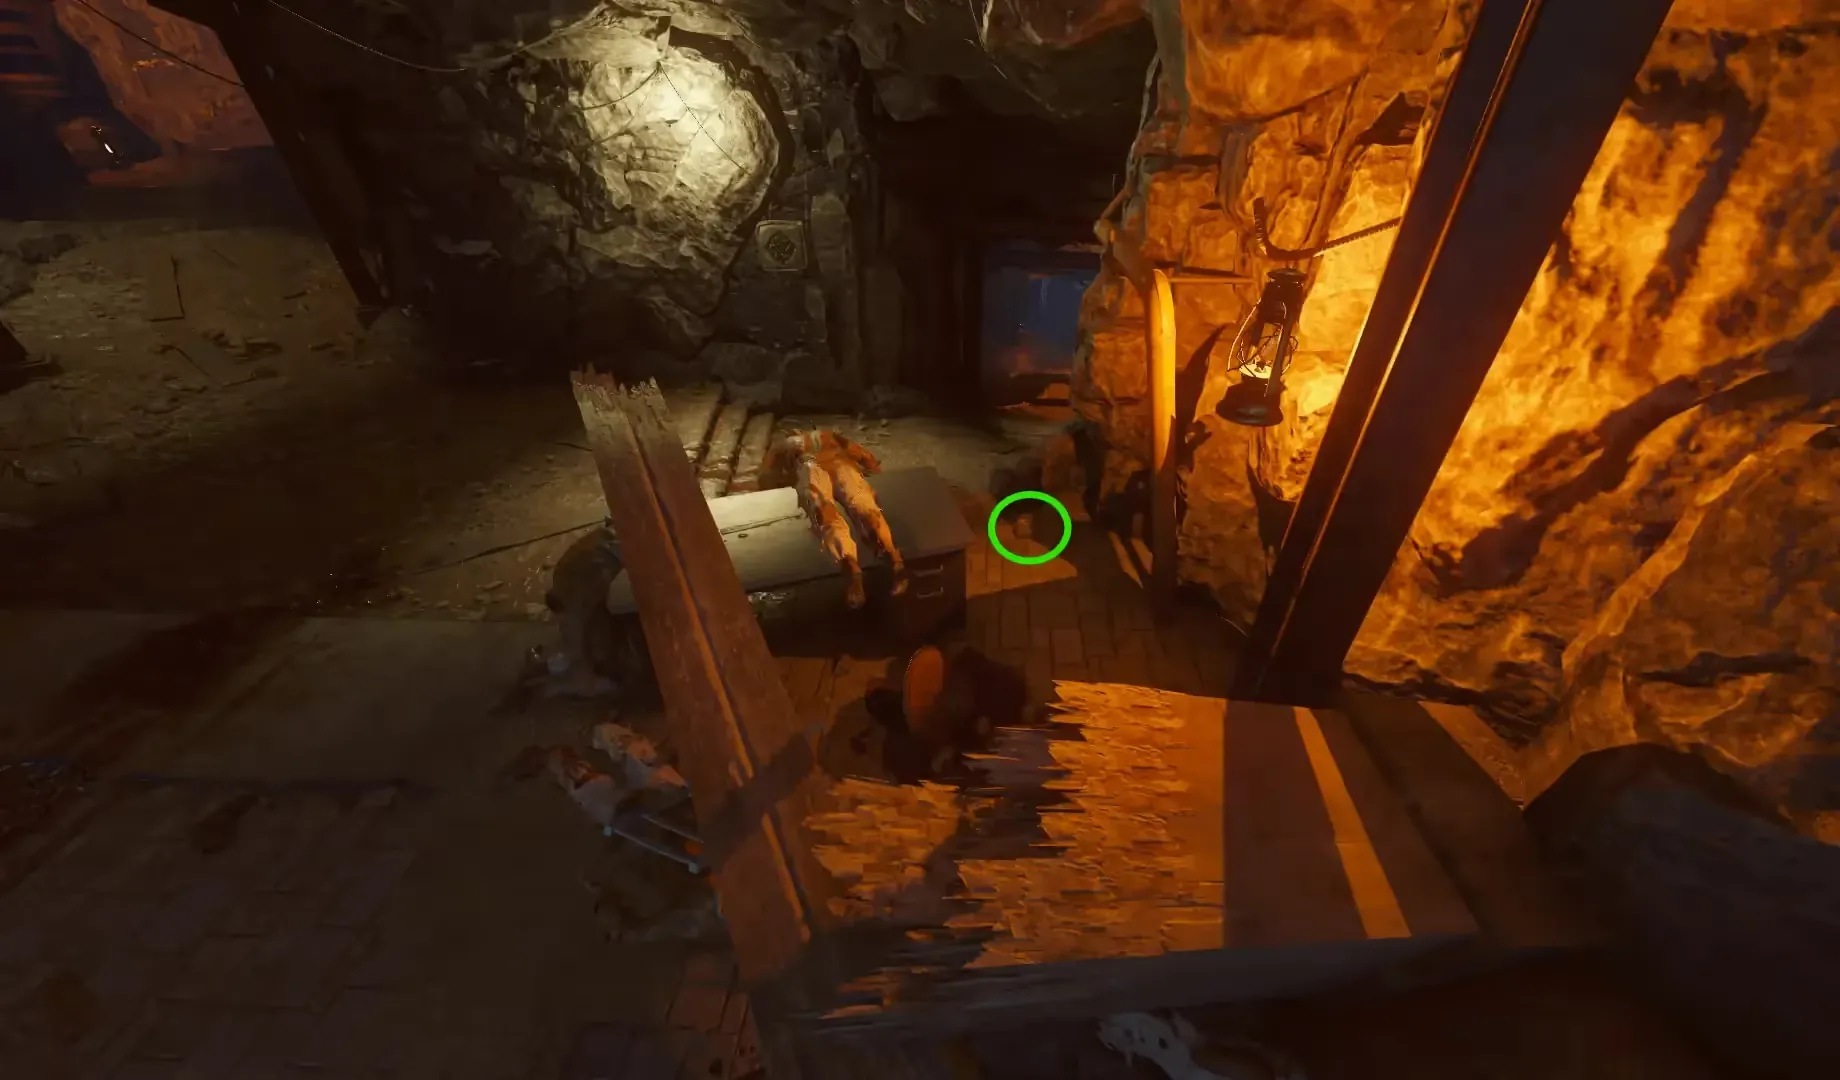

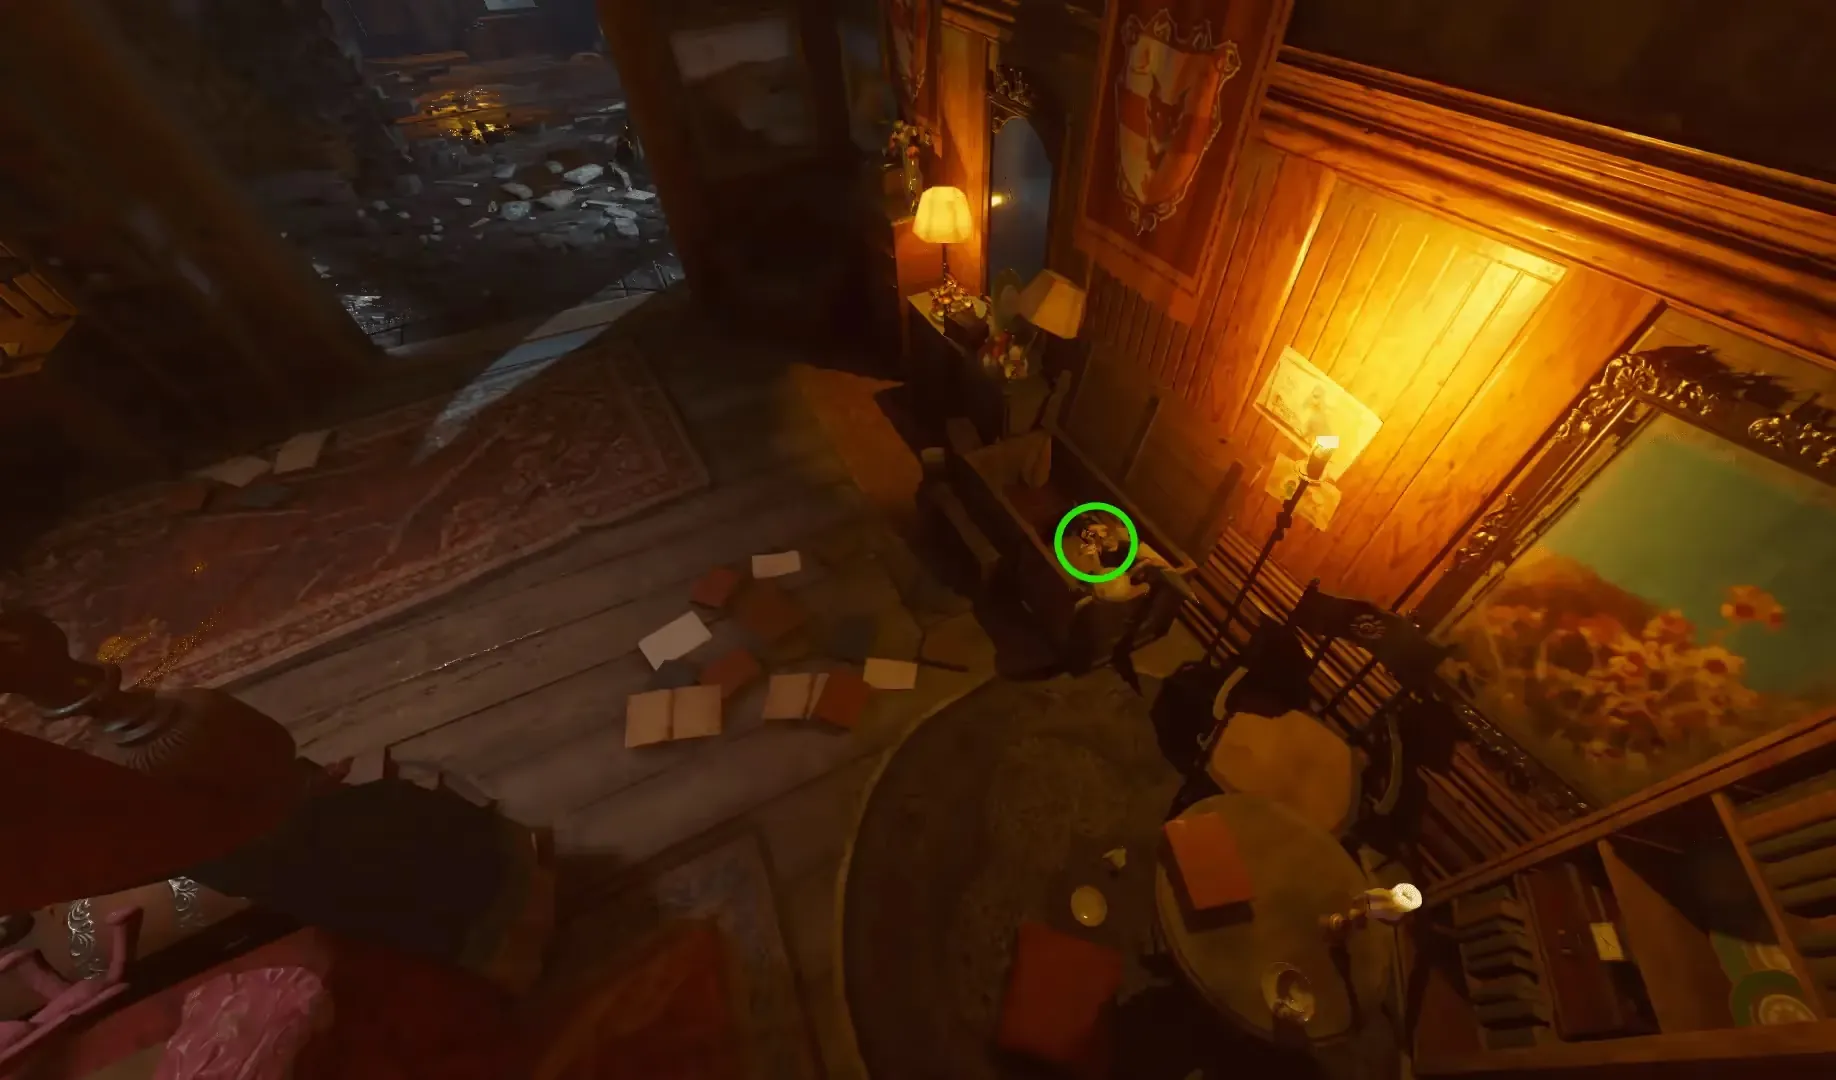

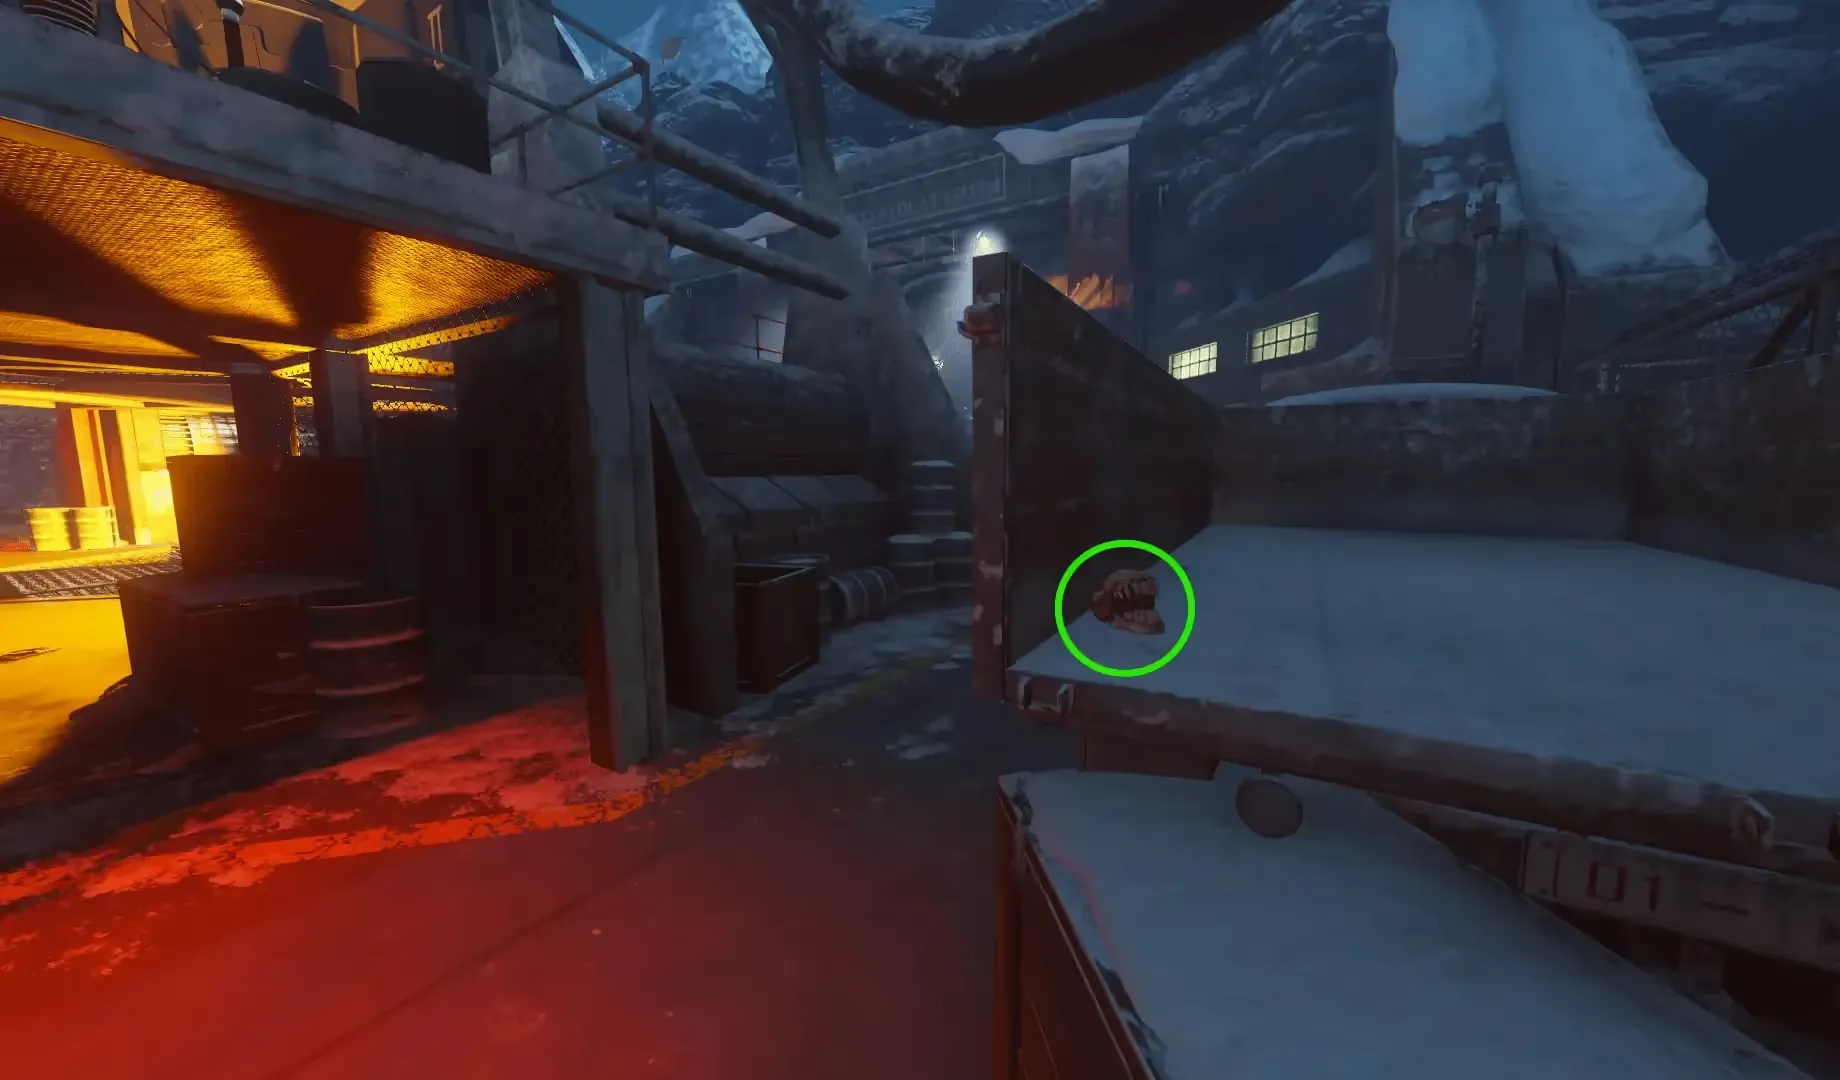
After interacting with all six skulls, you must bring six crawlers into the purple circle in the Trophy room to be consumed by the skulls. If done successfully, you will see an increase in the progress of your arrow, and the urn will state three of the six crests (Griffin, Heart, Door, Stag, Crown, or Horn).

You must remember the three words spoken by the urn for a later step, however, if at any point you forget the words spoken by the urn, shoot the urn with the Wrath of the Ancients to get the urn to repeat itself.
After hearing the three crests, you must kill zombies that will now uncommonly drop symbols that will be added to the summoning circle upon pickup. There are six symbols in total that you can collect, and they disappear quickly after dropping, so be vigilant in picking them up.
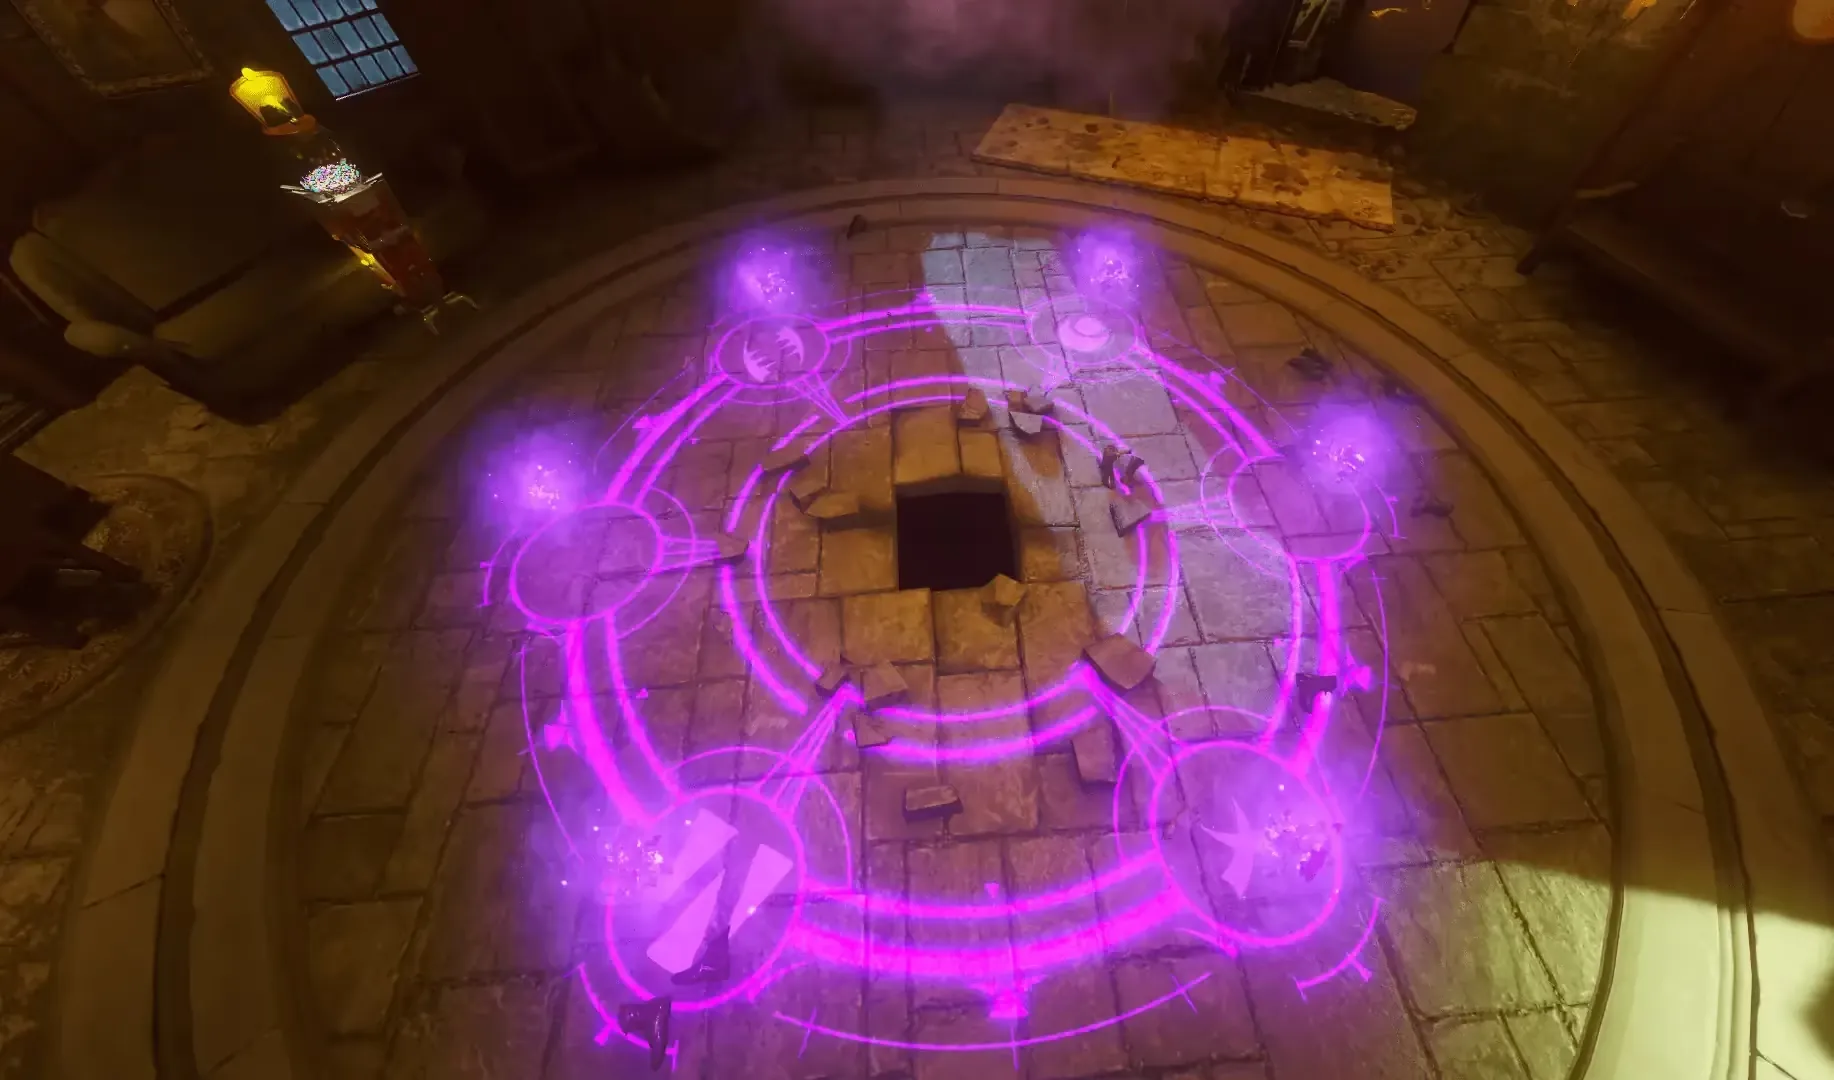
If you are in a multiplayer game, only kills by the player with the broken void arrow will have a chance to drop these symbols. Kills by other players will not drop any symbols.
Finally, once all six symbols have been collected, head to the corridor that leads to the power. Here are six knights, each containing a symbol of one of the six crests below them. You must find the three knights containing the three crests that the urn spoke to you (Griffin, Heart, Door, Stag, Crown, or Horn).
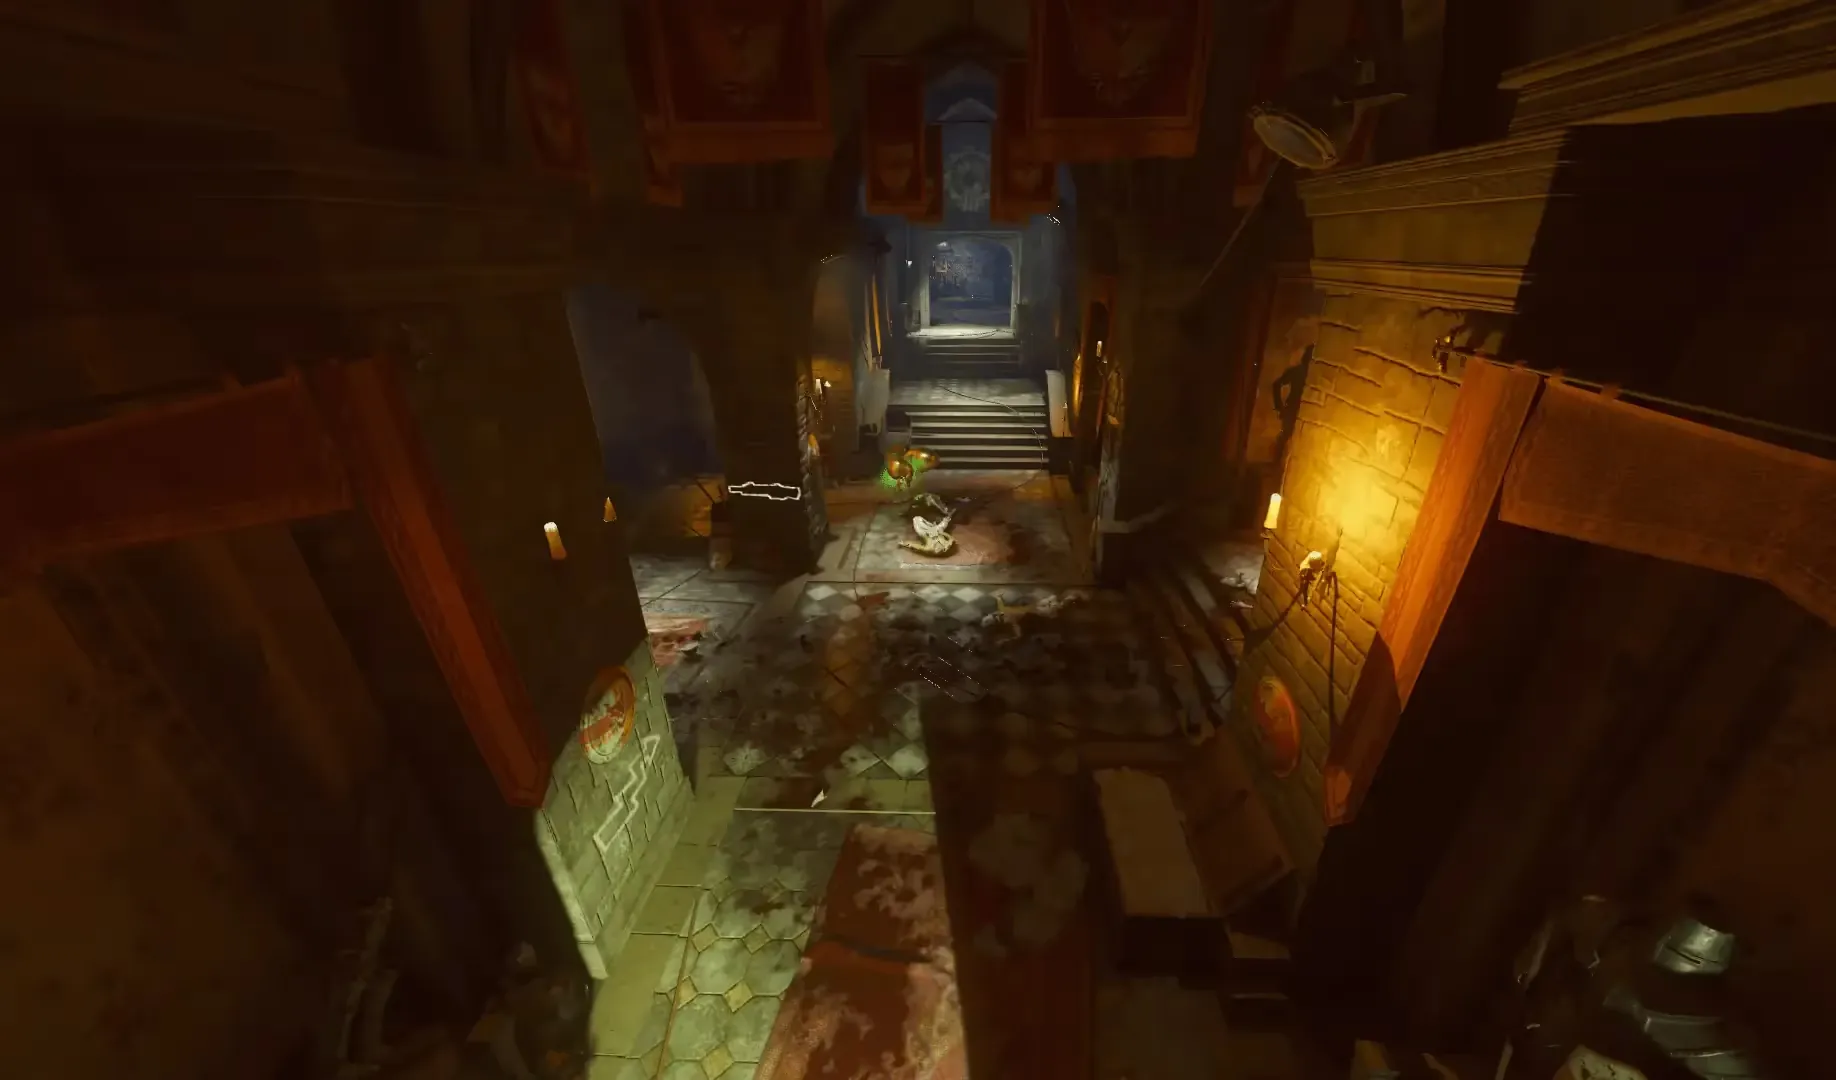
You only need to collect the symbols that match the crests spoken by the urn to progress, but, there is no downside in collecting them all to be safe.
Once you have located the three correct knights, interact with them each revealing a symbol from the summoning circle for each crest. Once you have seen all three symbols for each crest, head back to the summoning circle, and in the order that the urn spoke the crests, shoot the corresponding symbols with the Wrath of the Ancients.
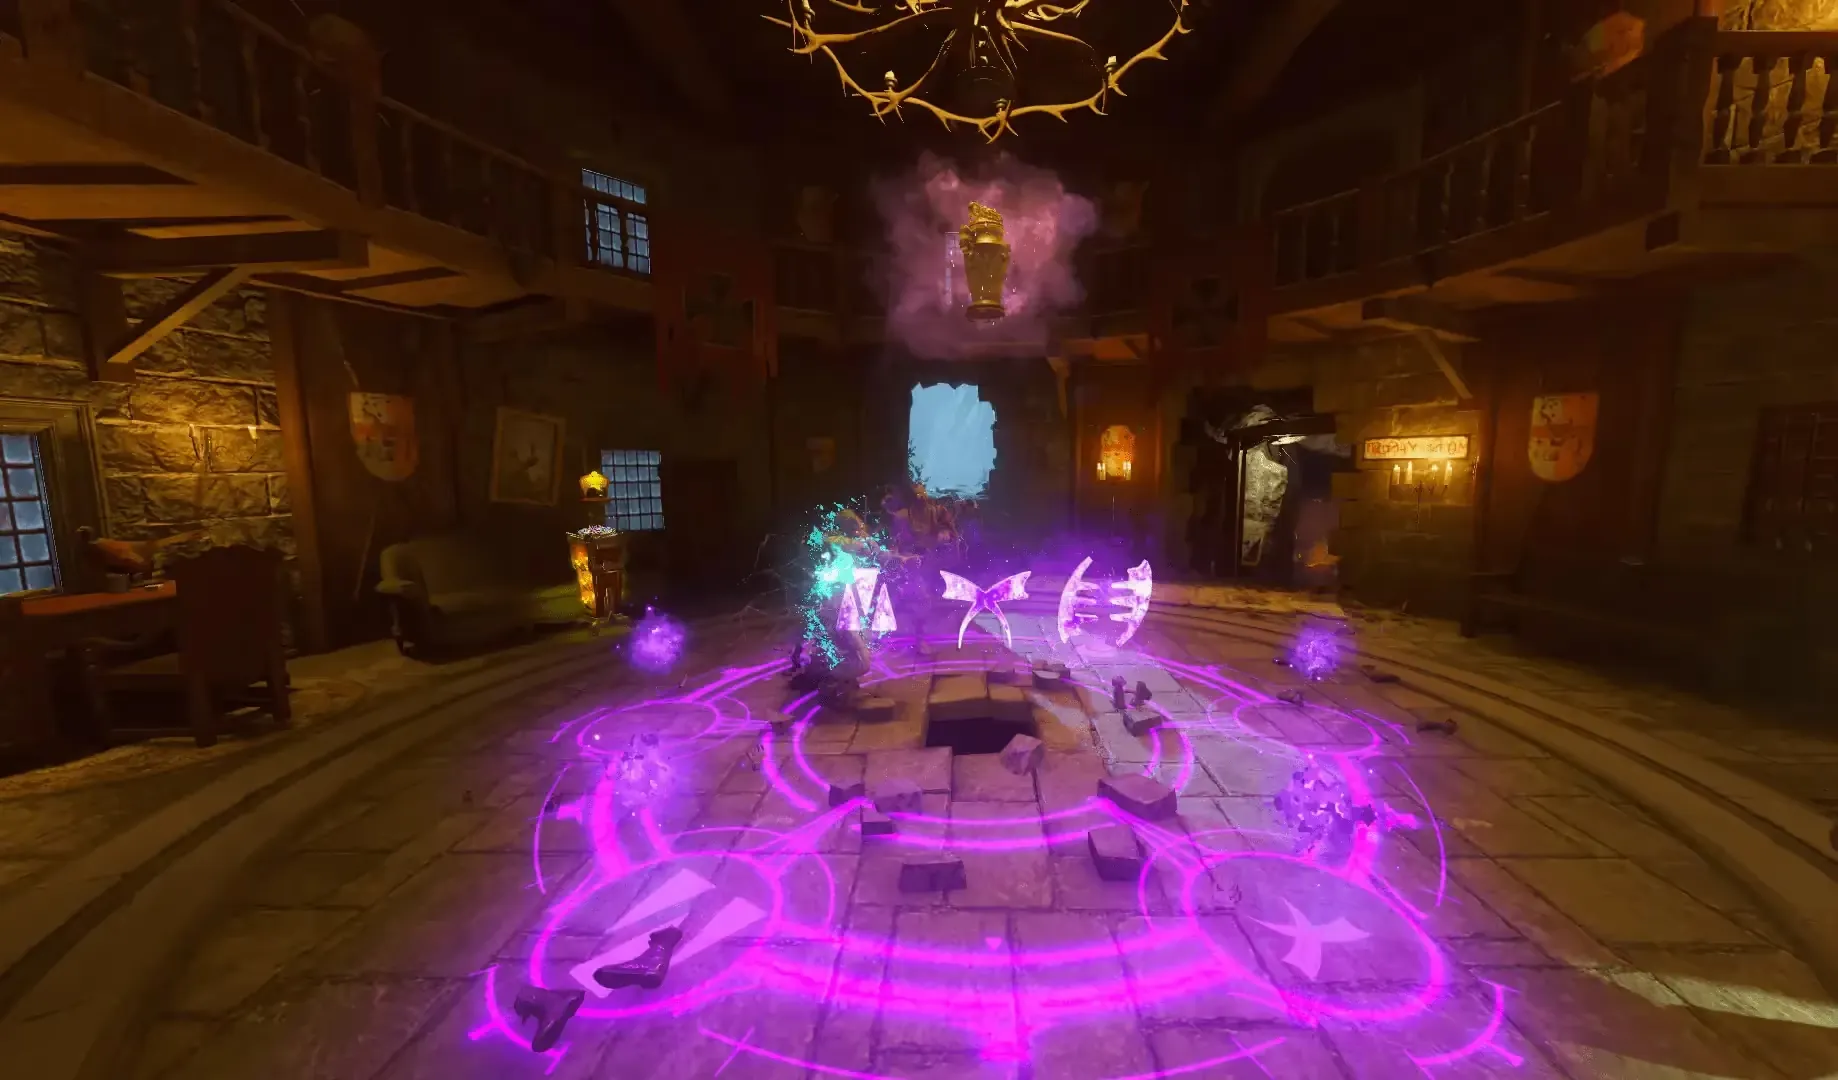
If you input the wrong order or the wrong symbols, you will be attacked by the skulls and must leave the room to be able to try again.
If done successfully, the urn will say "That is my name" and you must interact with the purple glow to reveal the reforged arrow you must claim.
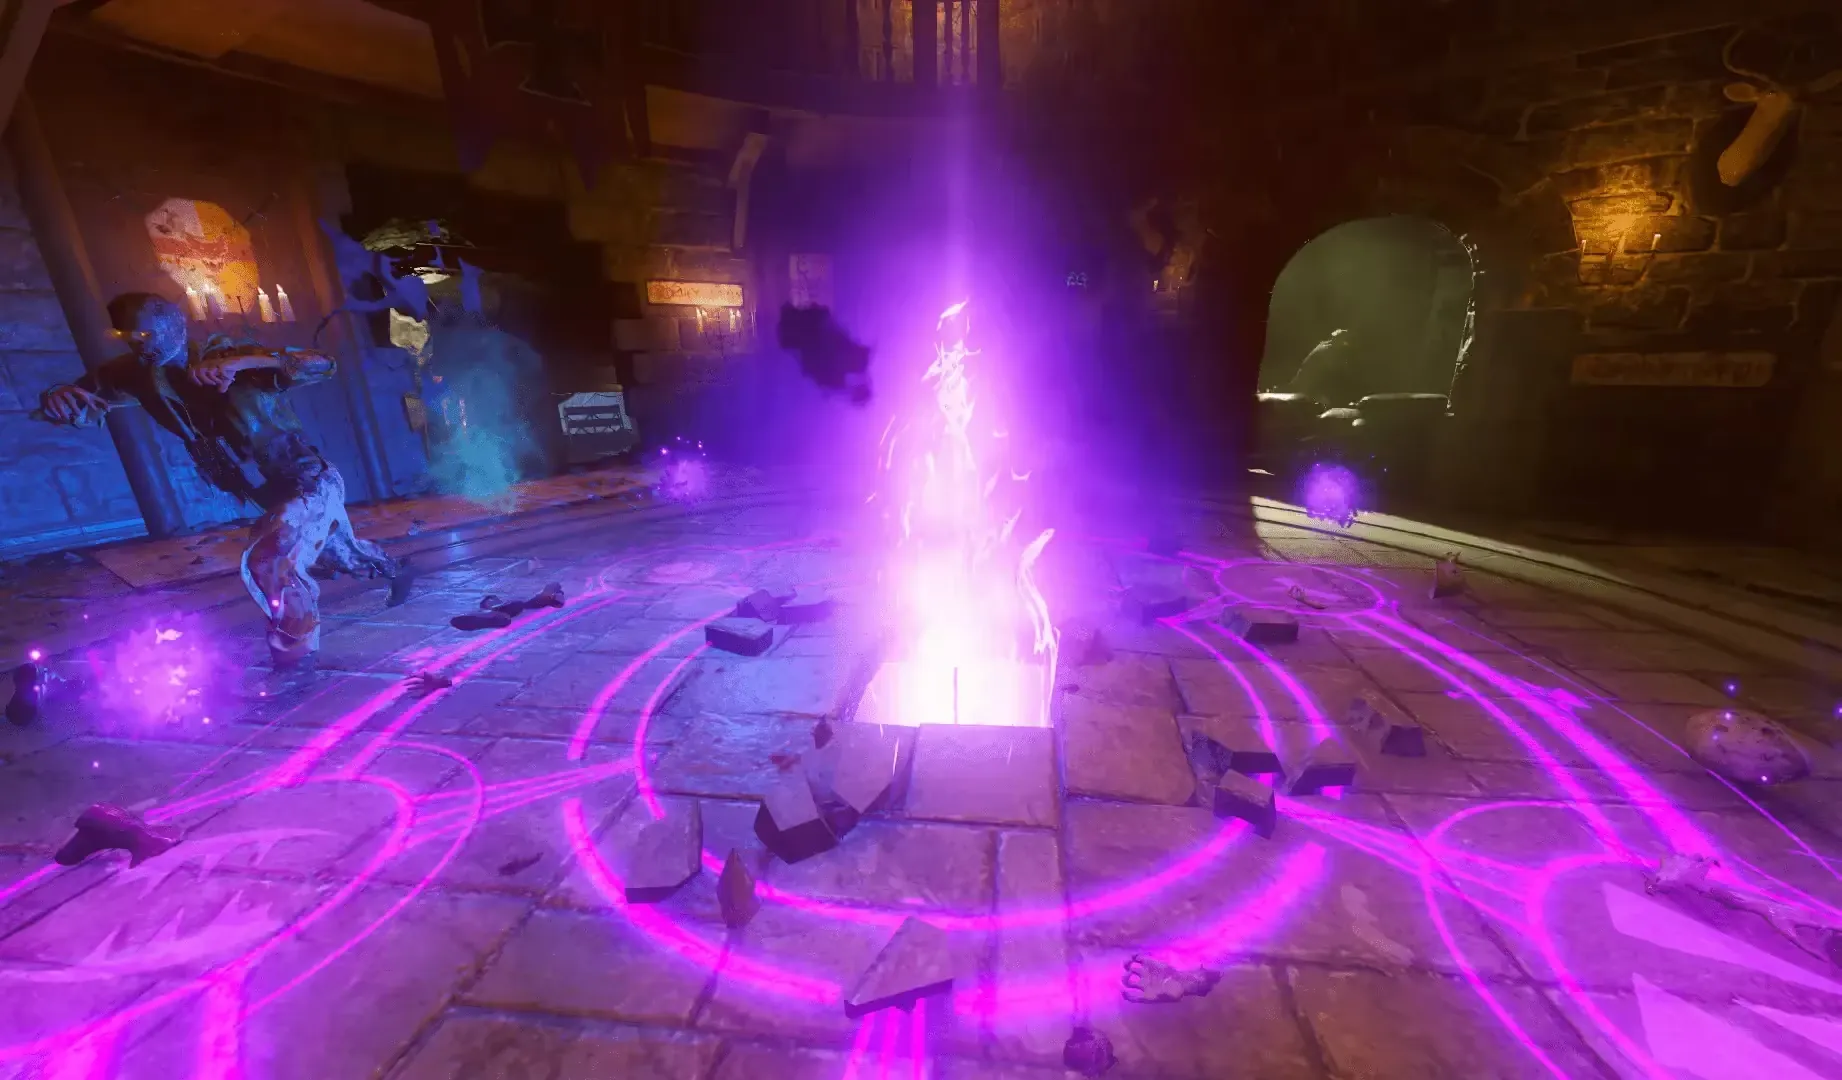
At this point, you have completed the Void Bow upgrade path and can skip to Completing the Upgrade, which is the same for all elemental bows.
Completing the Upgrade
Bring this reforged arrow to the Undercroft, you must place the arrow within the corresponding altar spawning a Max Ammo, afterward you must kill zombies within the square defined around the pyramid collecting souls.

Once enough souls have been collected, a sound will play and the arrow will have a white border around it, interact with the arrow and wait for the animation to finish to reveal your newly upgraded bow.

Activating Anti-Gravity
Head to the Undercroft, around the pyramid, there will be four squares that you must stand on for about five seconds activating them. Once all four squares have been activated, anti-gravity will activate and will periodically activate throughout the game from this point on.

Step 3: Travel Back in Time
Head to the Teleporter room, using the Wrath of the Ancients you must shoot the six blue glowing orbs above the teleporter until all six are glowing golden.

You can always grab the Wrath of the Ancients from the tomb room you originally claimed the bow from. If you have an upgraded bow, place it down at it's altar in the Undercroft to be able to claim the Wrath of the Ancients again.
Afterward, you will hear a Margwa screech indicating that the first electrical wisp has spawned on the map. You must find and shoot this wisp with any upgraded bow, you will then hear another screech meaning another wisp has spawned. You must repeat this four times, these wisps can spawn in eight different locations:
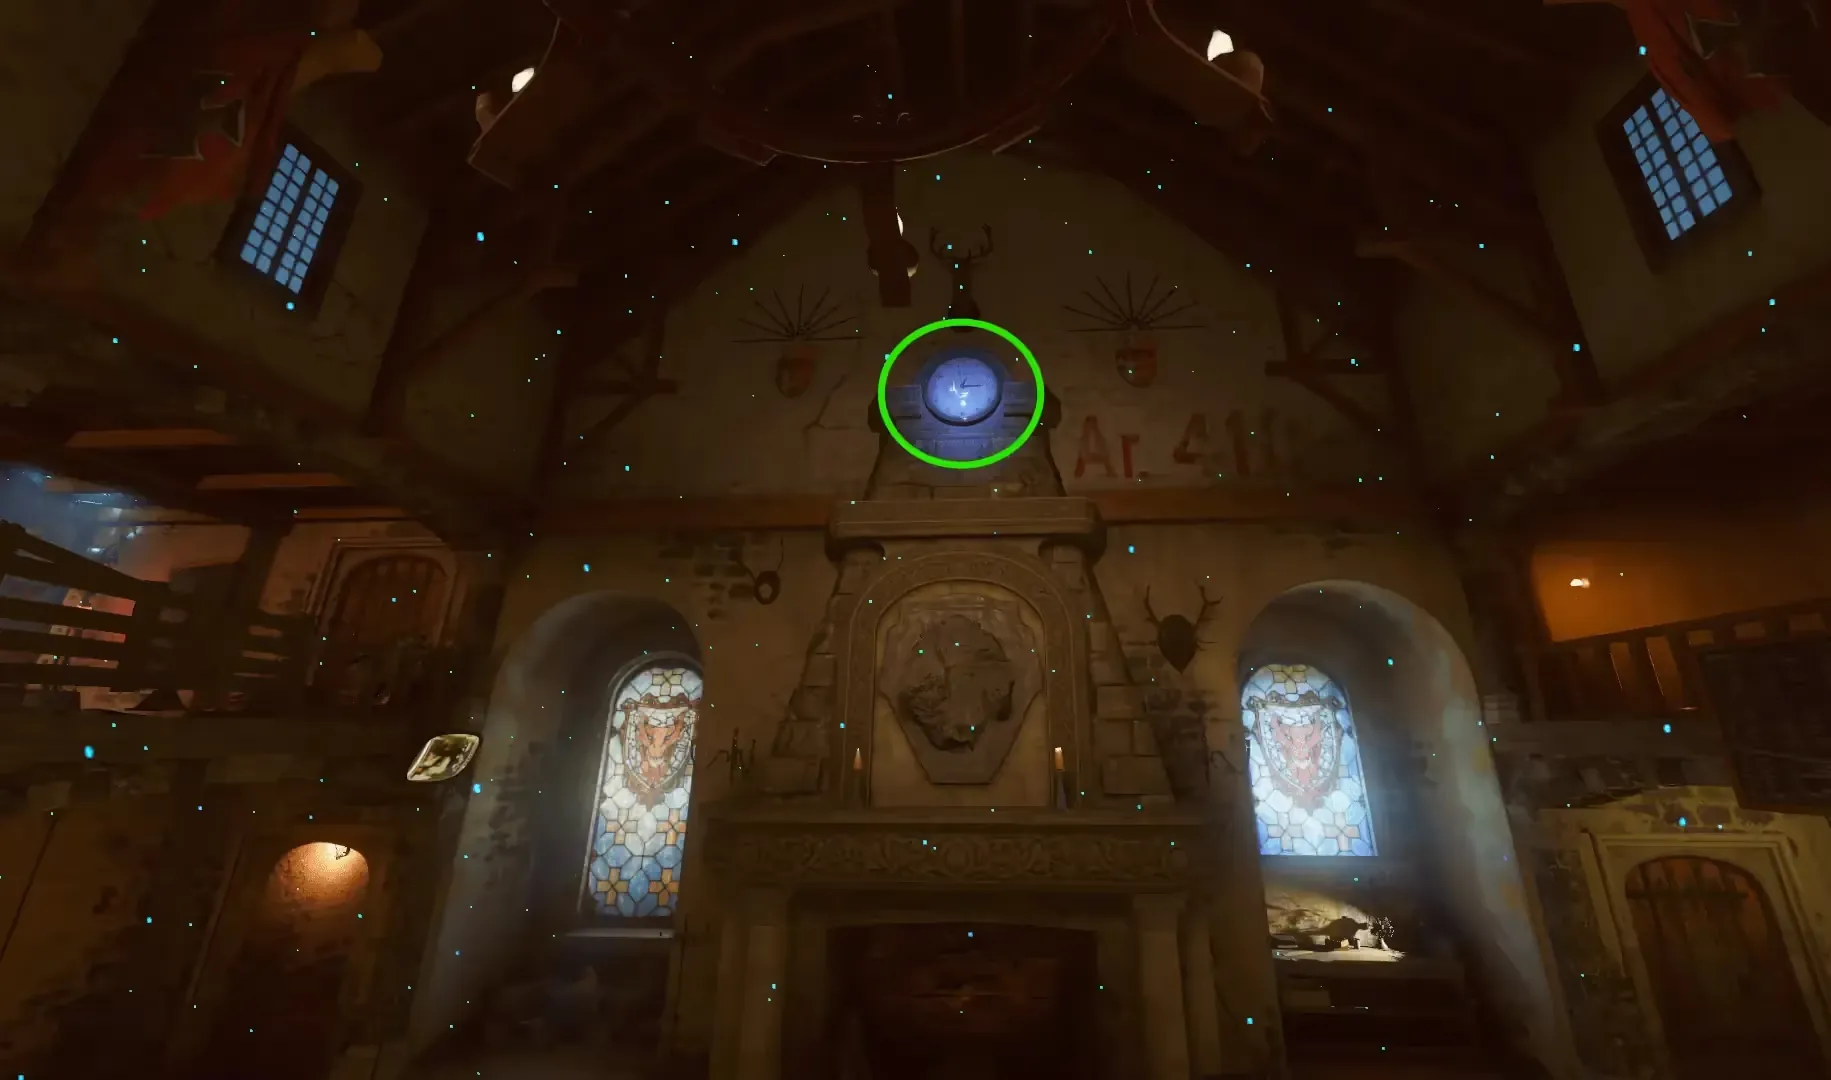
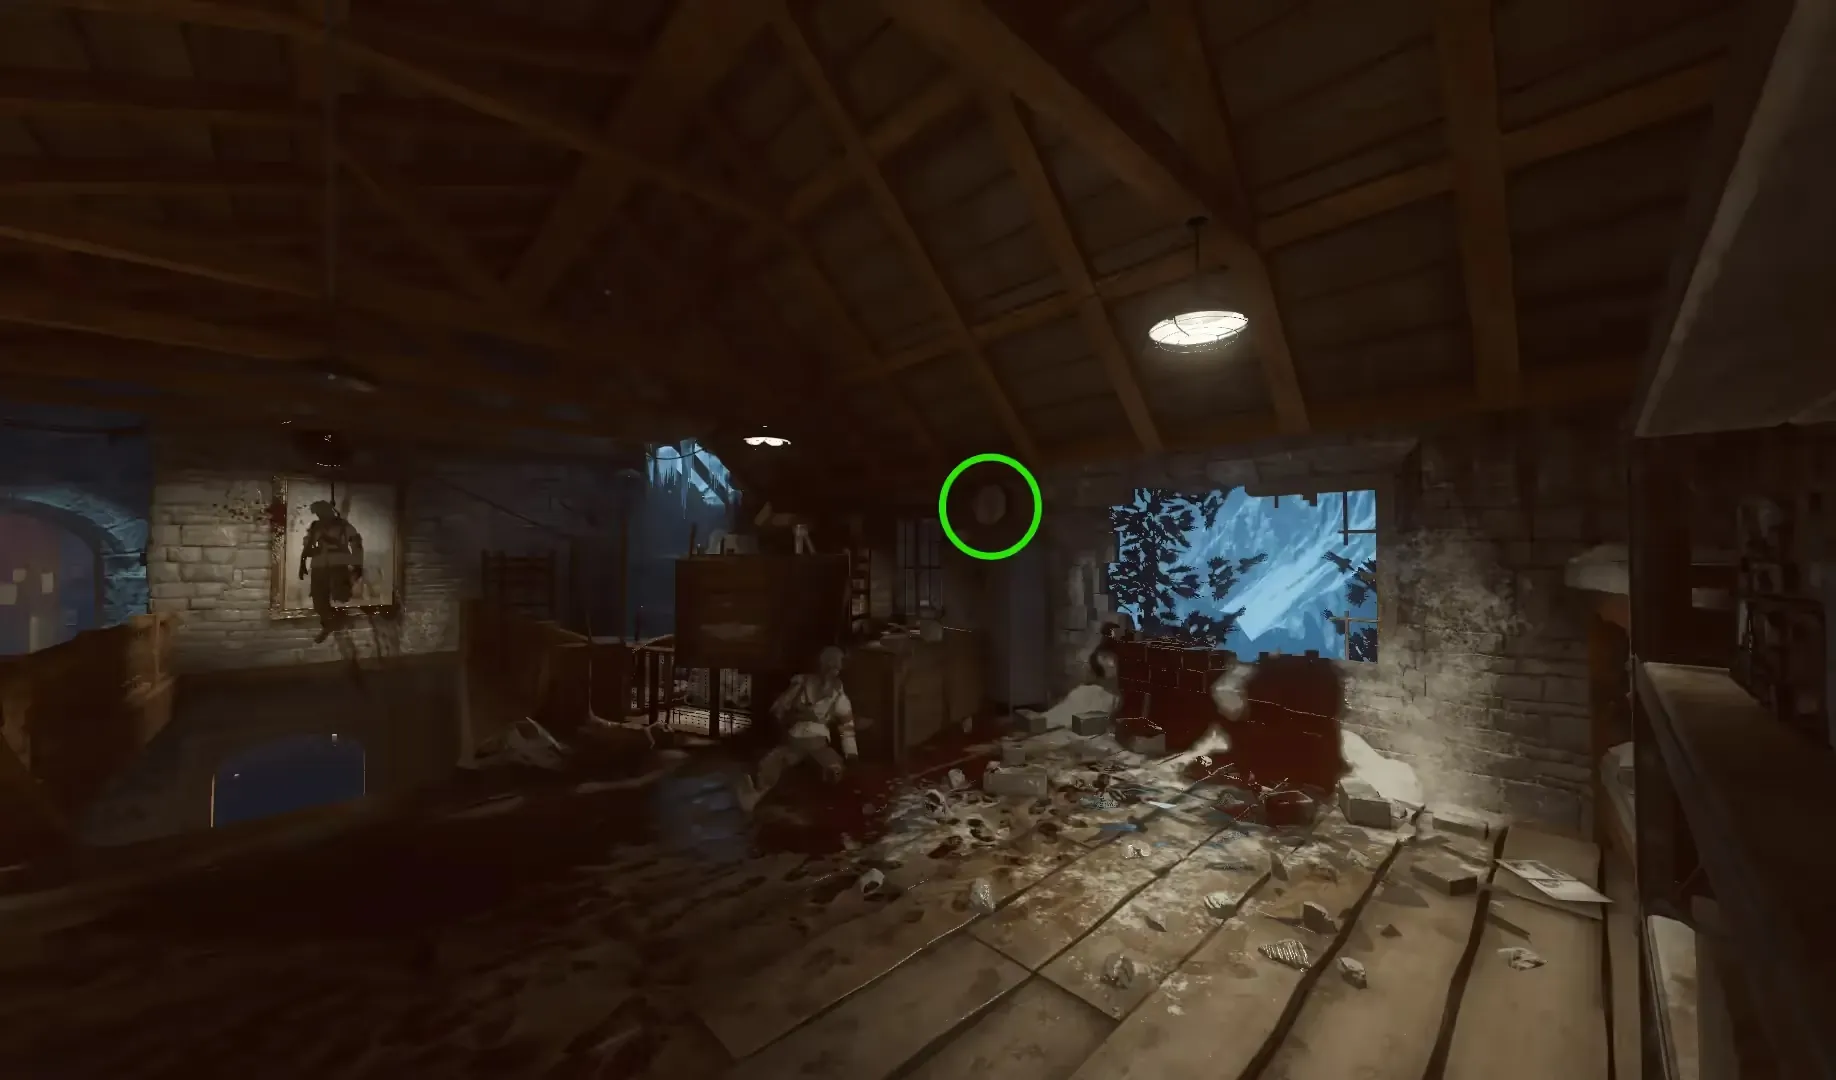
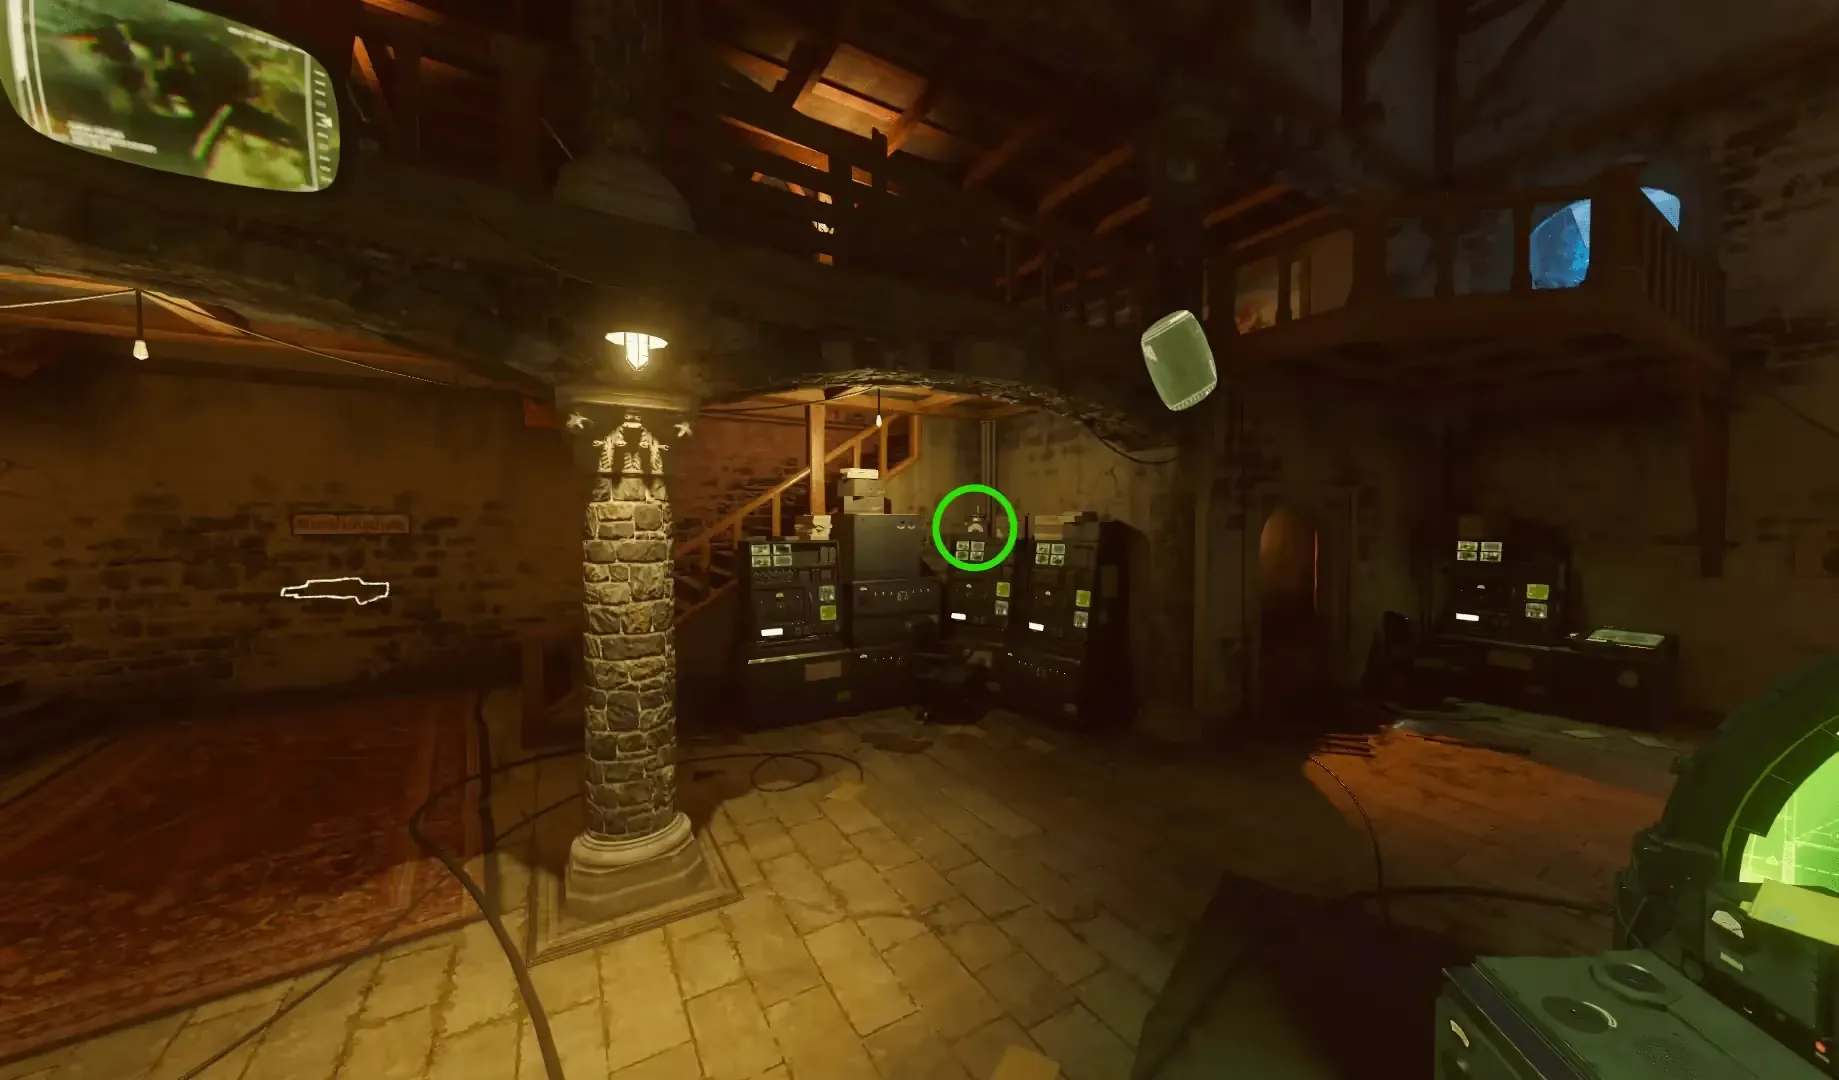

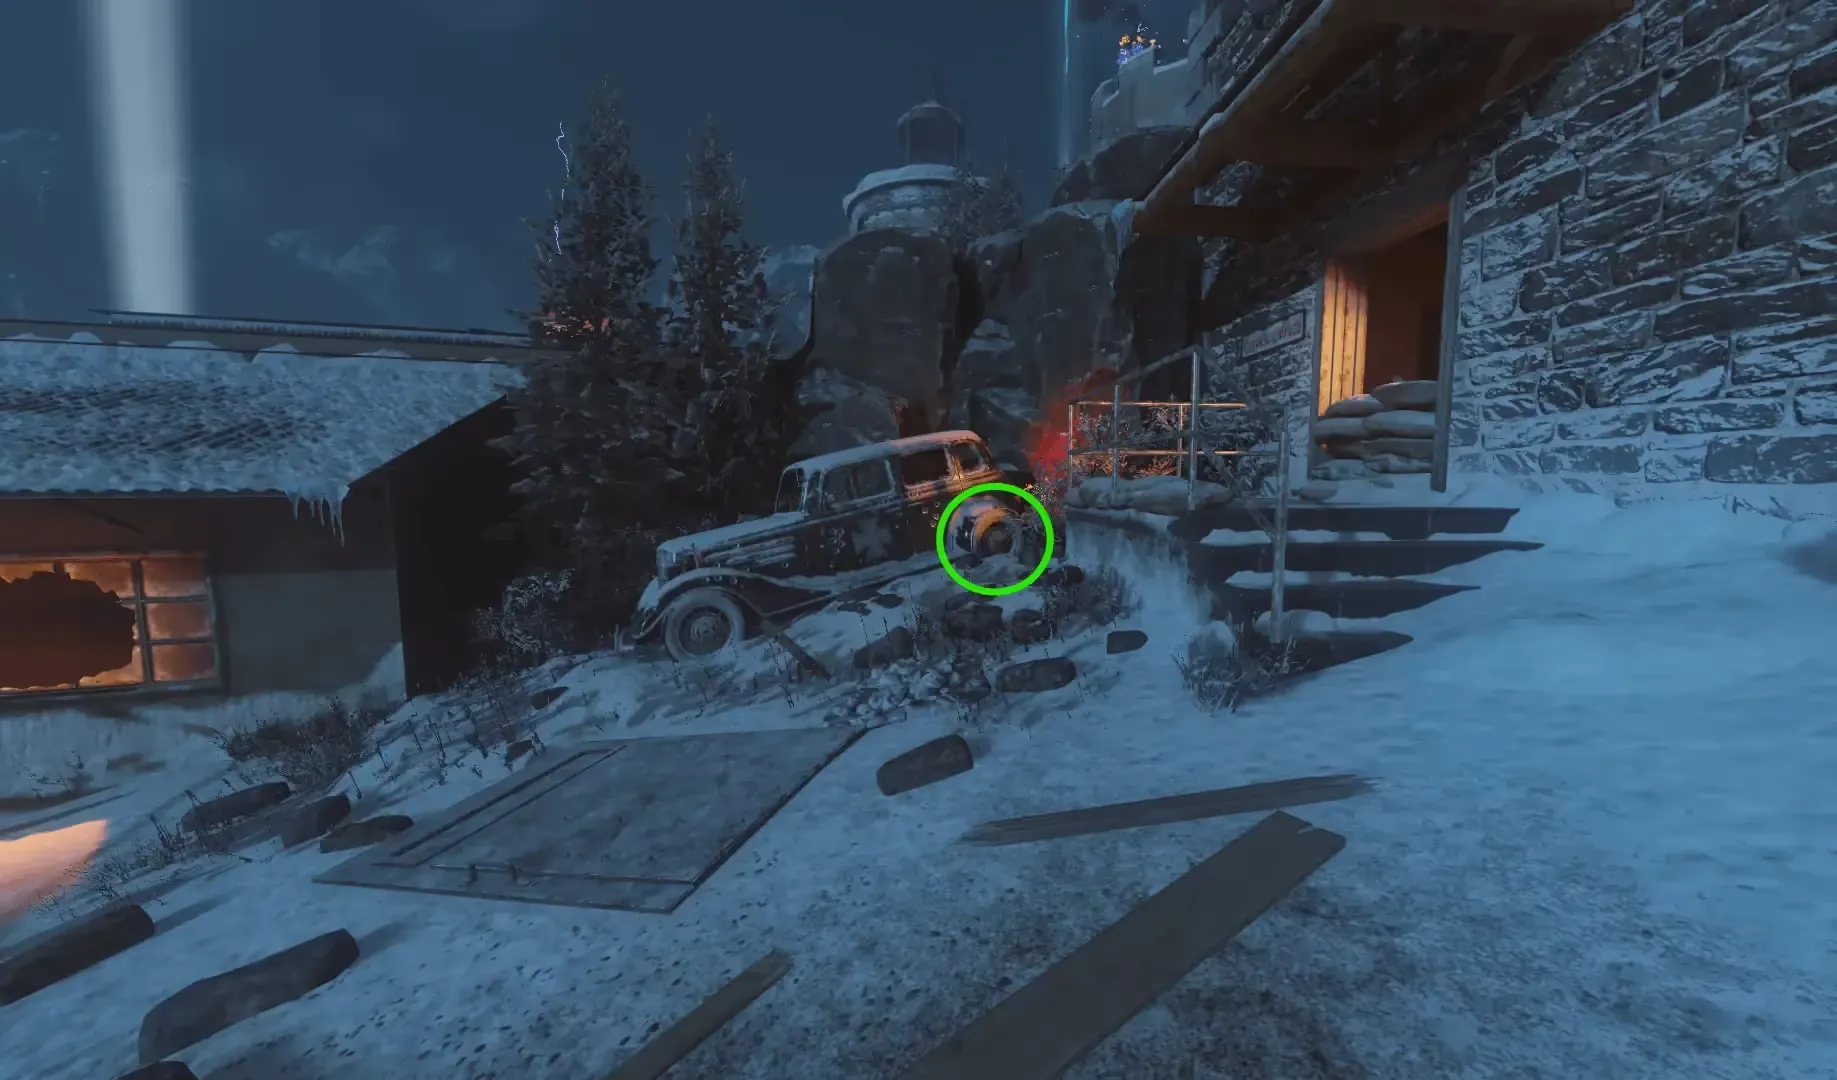
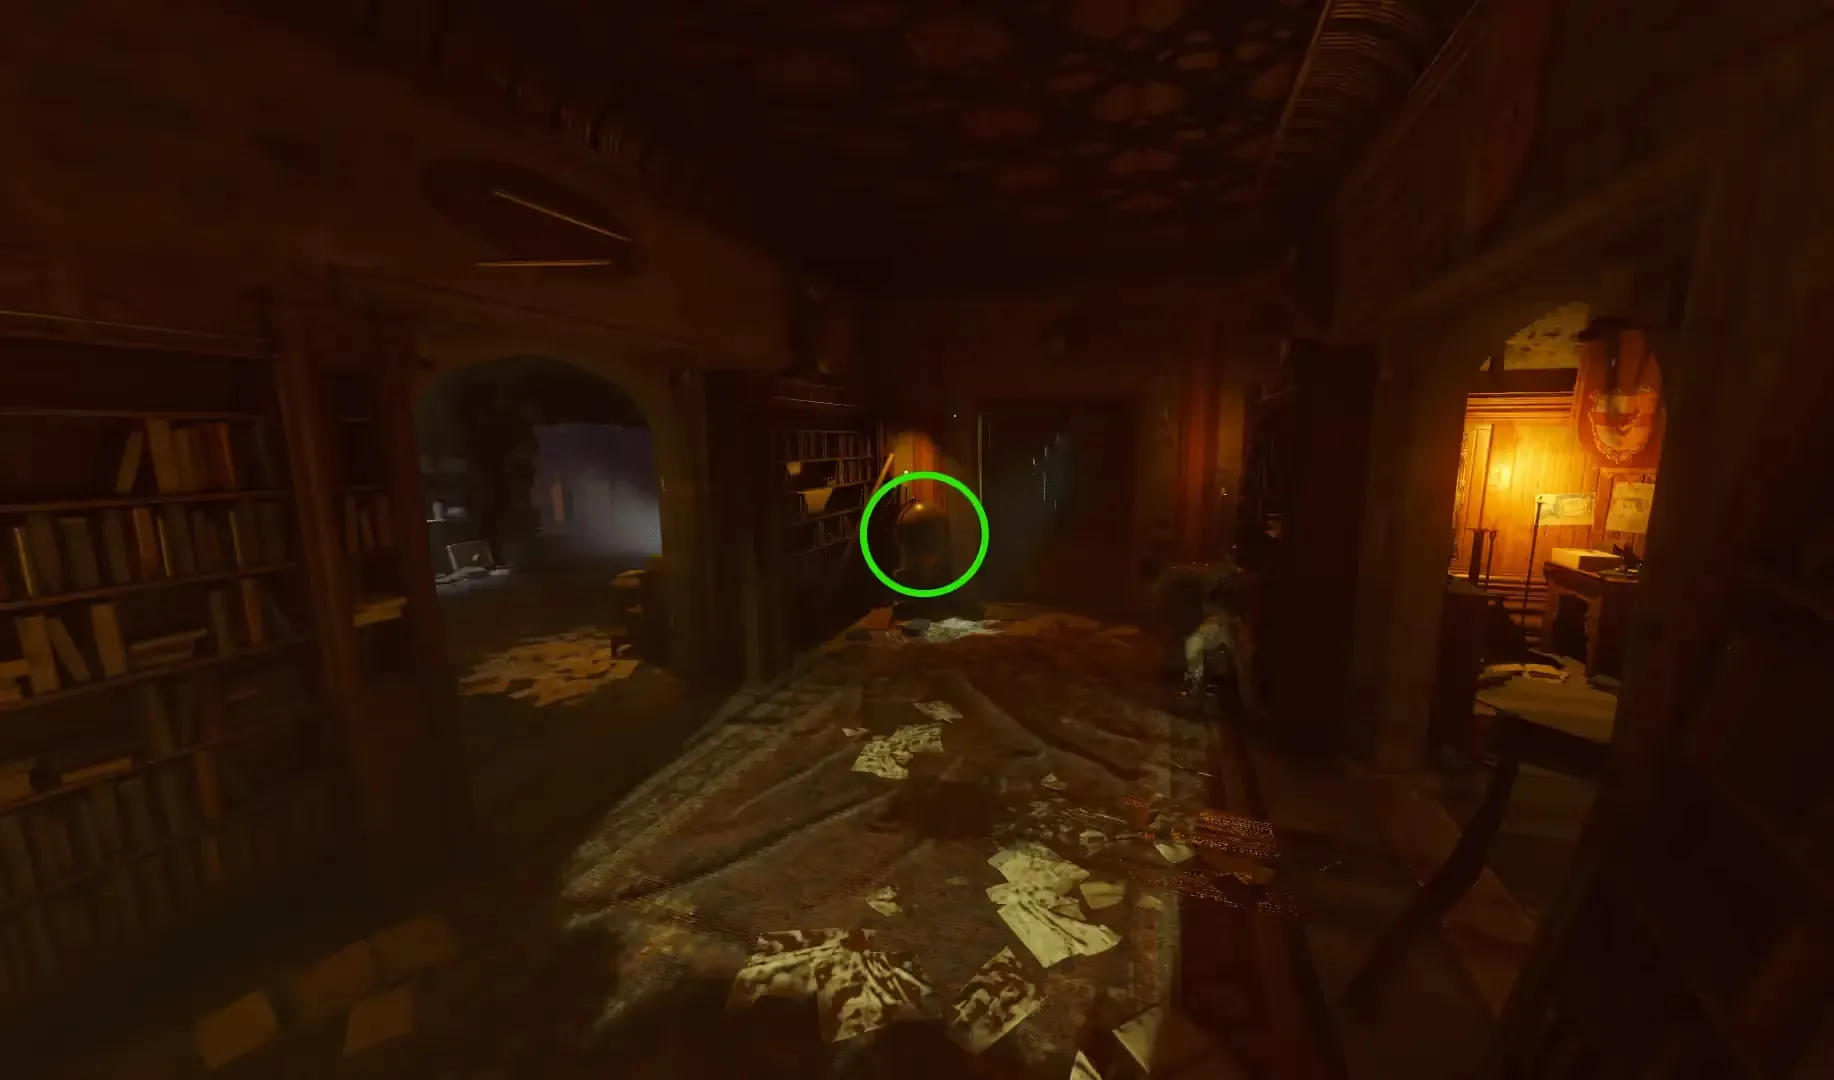

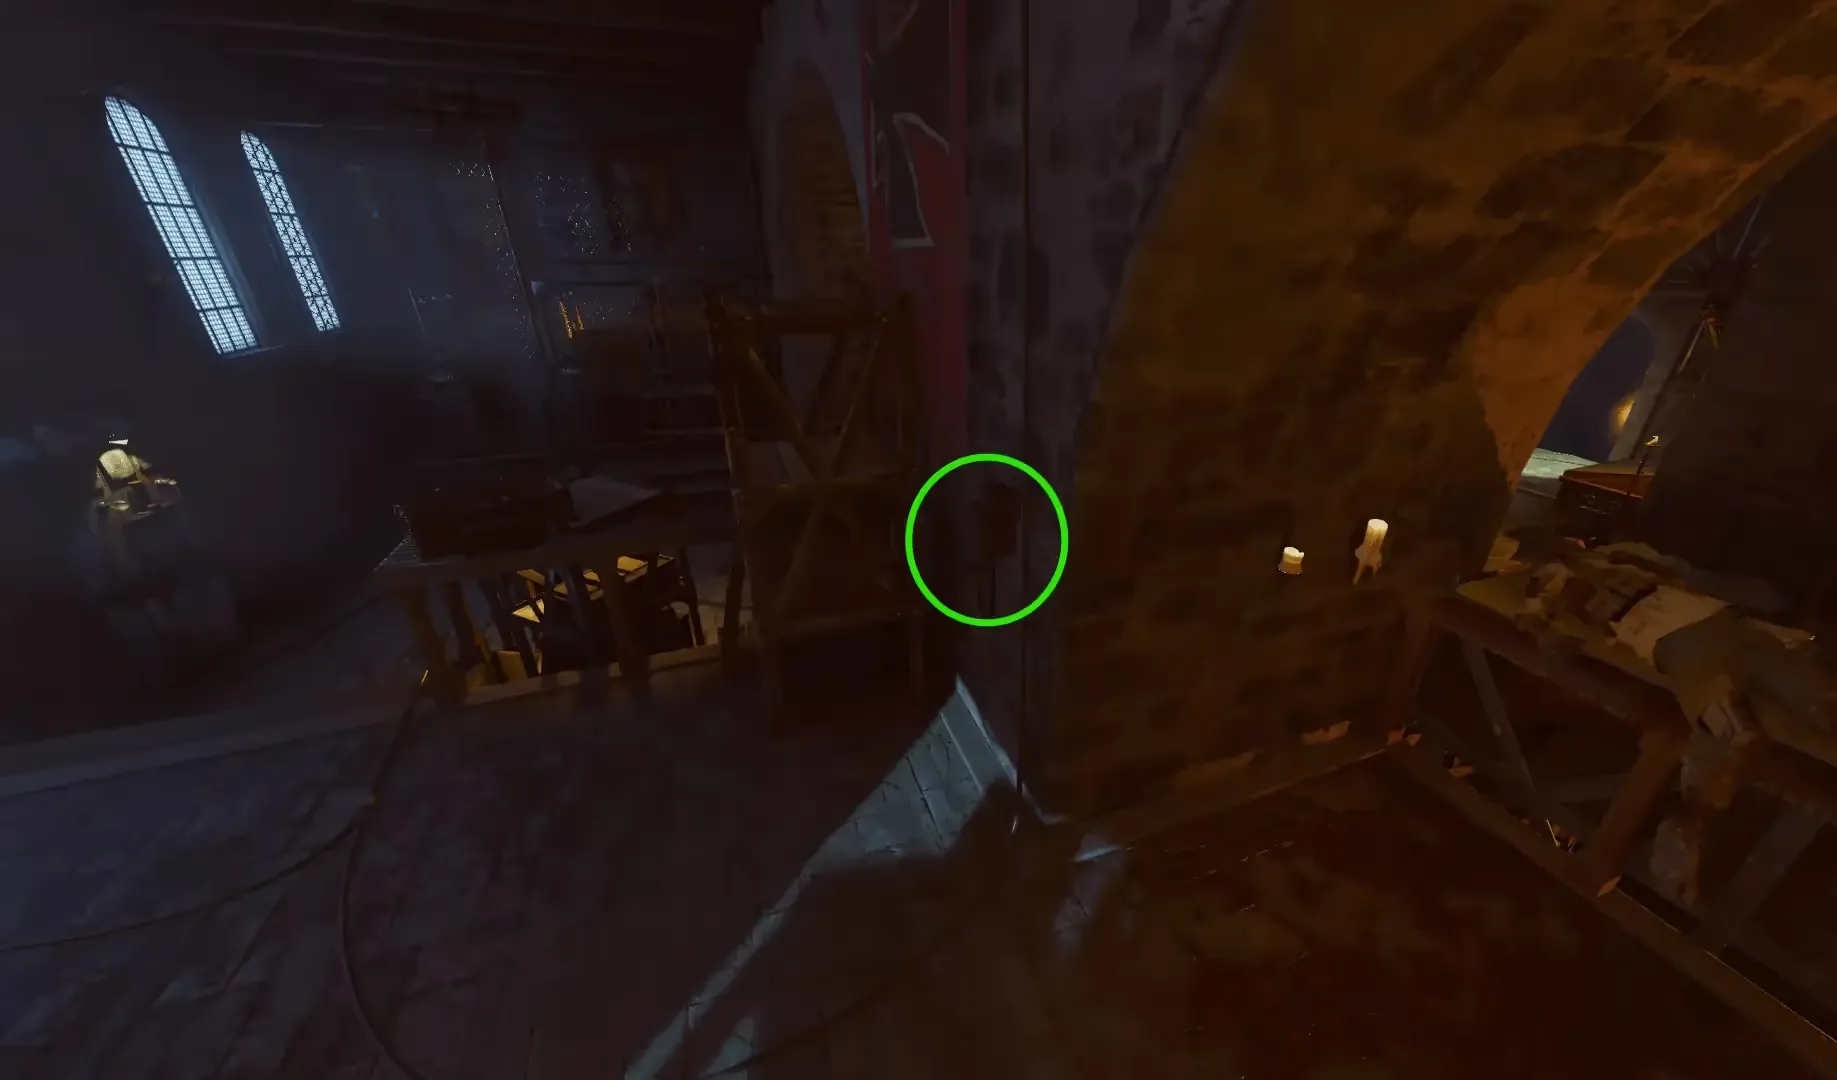
A wisp cannot spawn in the same location during a cycle, meaning while looking for the four wisps, it will never be in a location that a previous wisp was in during this cycle. A cycle is ended once four wisps have been shot and you hear the success sound and the teleporter pad is now glowing purple
Once all four wisps have been shot, you will hear a success sound and can return the teleporter which should now have a purple glow on the pad. Everyone in your game must stand on this pad for you to activate the teleporter (pay the 500 points) and travel back in time.
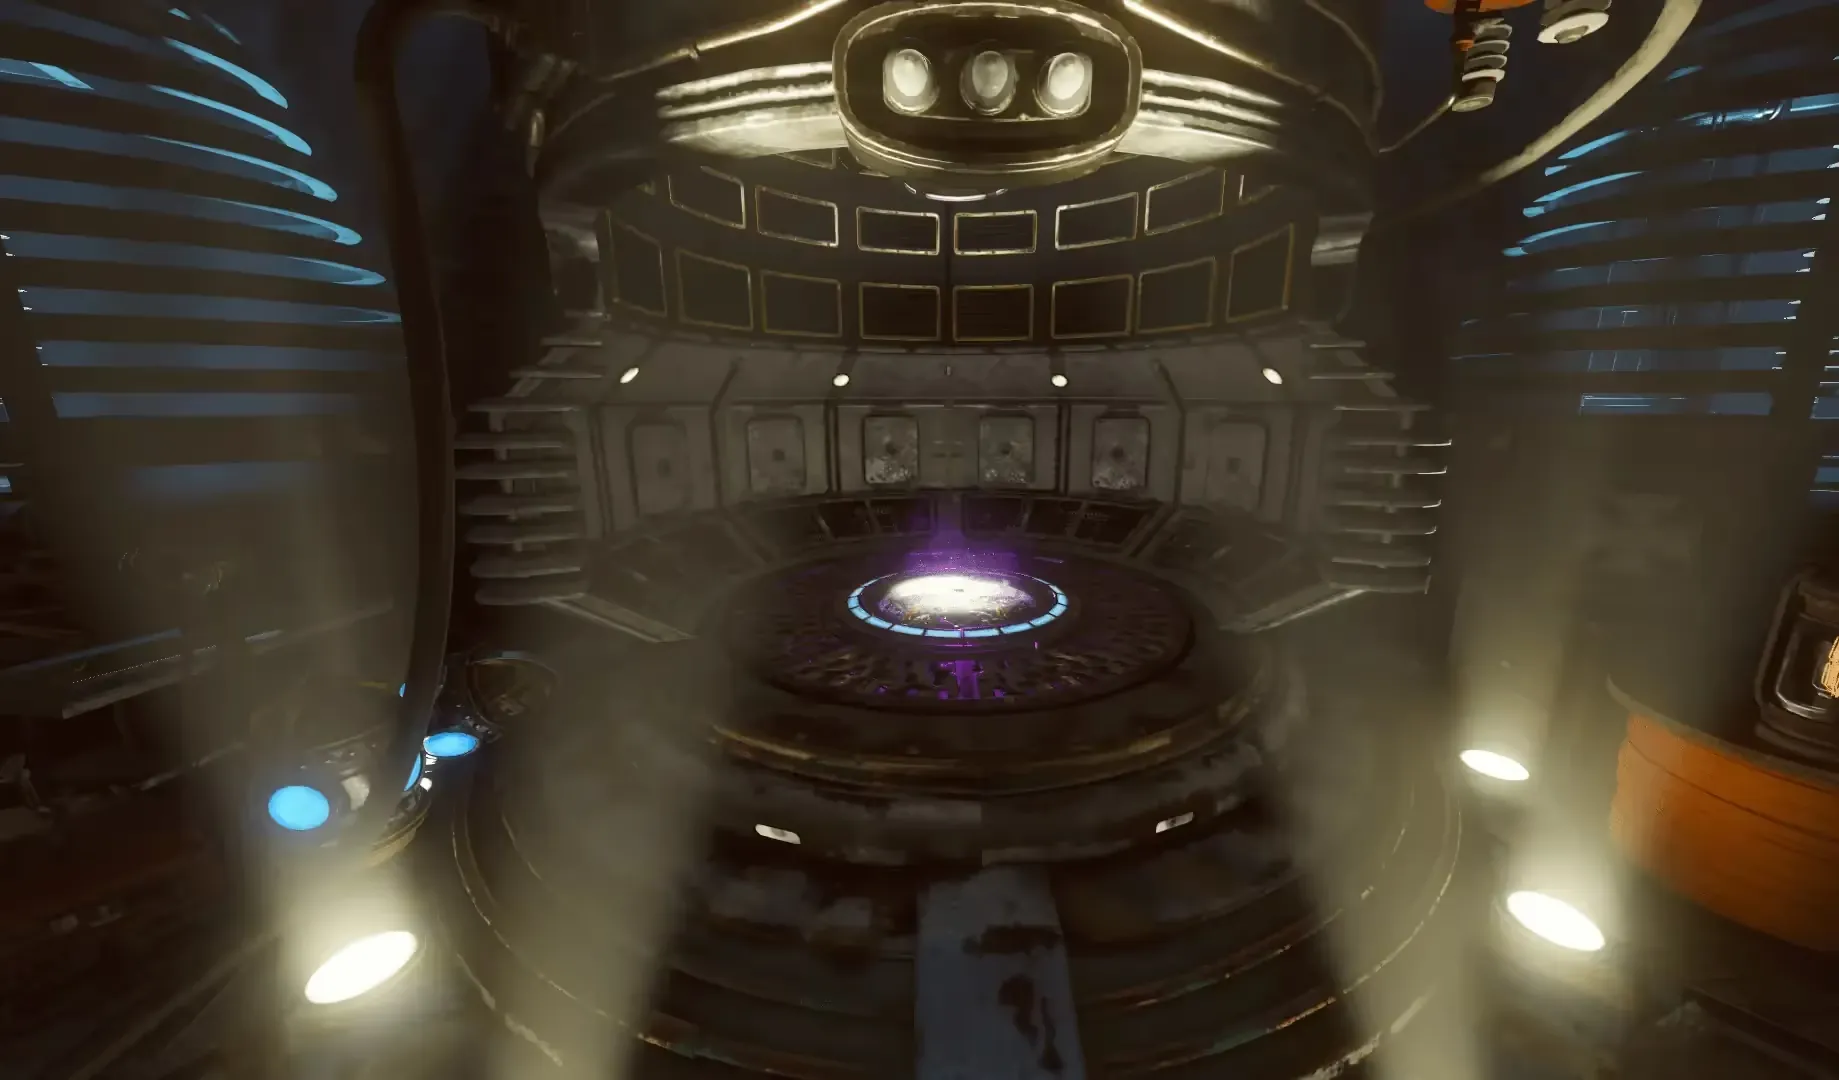
Ending the current round will spawn another cycle of wisps and prevent you from teleporting to the past.
Once teleported, you must collect three things before you automatically get teleported back to the present:
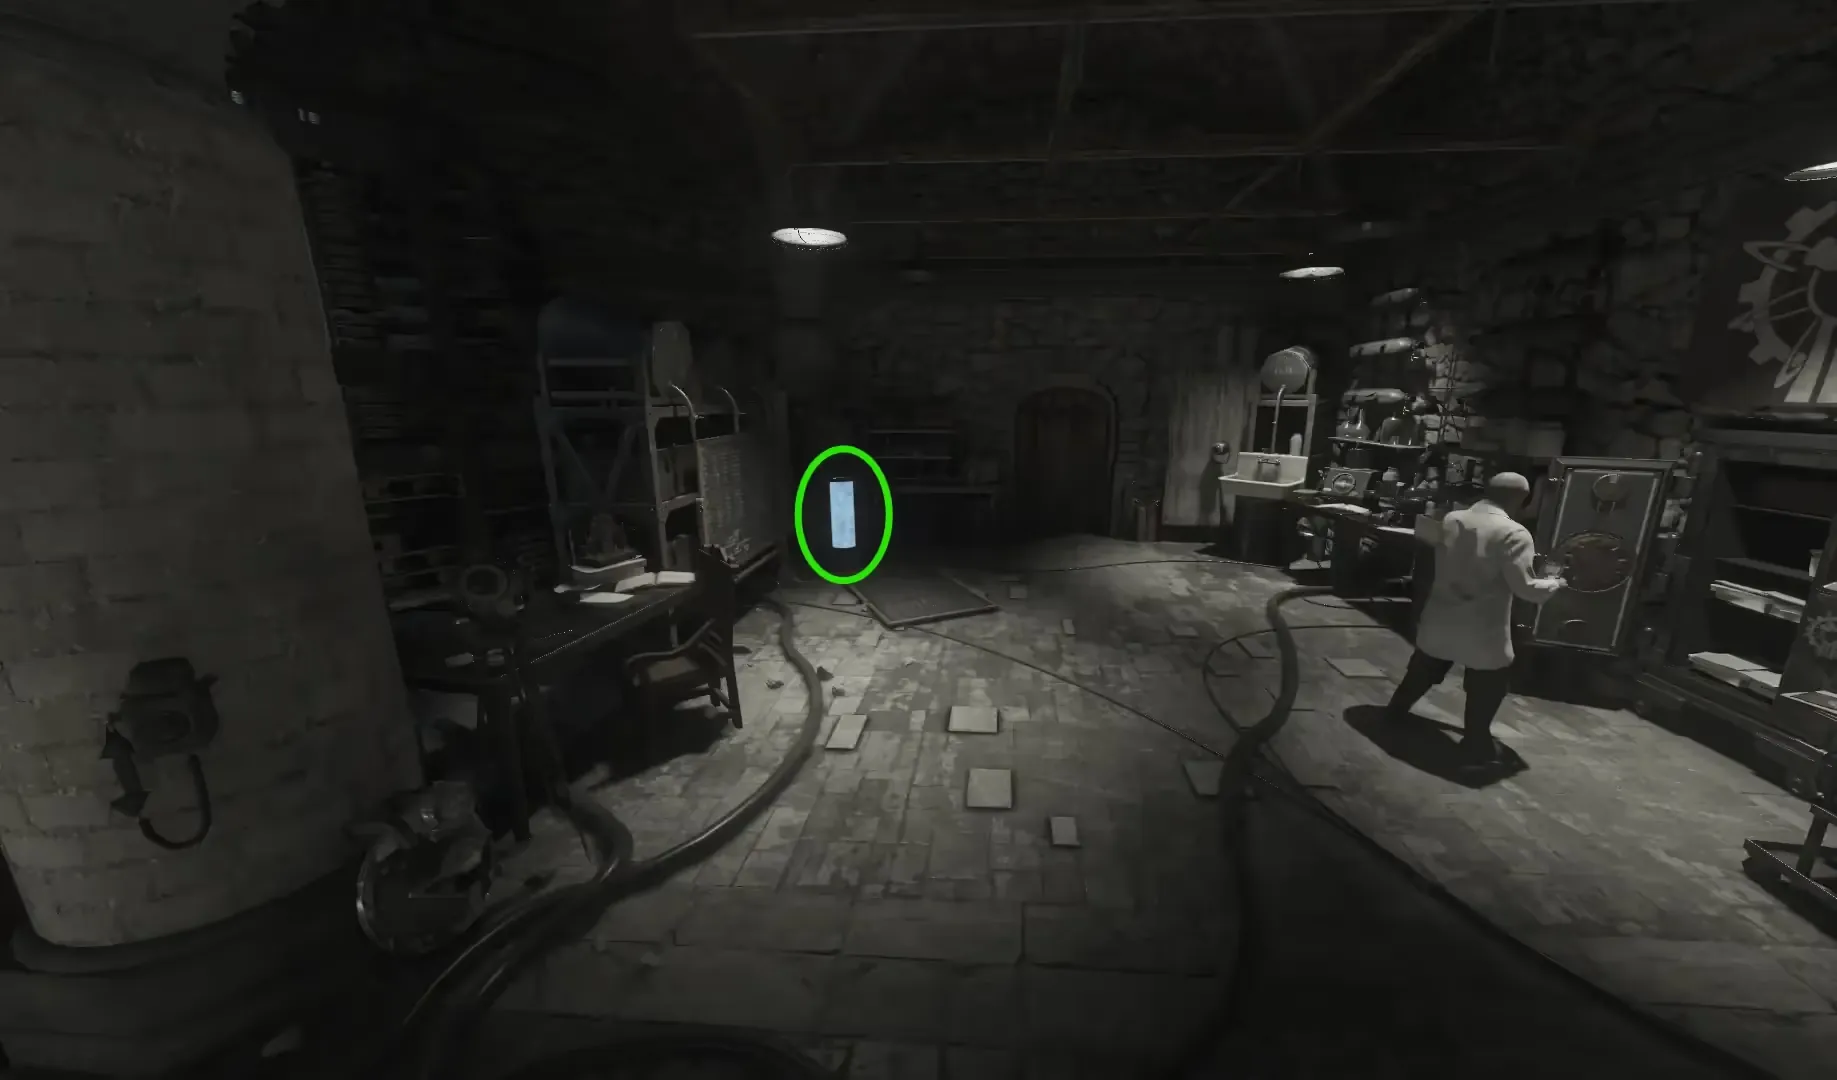

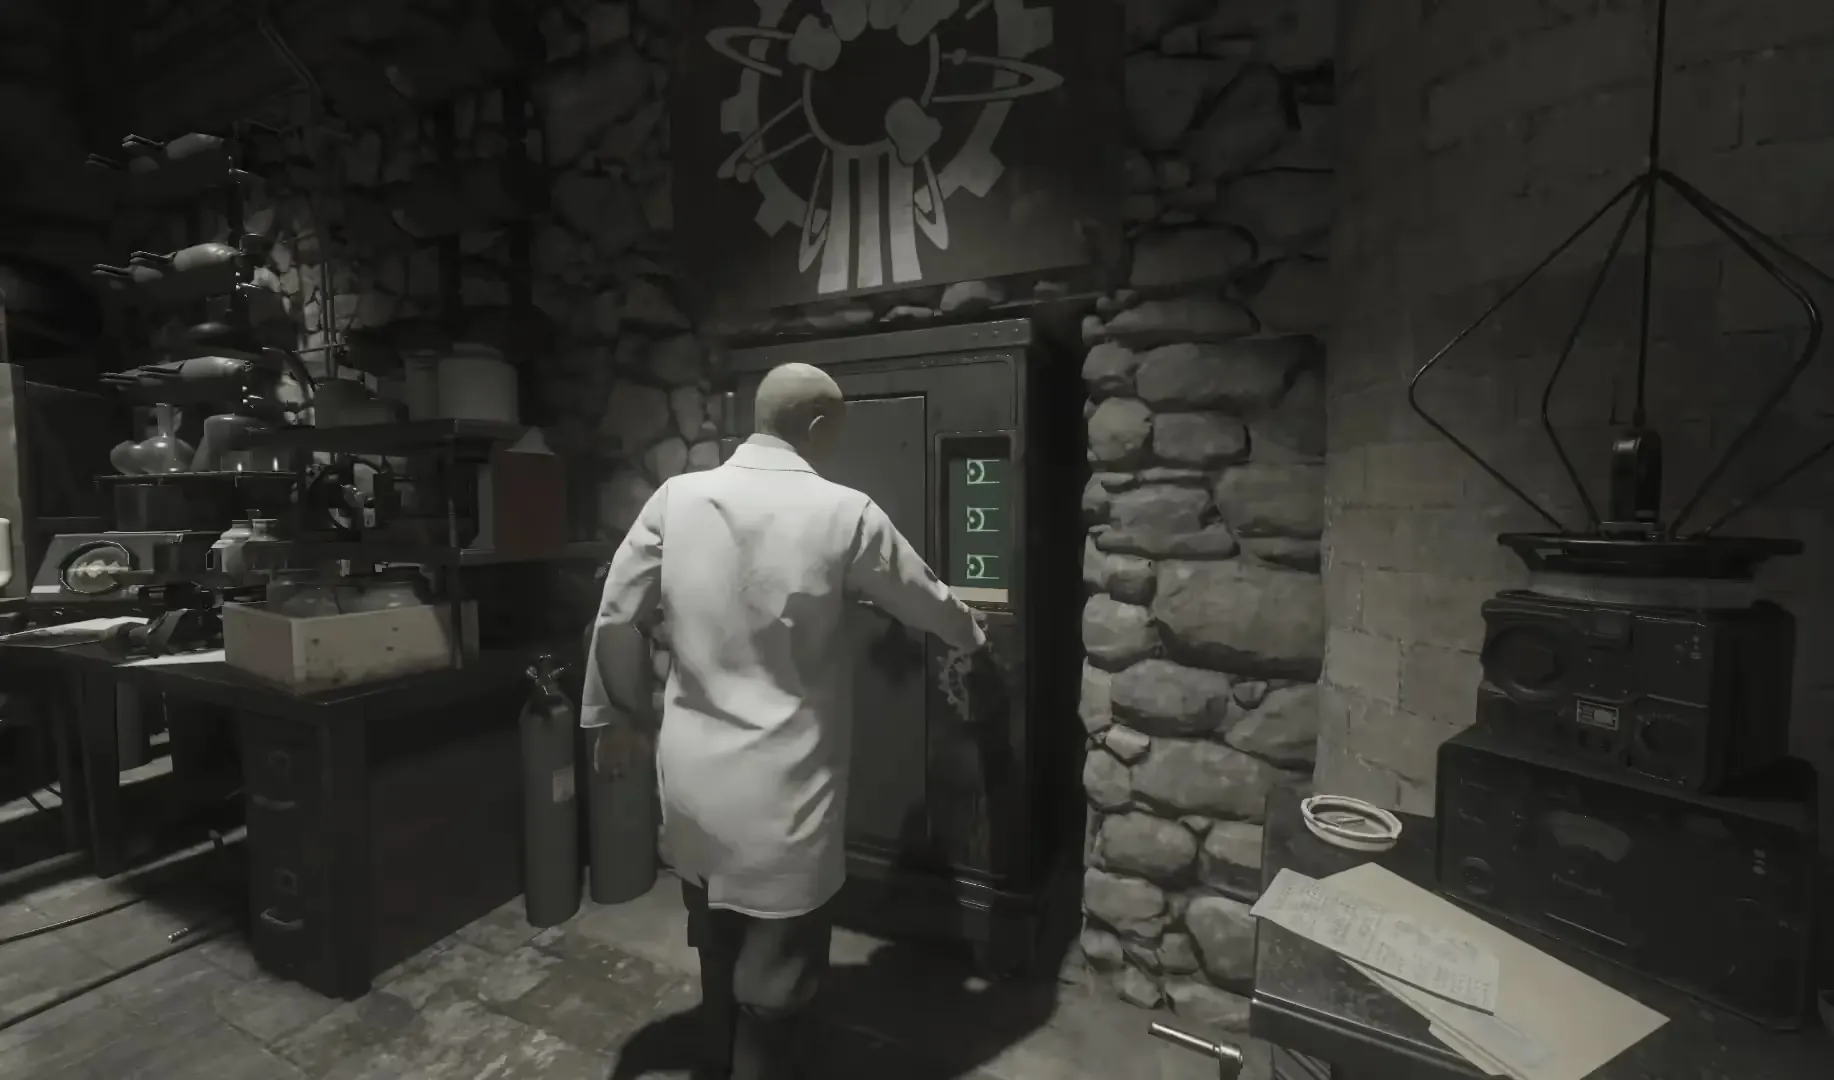
The code will be different every single game, If you fail to collect any of the three things mentioned above, you must end the round to get another cycle of wisps to spawn for you to repeat the process.
Upon returning to the present at the Rocket Pad, you will be greeted by a Panzersoldat. Kill the Panzersoldat and go to the Death Ray at the top of the castle. You must insert the fuses you collected from the past into the side of the Death Ray (side facing the Clock Tower).
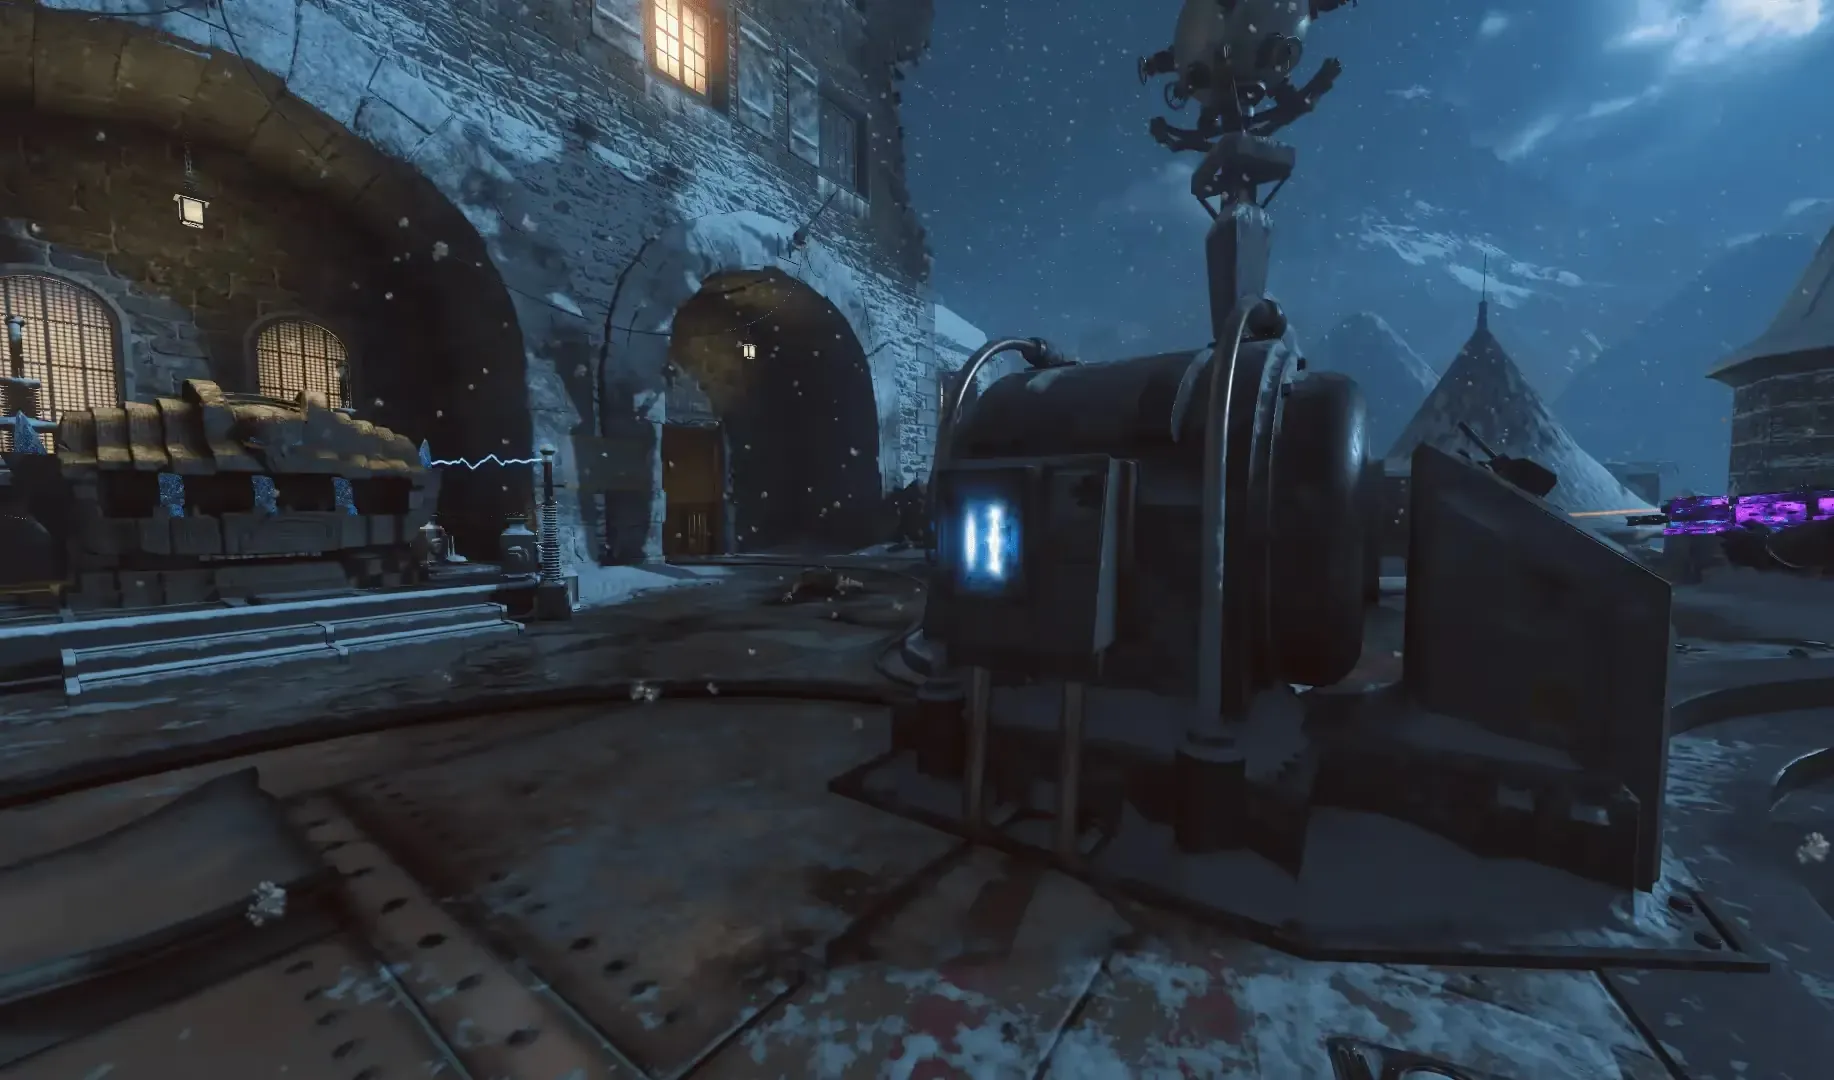
Before continuing, the Death Ray must have been used at least once during the game to proceed with the main quest. Activate it now if you haven't yet in the game.
Once inserted, go to the other side of the Death Ray and interact with the gauge to flip it from "Destroy" to "Protect". This will power a terminal near the Clock Tower where you can input the code you saw Dr. Groph use to lock the safe in the past.

If you input the wrong code, you will need to end the current round to get a new cycle of wisps to then travel back in time to recieve a new code.
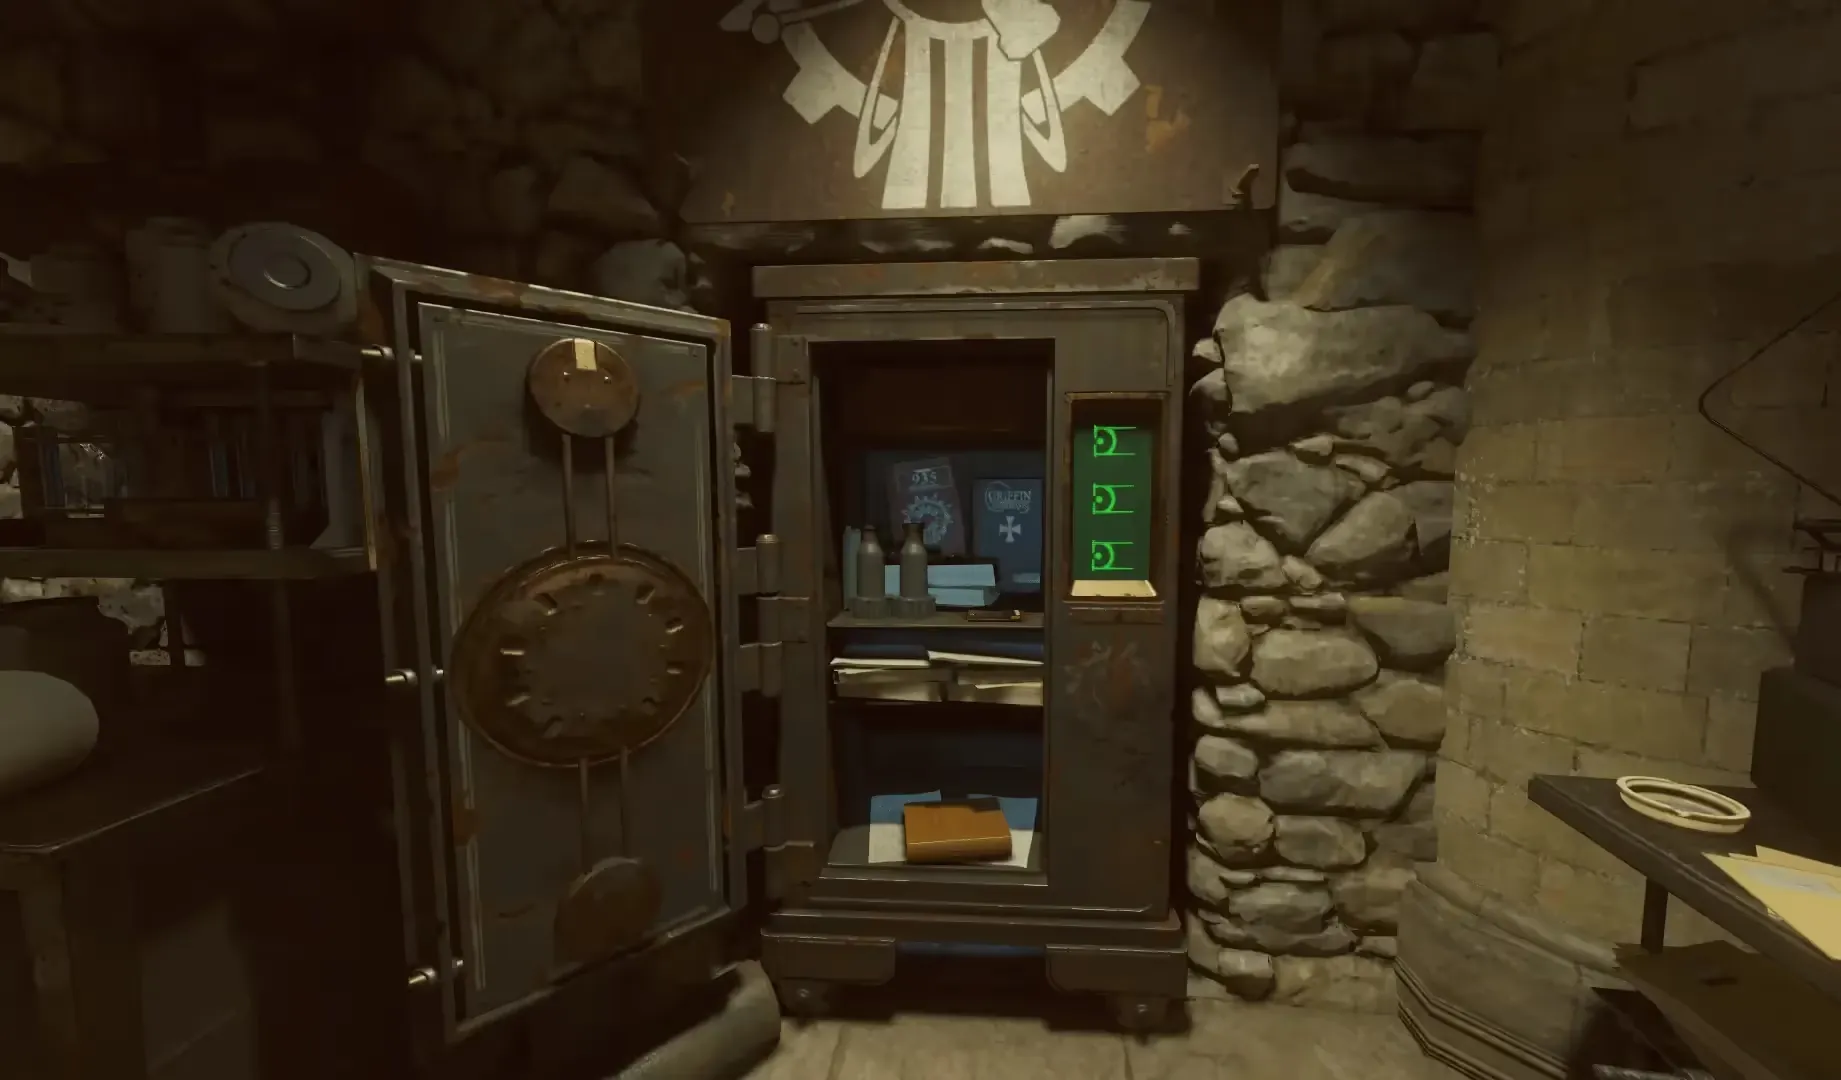
After entering the correct code, head to the safe in the teleporter room which should now be open, and collect the keycard and two fuses from the top shelf of the safe.
Step 4: Memory Game
Head back to the Death Ray and insert one fuse into each Tesla coil on either side of the Death Ray, then flip the Death Ray from "Protect" back to "Destroy".

Afterward, you must play two memory games, one on each terminal on the map by interacting with them. When activating these terminals, four symbols will appear on the bottom screens for a few seconds before disappearing.
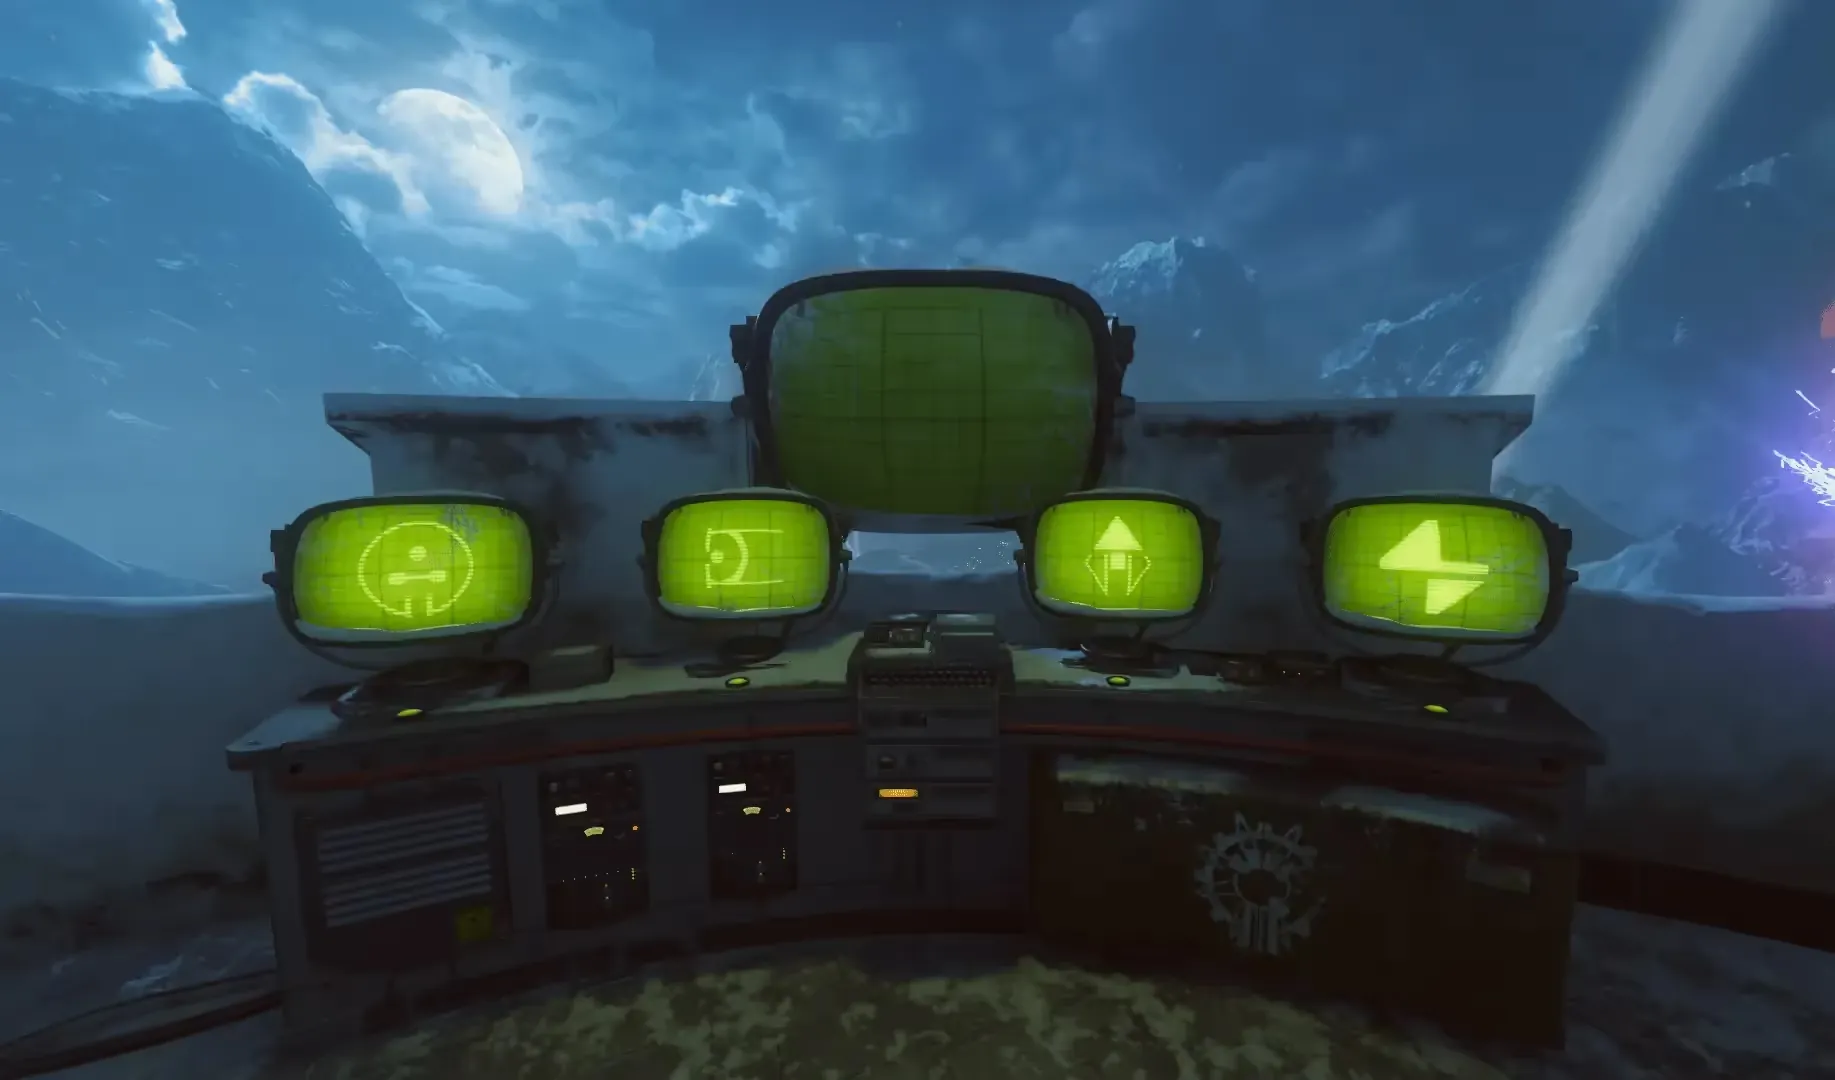
These are always the four symbols, but, their location on the screens will be different every game. When activating these terminals unlimited Hellhound will spawn as you are doing the memory game.
You must memorize what symbol appeared on each screen, and when a symbol appears on the large screen you must interact with the bottom screen that displayed that symbol. You must do this until the machine turns off and you hear a success cue. These terminals are located:
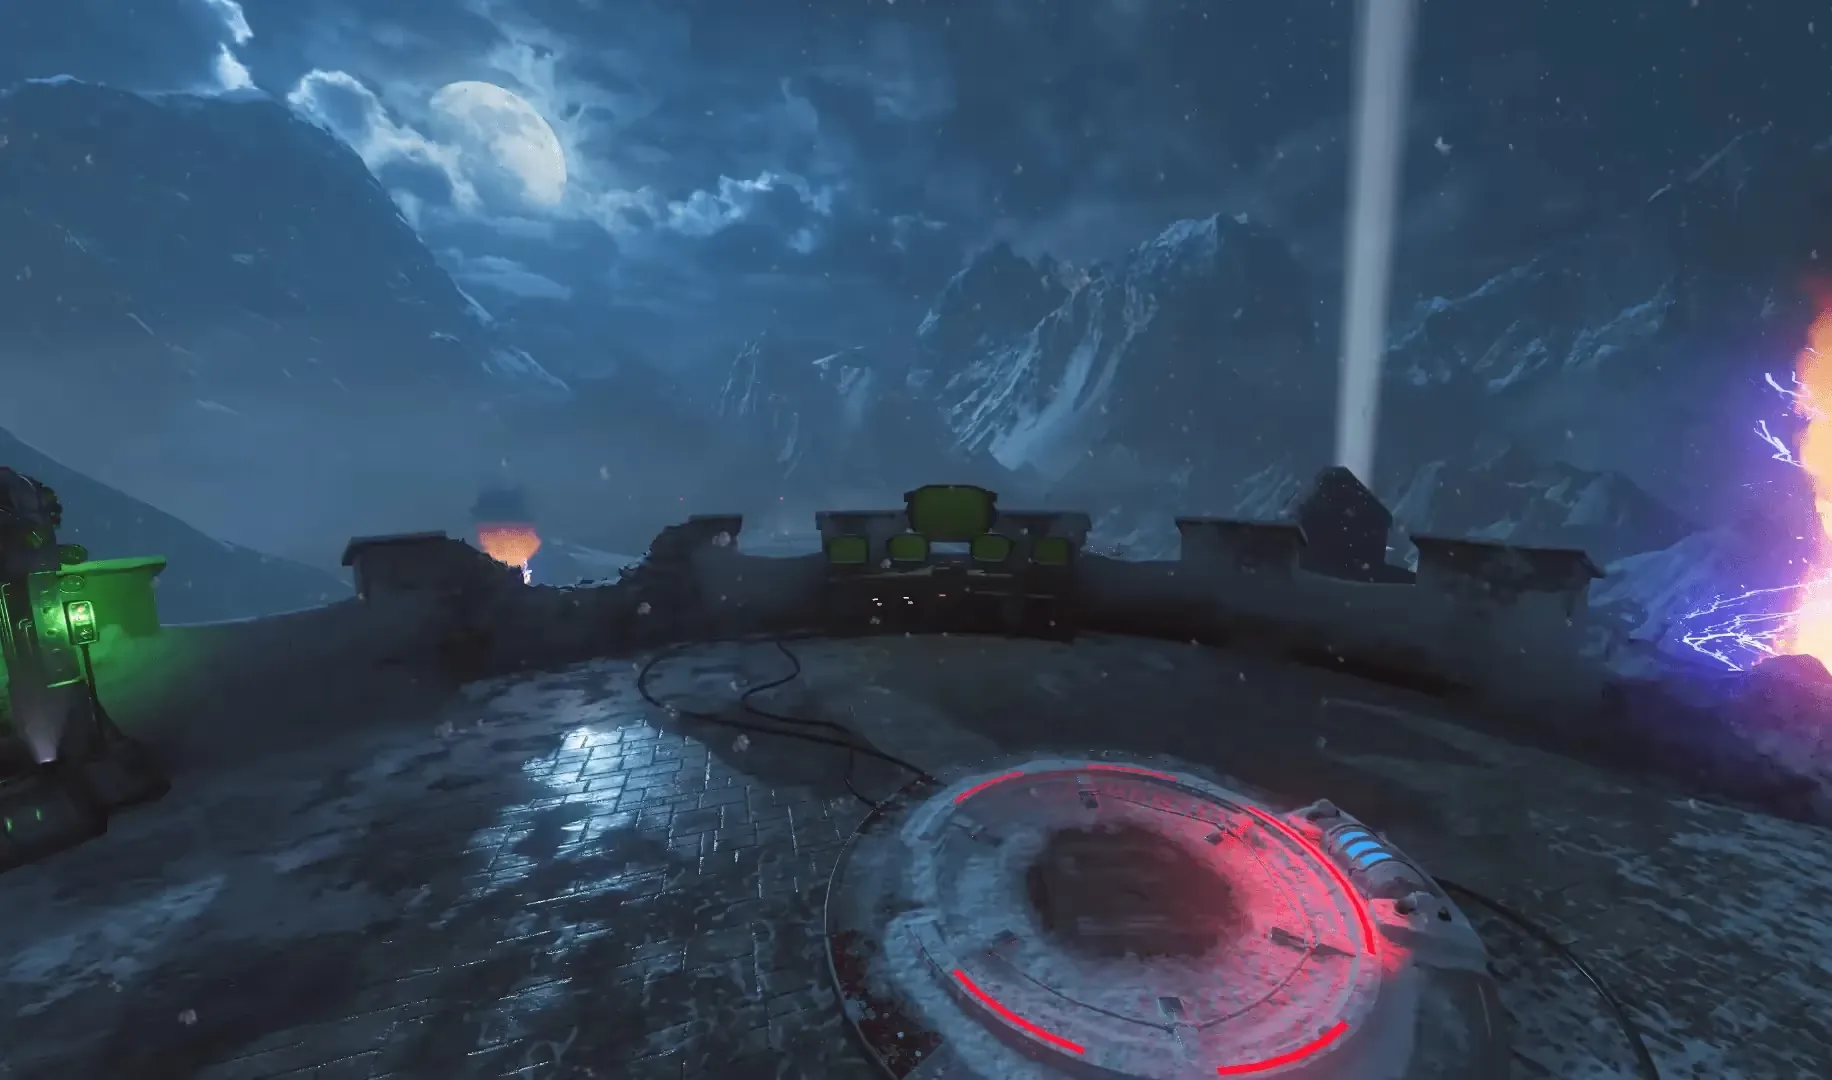

If you fail the memory game, you can immediately try again by interacting with the terminal again, however, if you fail the second terminal after completing the first, you will need to repeat both memory games.
If done successfully, a Tesla coil will be glowing for each of the memory games completed. Both Tesla coils must be glowing to proceed to the next step.
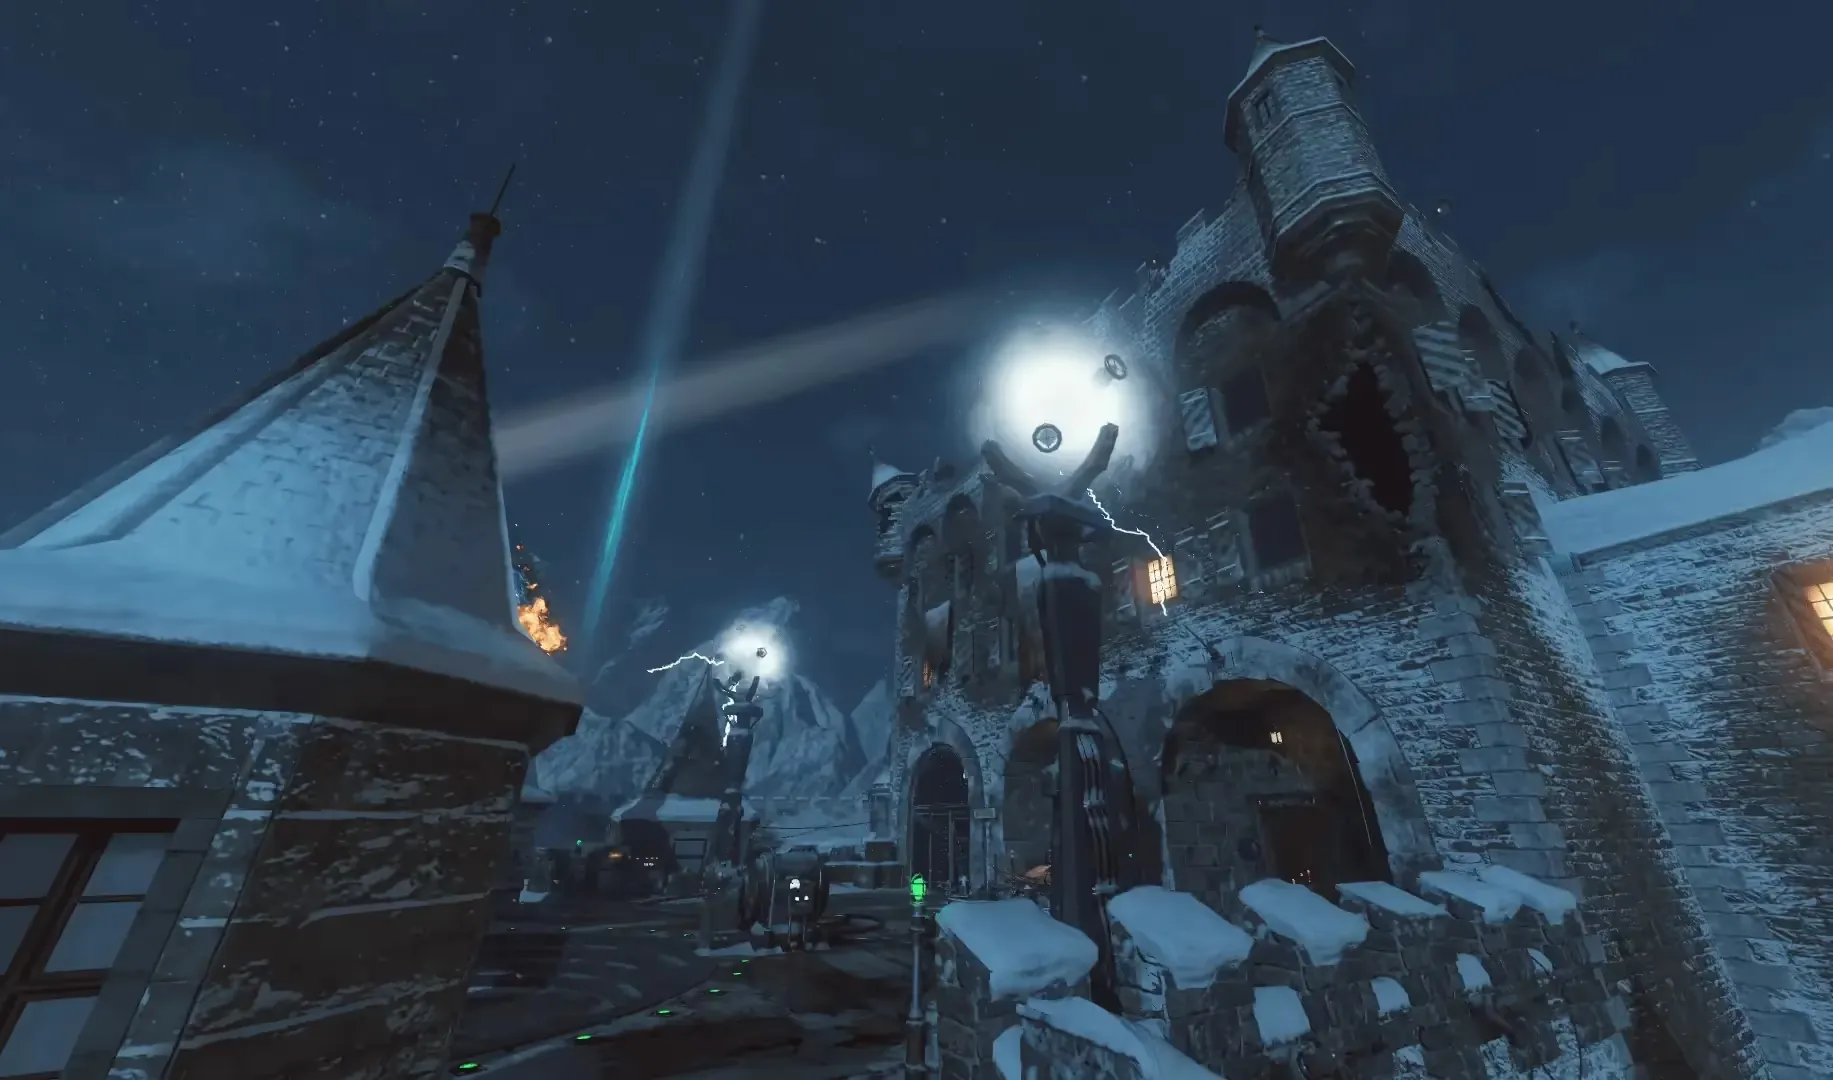
It is recommeneded to complete the Rocket Pad terminal first due to the fact that if a rocket test happens while you are doing the memory game, you will be forced to abandon the terminal thus failing the step.
Step 5: Bring "Ultimis" Dempsey Home
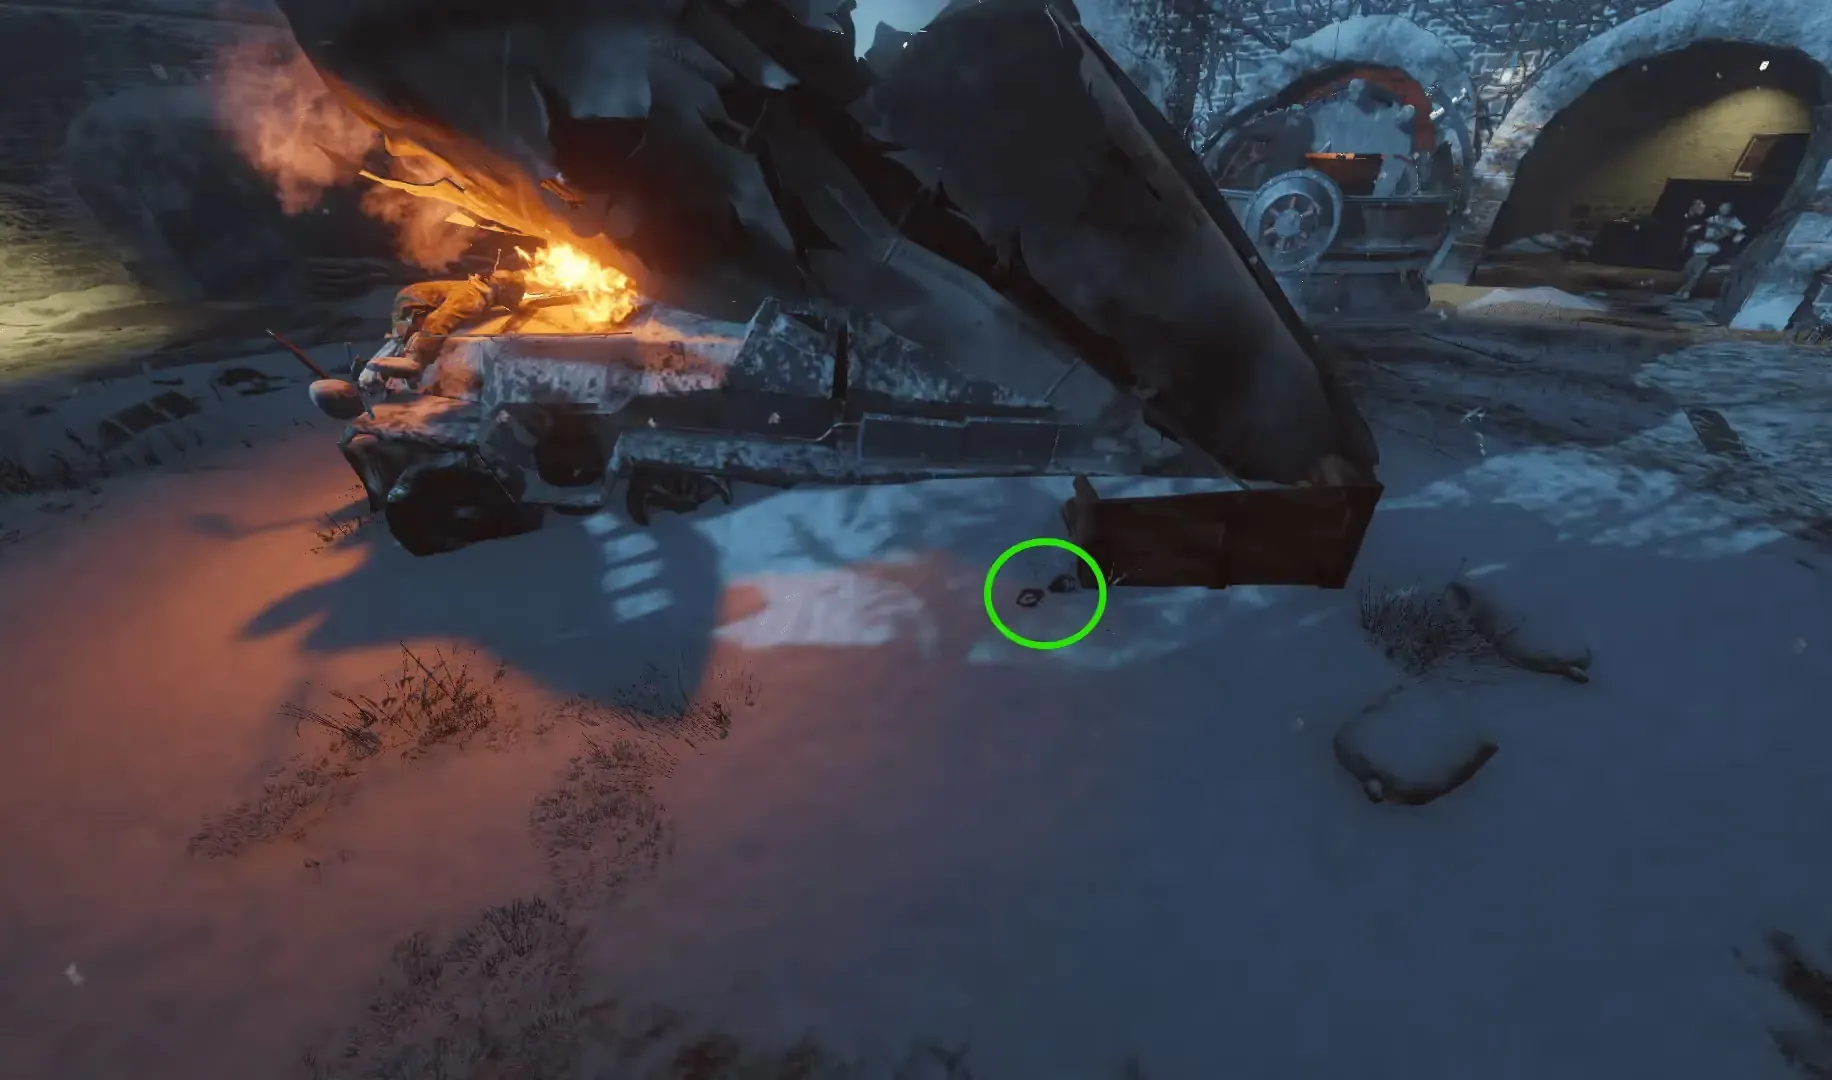
Head back to the Death Ray. The front of the Death Ray will now have a bright green button that you can interact with, bringing a rocket containing Ultimis Dempsey crashing into the Clock Tower and landing in the courtyard. Head to the crash site, and in the snow next to the rocket will be the Vril Device on the floor for you to pick up.

Step 6: Stealing the M.P.D.
You must complete another cycle of wisps to travel back in time again. This time you must interact with a computer in the far right corner of the room (left of the Kronorium) to open a crate in the middle of the room containing a keeper slab you must pick up.
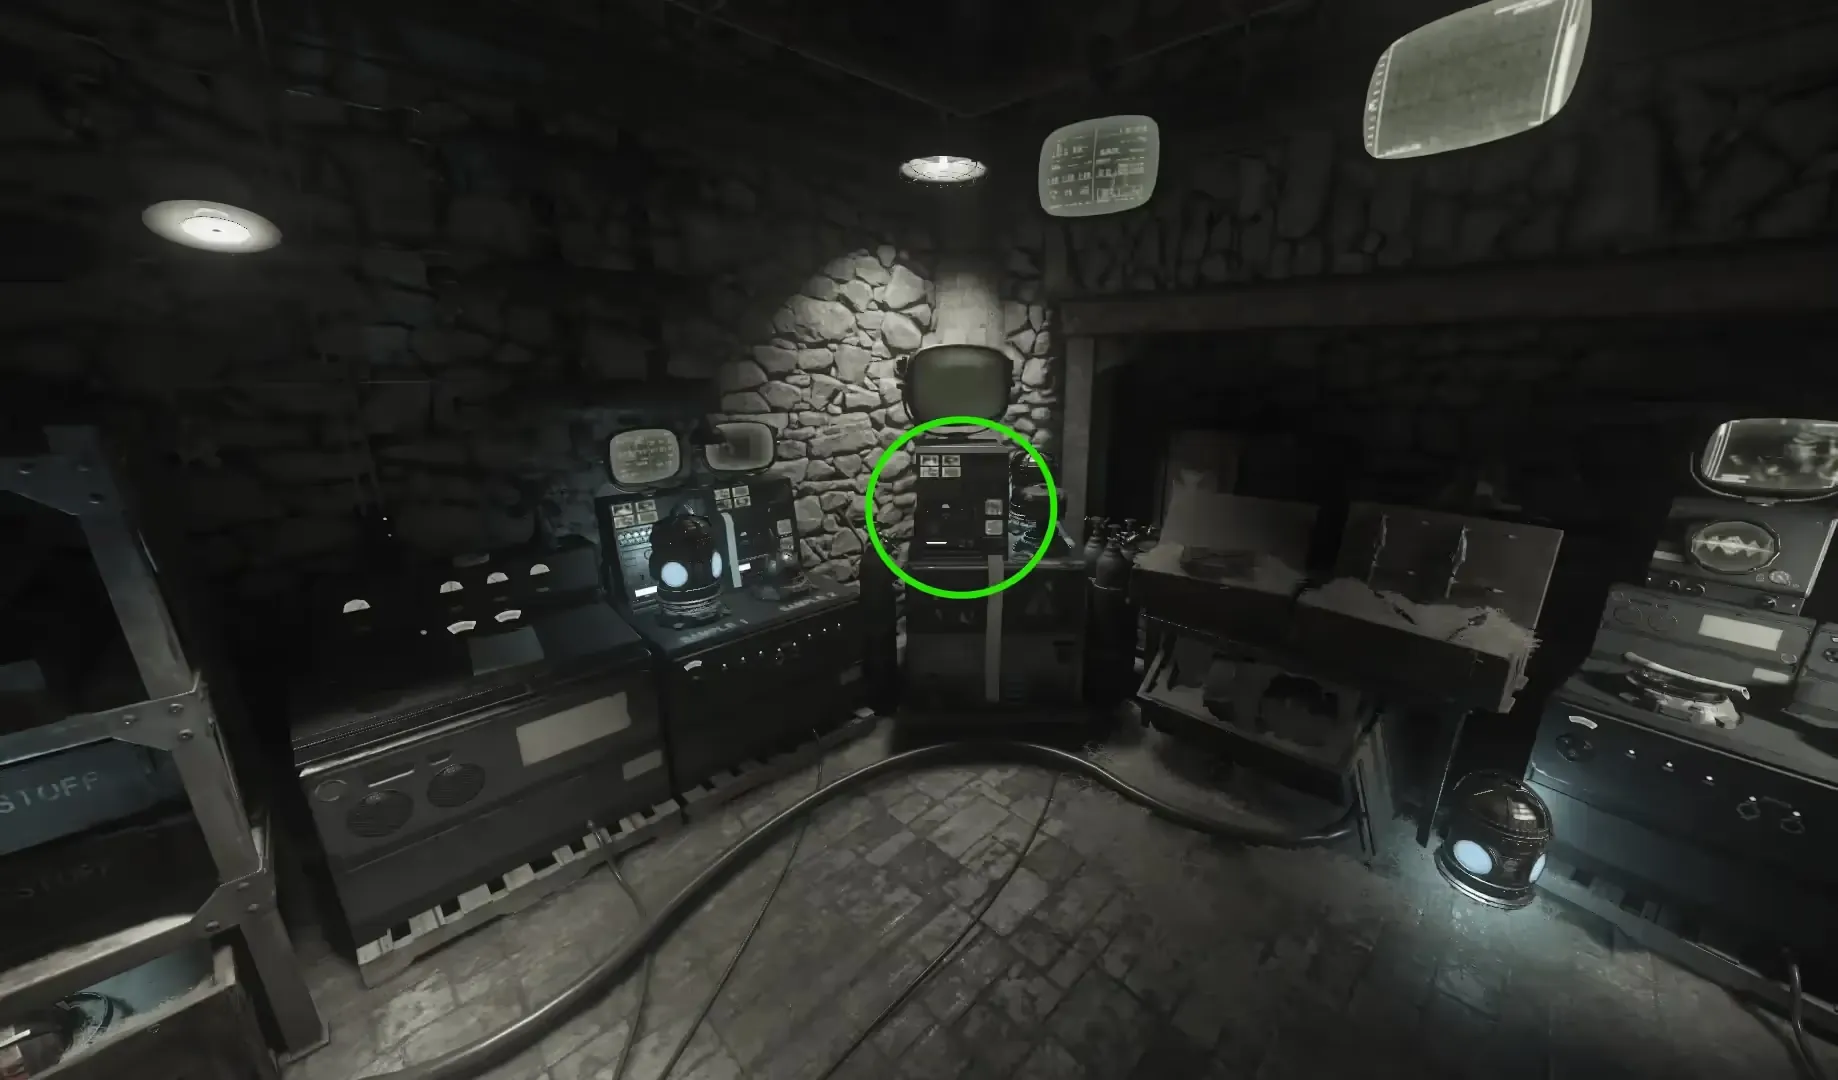

Once back in the present, head to the Tomb room where you claimed the Wrath of the Ancients. Place the Vril Device in the slot just below the Tomb spawning an ethereal keeper you must follow.

Similar to the Memory Game step, unlimited Hellhound will spawn until you have completed this step.
The keeper will travel around the map stopping at four separate locations in random order (these images are taken in theater mode so the keeper will not appear ghostly in them):


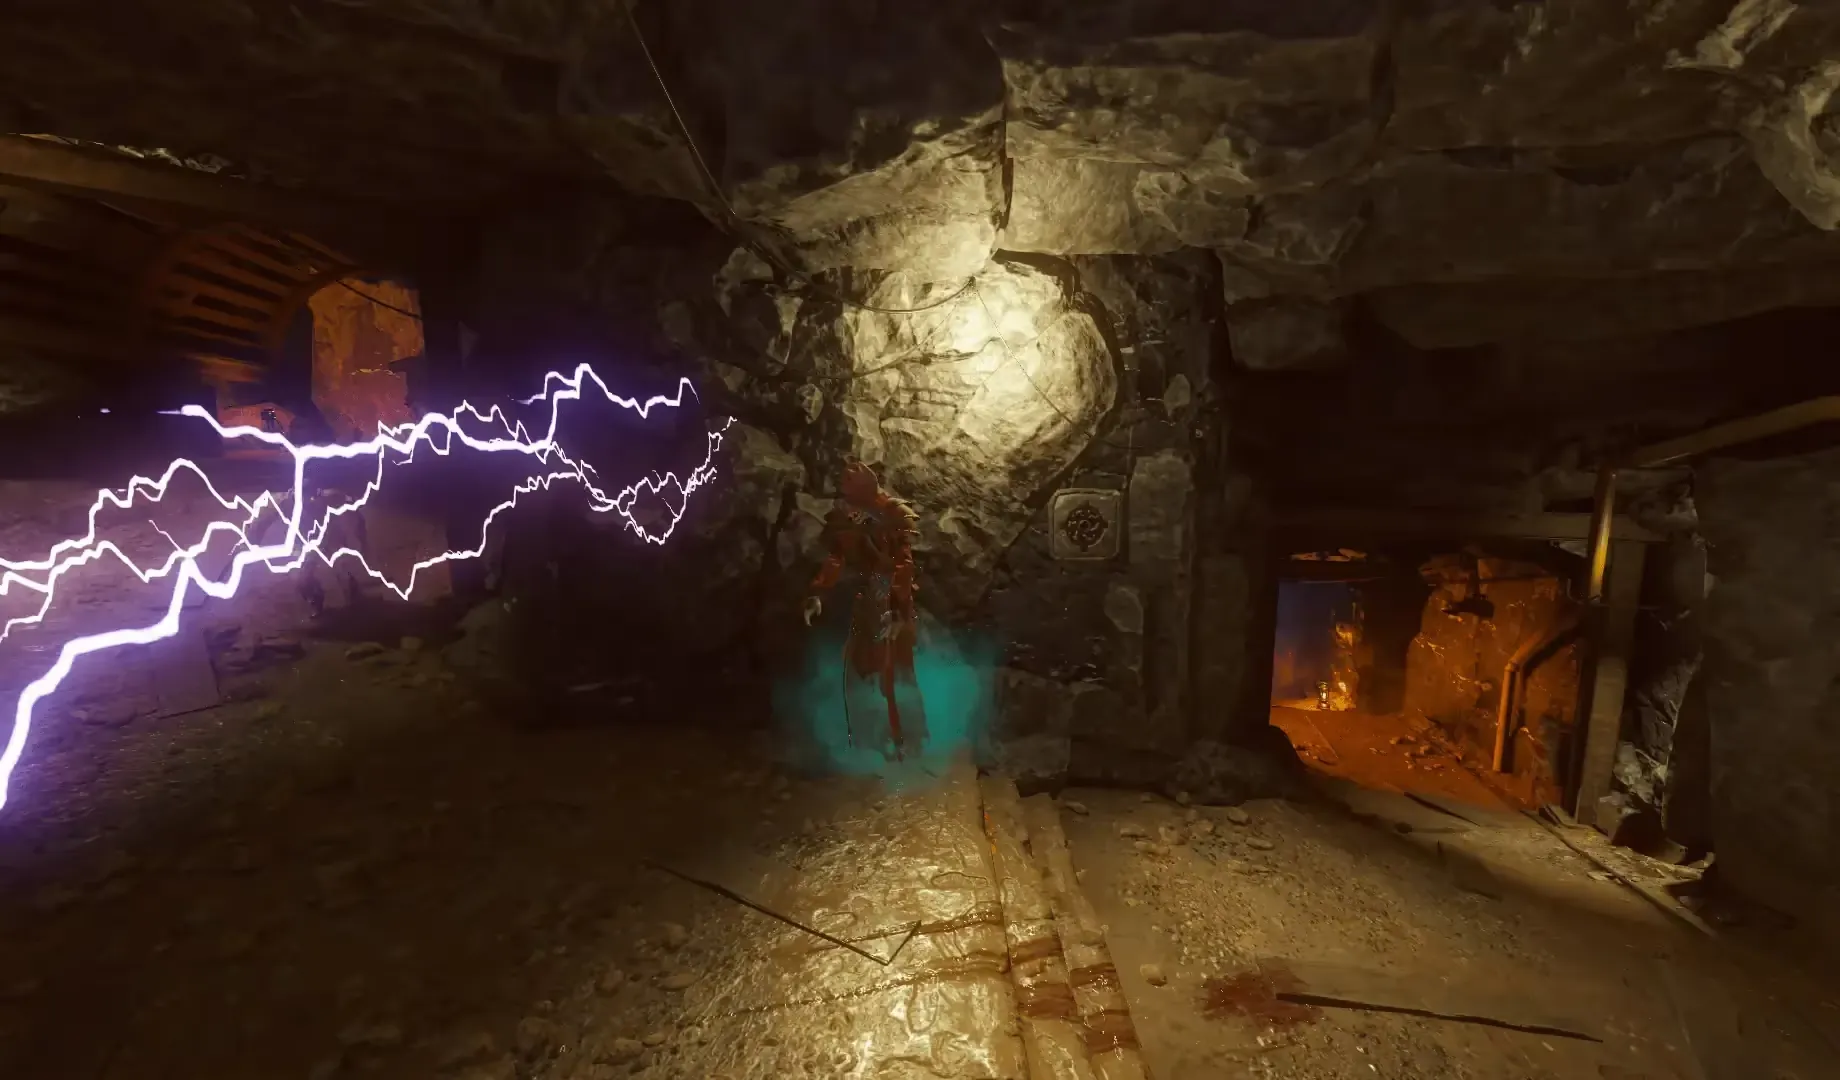
You must place the keeper slab at the bridge near
Double Tap for the keeper to collect souls at that location.
To complete this step, every player in the game must have an upgraded bow. A white circle will appear beneath the keeper once stopped at one of the above locations; when entered there will be a colored glow on the screen which indicates which upgraded bow is required to continue:
If solo, there will be a glow for every bow you upgraded in your game. If you only upgraded one bow then you will only ever see that bow's color glow when standing in the white circle.
The player wielding the indicated bow must get kills while standing in the circle until the tablet has been filled with souls. You must repeat this for all four locations after which the keeper will become corporeal and travel to the Undercroft and get struck by lasers before teleporting to the moon.
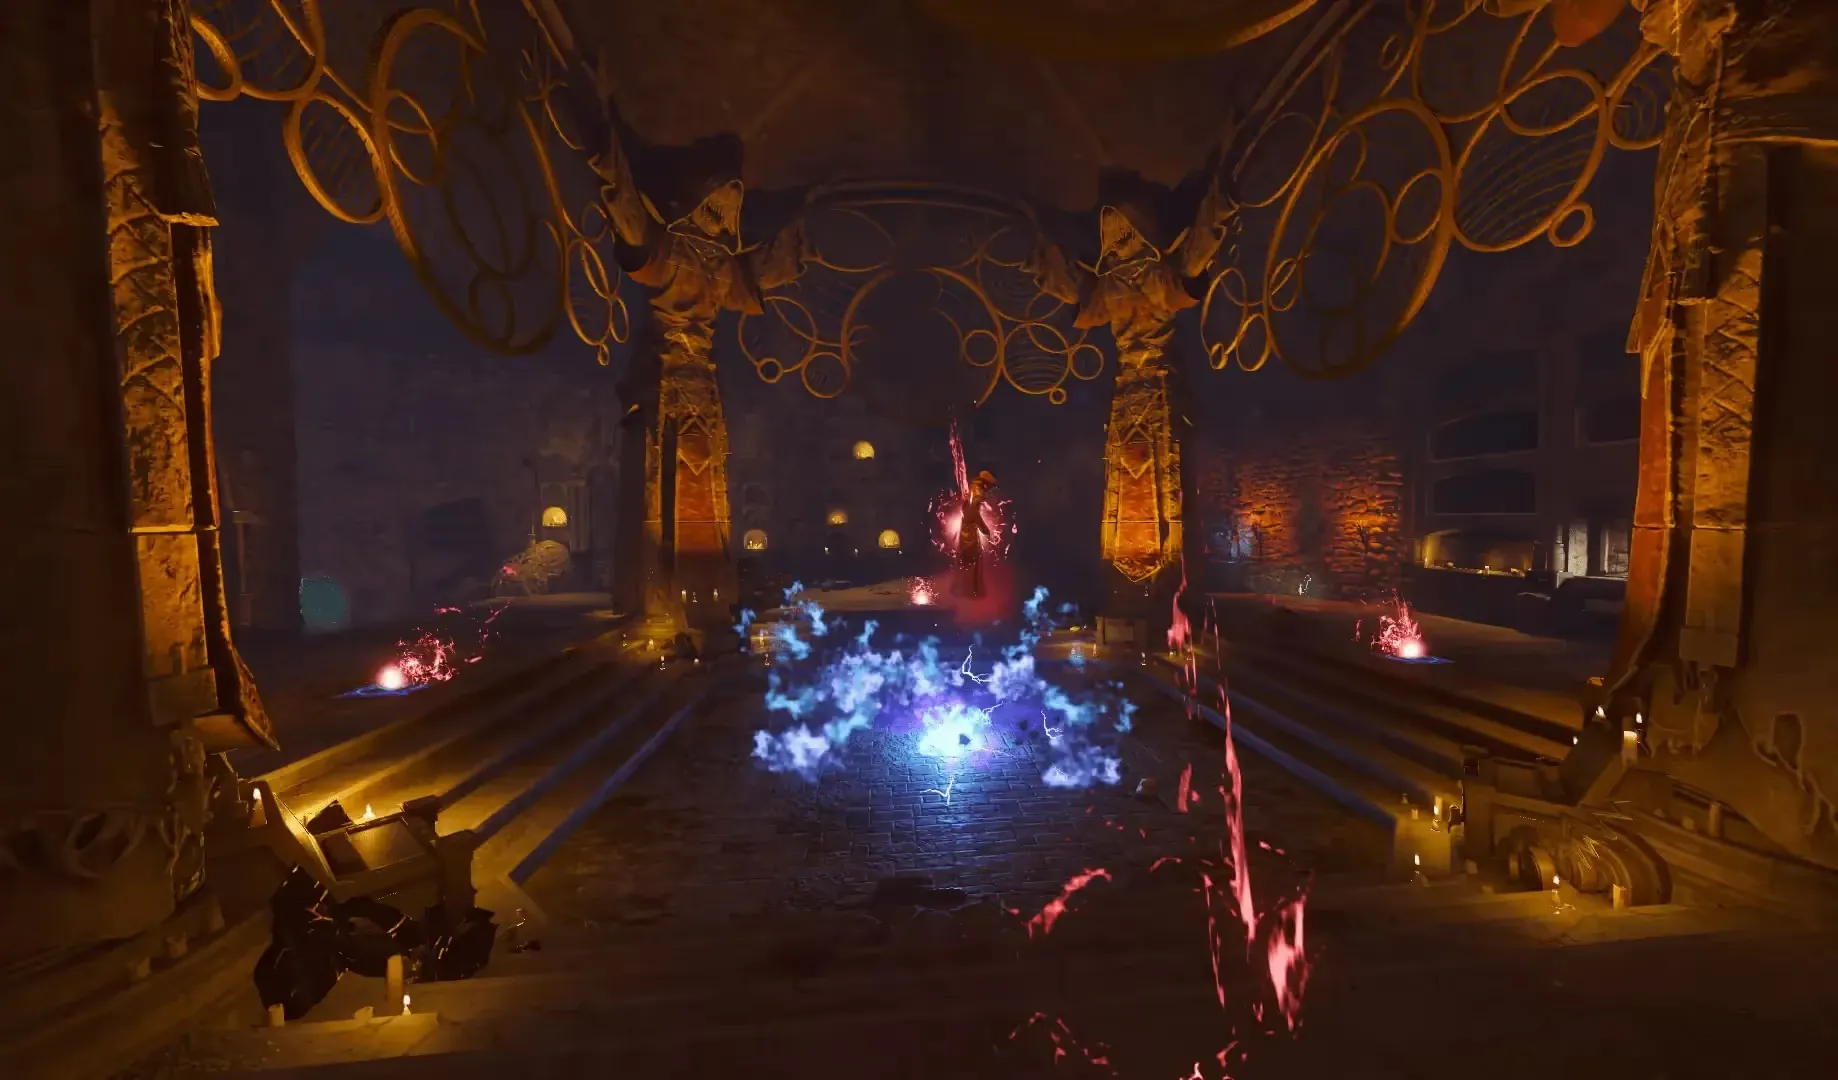
You only need to collect about 20 souls for the tablet to be charged, but, the keeper will not progress to the next tablet until the current round has ended. If you want to progress this step faster, you can end the round via the
Round Robbin' Gobblegum or by picking up a nuke power-up after collecting around 20 kills.
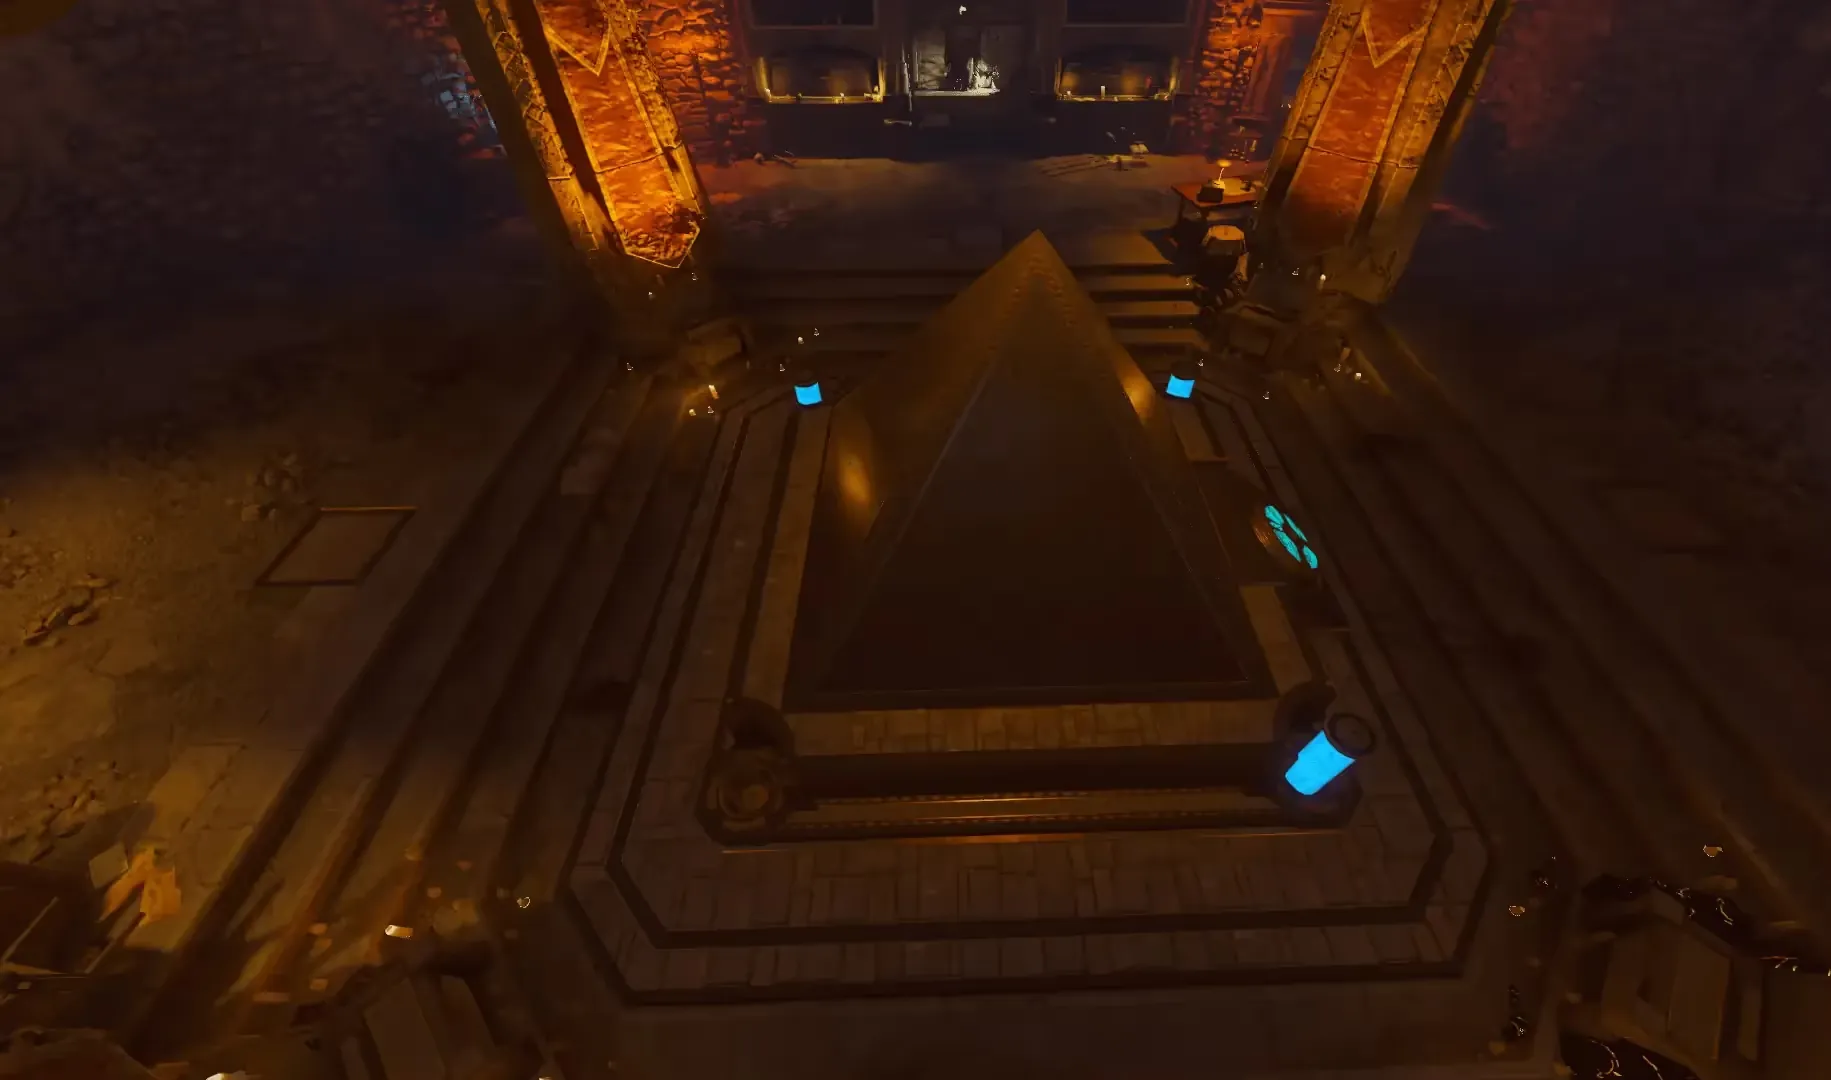
After some dialogue, the keeper will return with the M.P.D. (Moon Pyramid Device), and you must place the soul canister you collected from your first-time travel to the past into the corner of the M.P.D. that doesn't contain one.
Step 7: Keeper Boss Fight
Before continuing, it is highly recommended to use a Pack-a-Punched shotgun (KRM, Haymaker, Brecci) for taking care of Panzersoldat easily, as there will be many in this boss fight as well as acquiring either the XM-53 rocket launcher or Ray Gun from the Mystery Box, as these weapons, Pack-a-Punched, do huge amounts of damage to the boss.
The Ragnarok DG-4s are required to enter the boss room, if you have them built in your game already you can skip to entering the boss room. Otherwise, see how to build them below.
Building the Ragnarok DG-4s
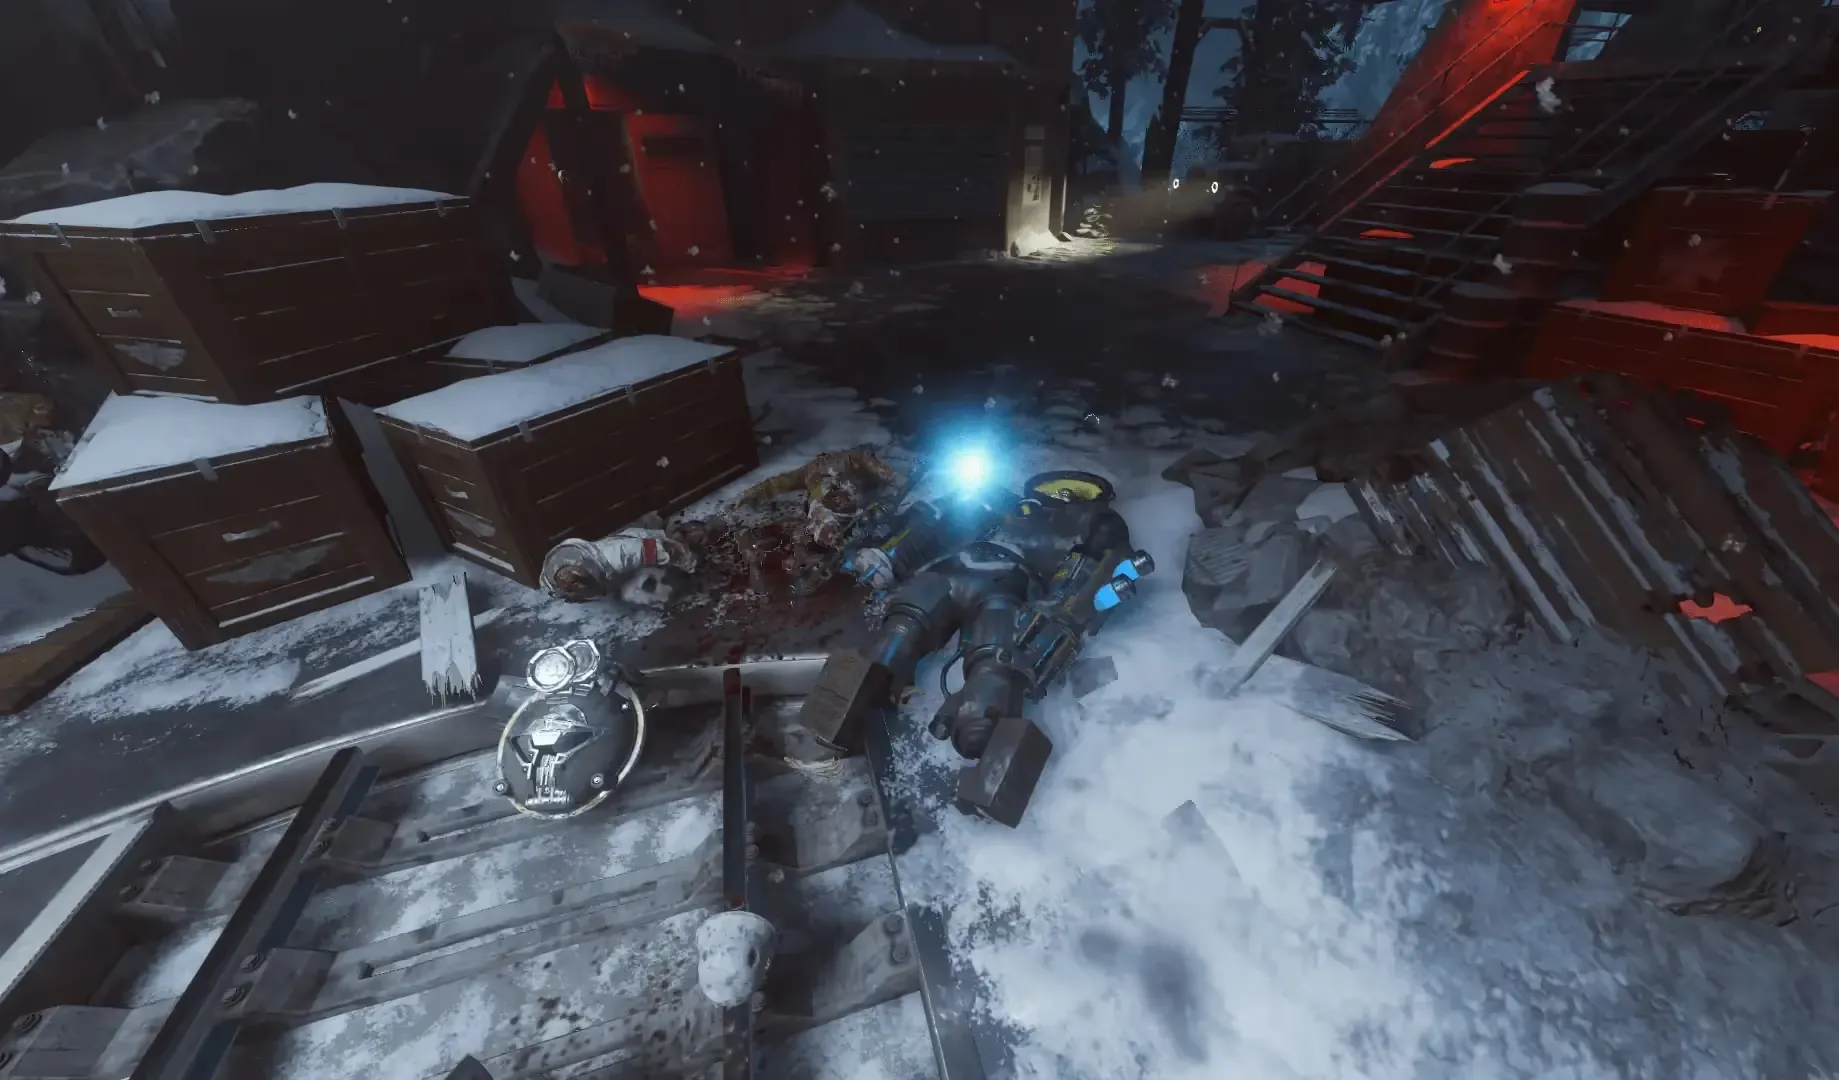
There are three parts required to build the Ragnarok DG-4s. The first part is dropped by the Panzersoldat on round 12, upon killing the Panzersoldat you can walk over the part to pick it up.
The second part is obtained by turning on the Death Ray. After activating the Death Ray, look in the sky above the Death Ray to see a glowing part that will either be hovering above the spawn or the Death Ray platform. You must use a Wundersphere to collect this part depending on where it's hovering.
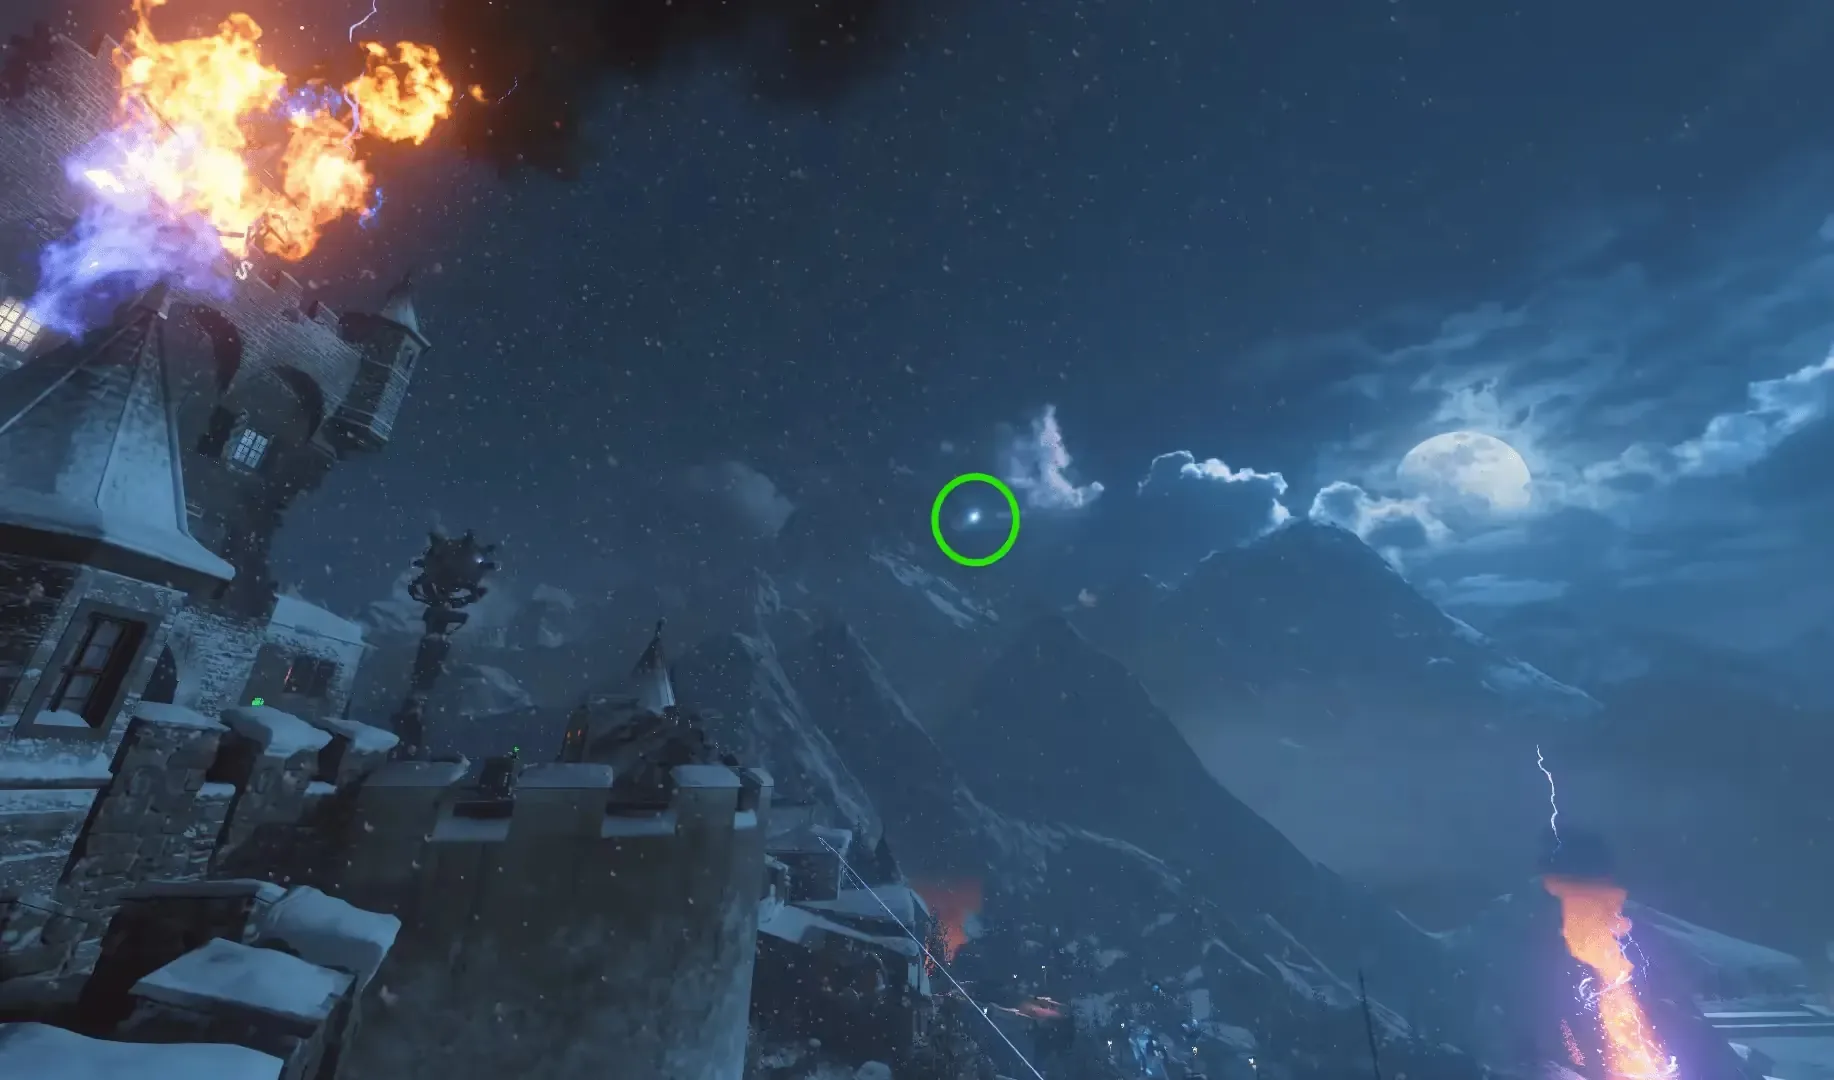
This part will despawn if not picked up in time, If the part is hovering above spawn, use the Wundersphere in the room above
Double Tap. If the part is above the Death Ray platform, use the Wundersphere in the church/Mission Control courtyard.
The final part is obtained at the Rocket Test Site. While at the site, wait for a rocket test to begin which will allow a lever under the rocket to be flipped. You must flip this lever and then quickly run to safety in the tunnel where the teleporter is located.
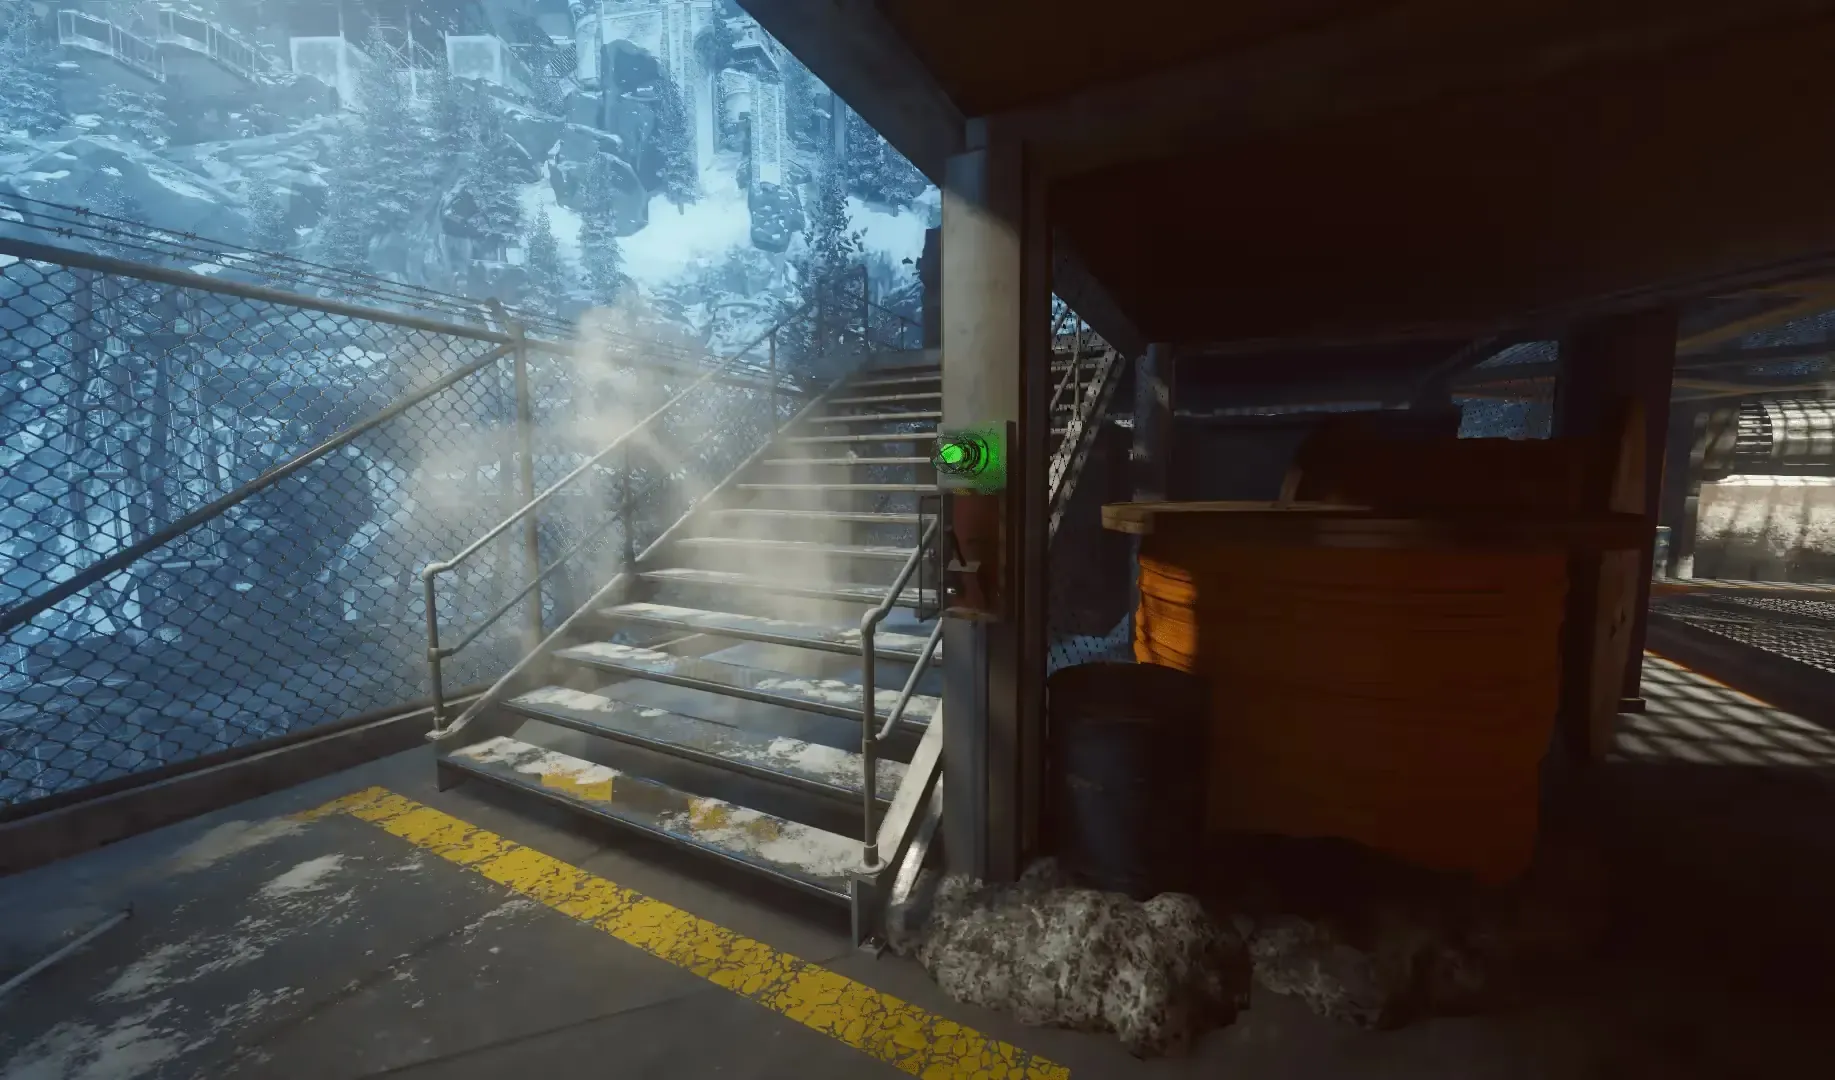
Left of the teleporter will be another lever with three lights on it that start as red and slowly turn green as the rocket test progresses, once all three lights are solid green you must quickly flip this lever to spawn the part in the teleporter.
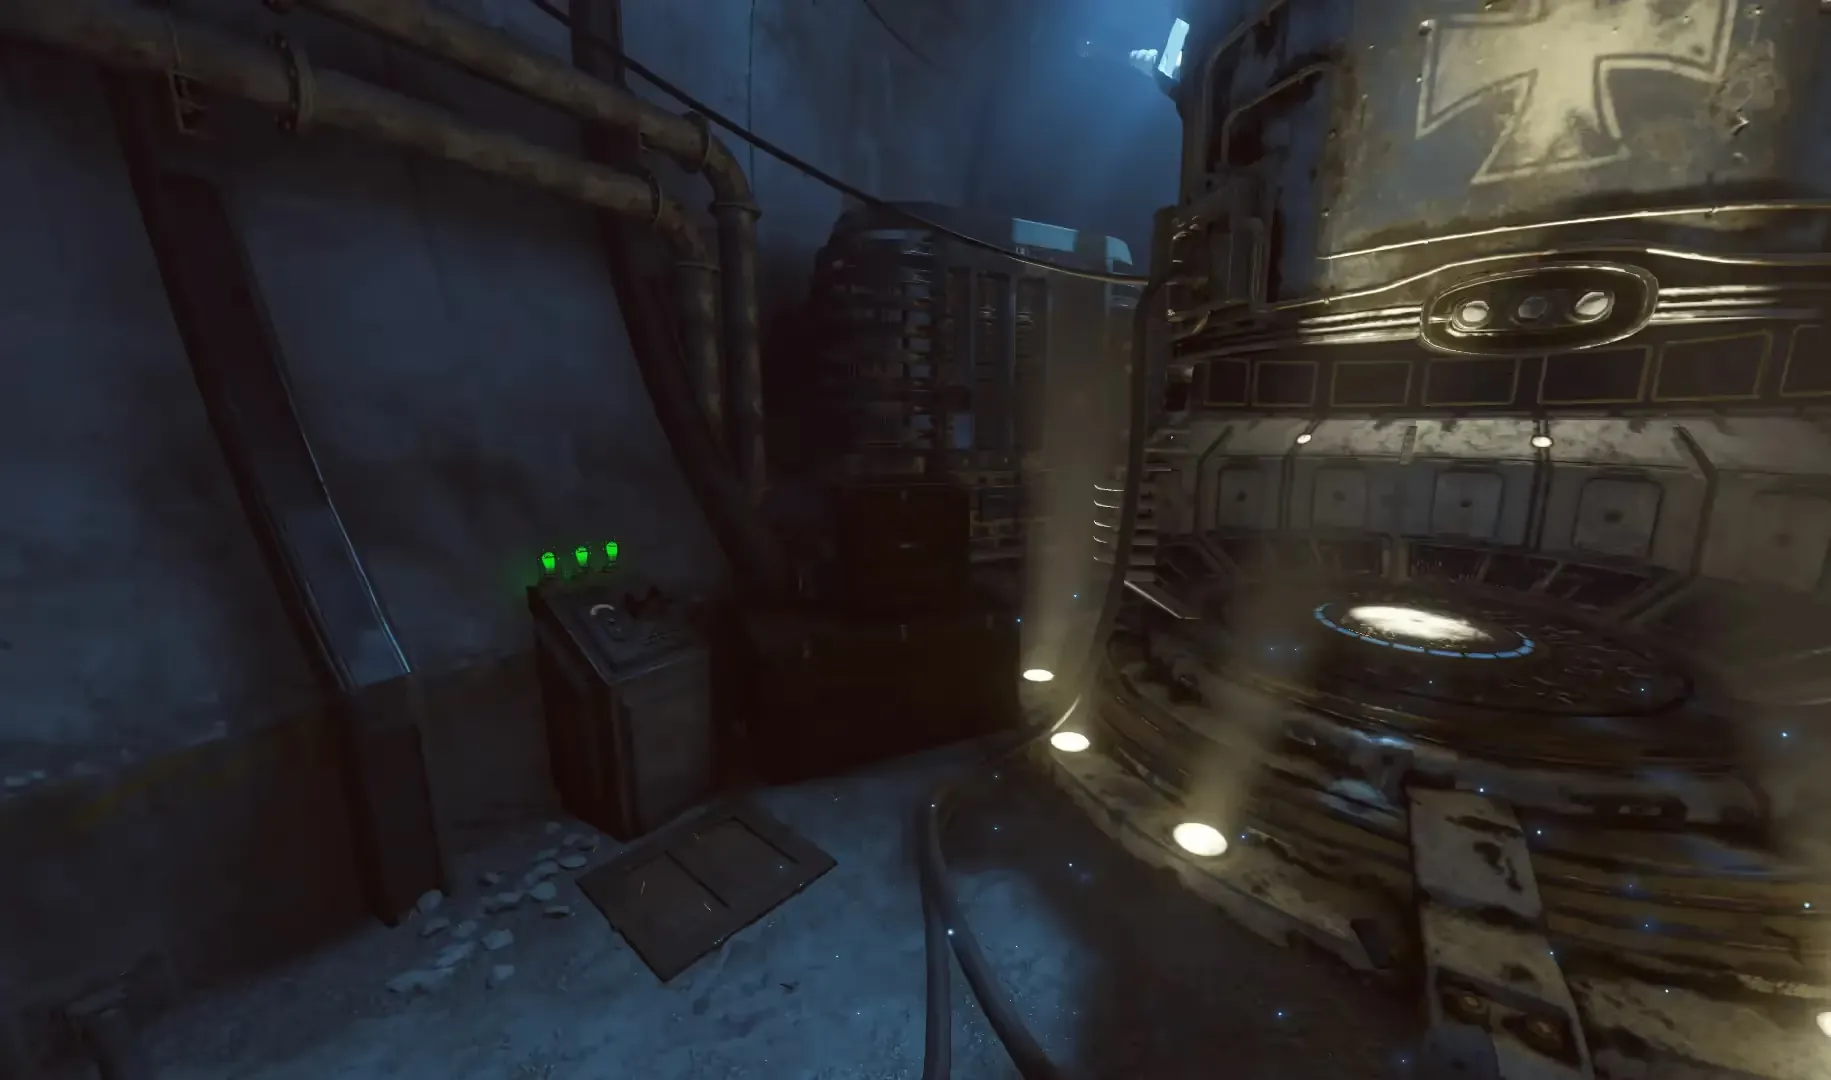
If you fail to flip this lever in time after the rocket test has ended, you will need to repeat the process to get the part.
Entering the Boss Room
All players in the game must have their Ragnarok DG-4s fully charged and ready to use. Each player in the game must place their Ragnarok DG-4s down on separate blue squares around the M.P.D. used to activate the anti-gravity, this will teleport everyone to the boss room.
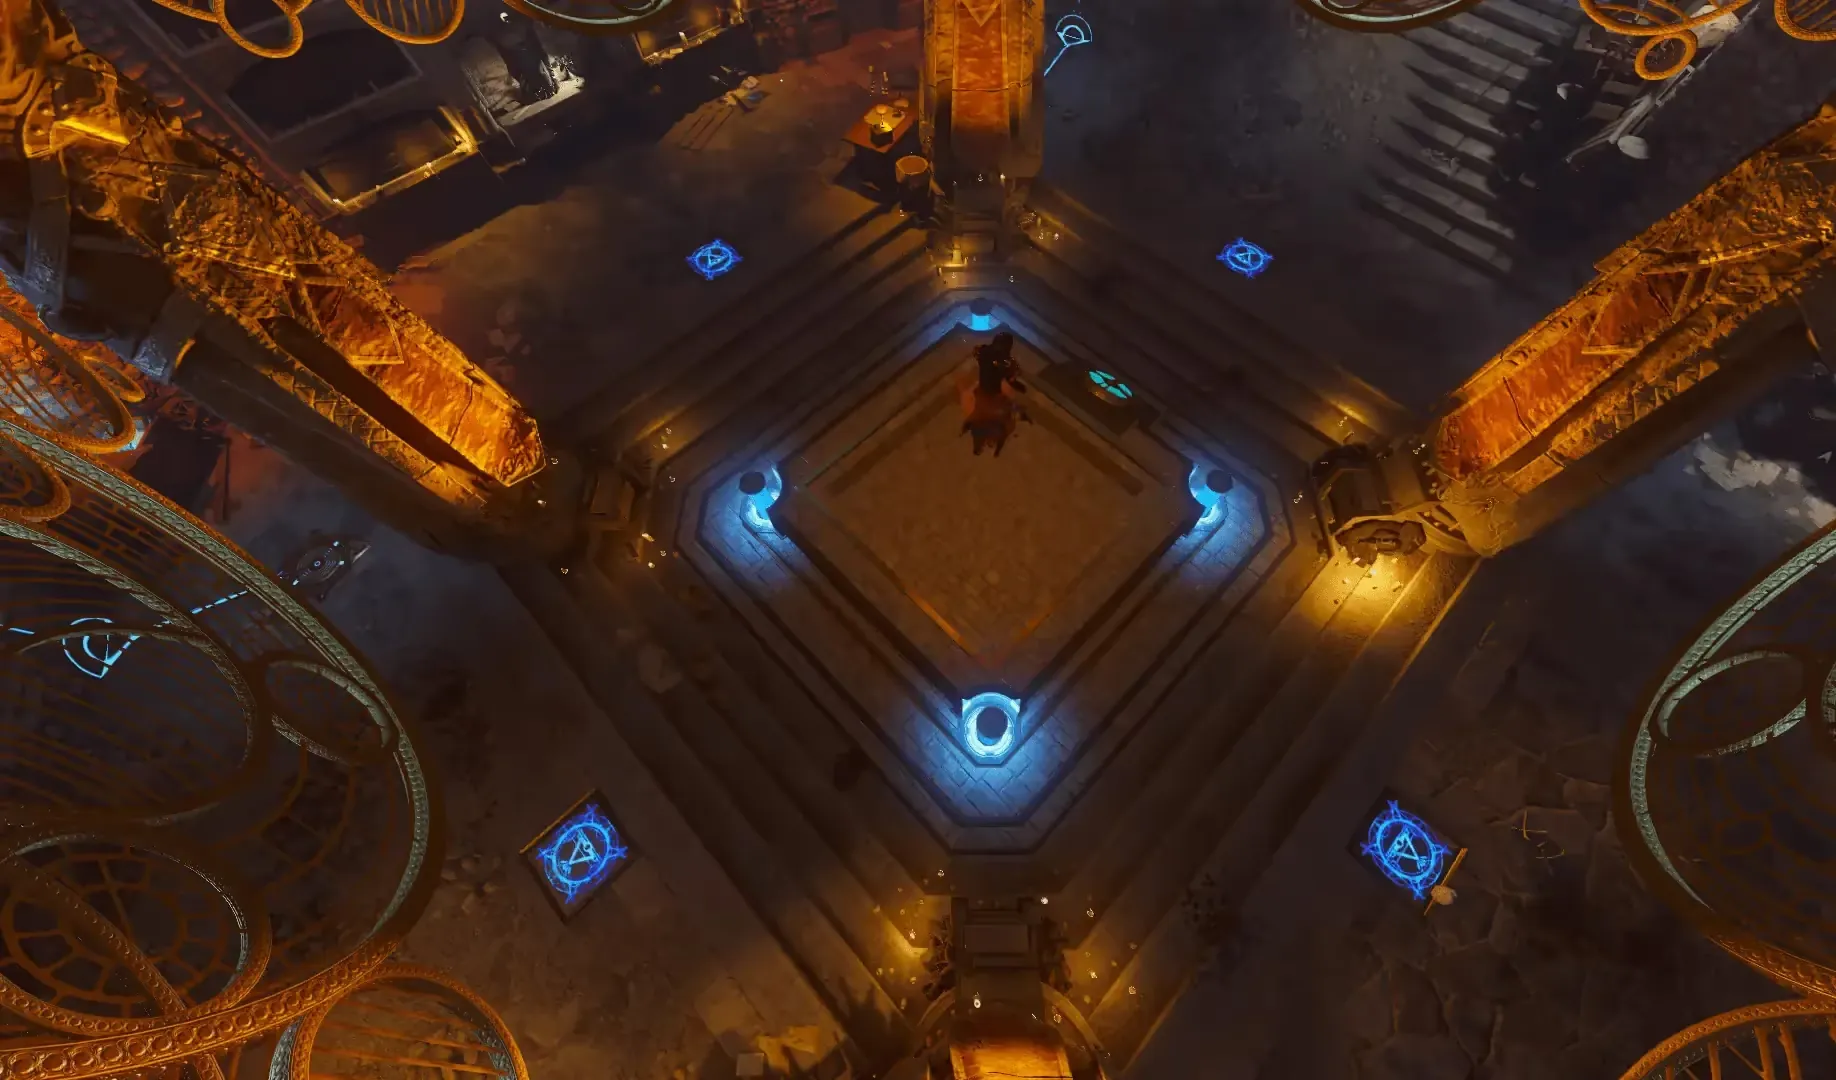
Be sure that all dialogue has ended before attempting this as it can sometimes prevent you from entering the boss room.
Boss Fight Rotation
Once in the boss room, you will be attacked by zombie Skeleton, do not waste much ammo on these as they aren't a threat and should just be avoided by running in circles. After some time, the boss will appear and attack you by launching skulls at you or summoning volcanic rocks that damage you as you pass through them.

Use your upgrade bow to kill the small threats like the Skeleton, as you need to make sure you or someone in your game their Ragnarok DG-4s charged.
Eventually, the boss will teleport to the middle of the room to prepare for a one-shot attack downing everyone hit by it. During this preparation, a glowing electrical ball will appear underneath the boss that any player must run to and place their Ragnarok DG-4s right on the ball to cancel the boss's attack and stun him.
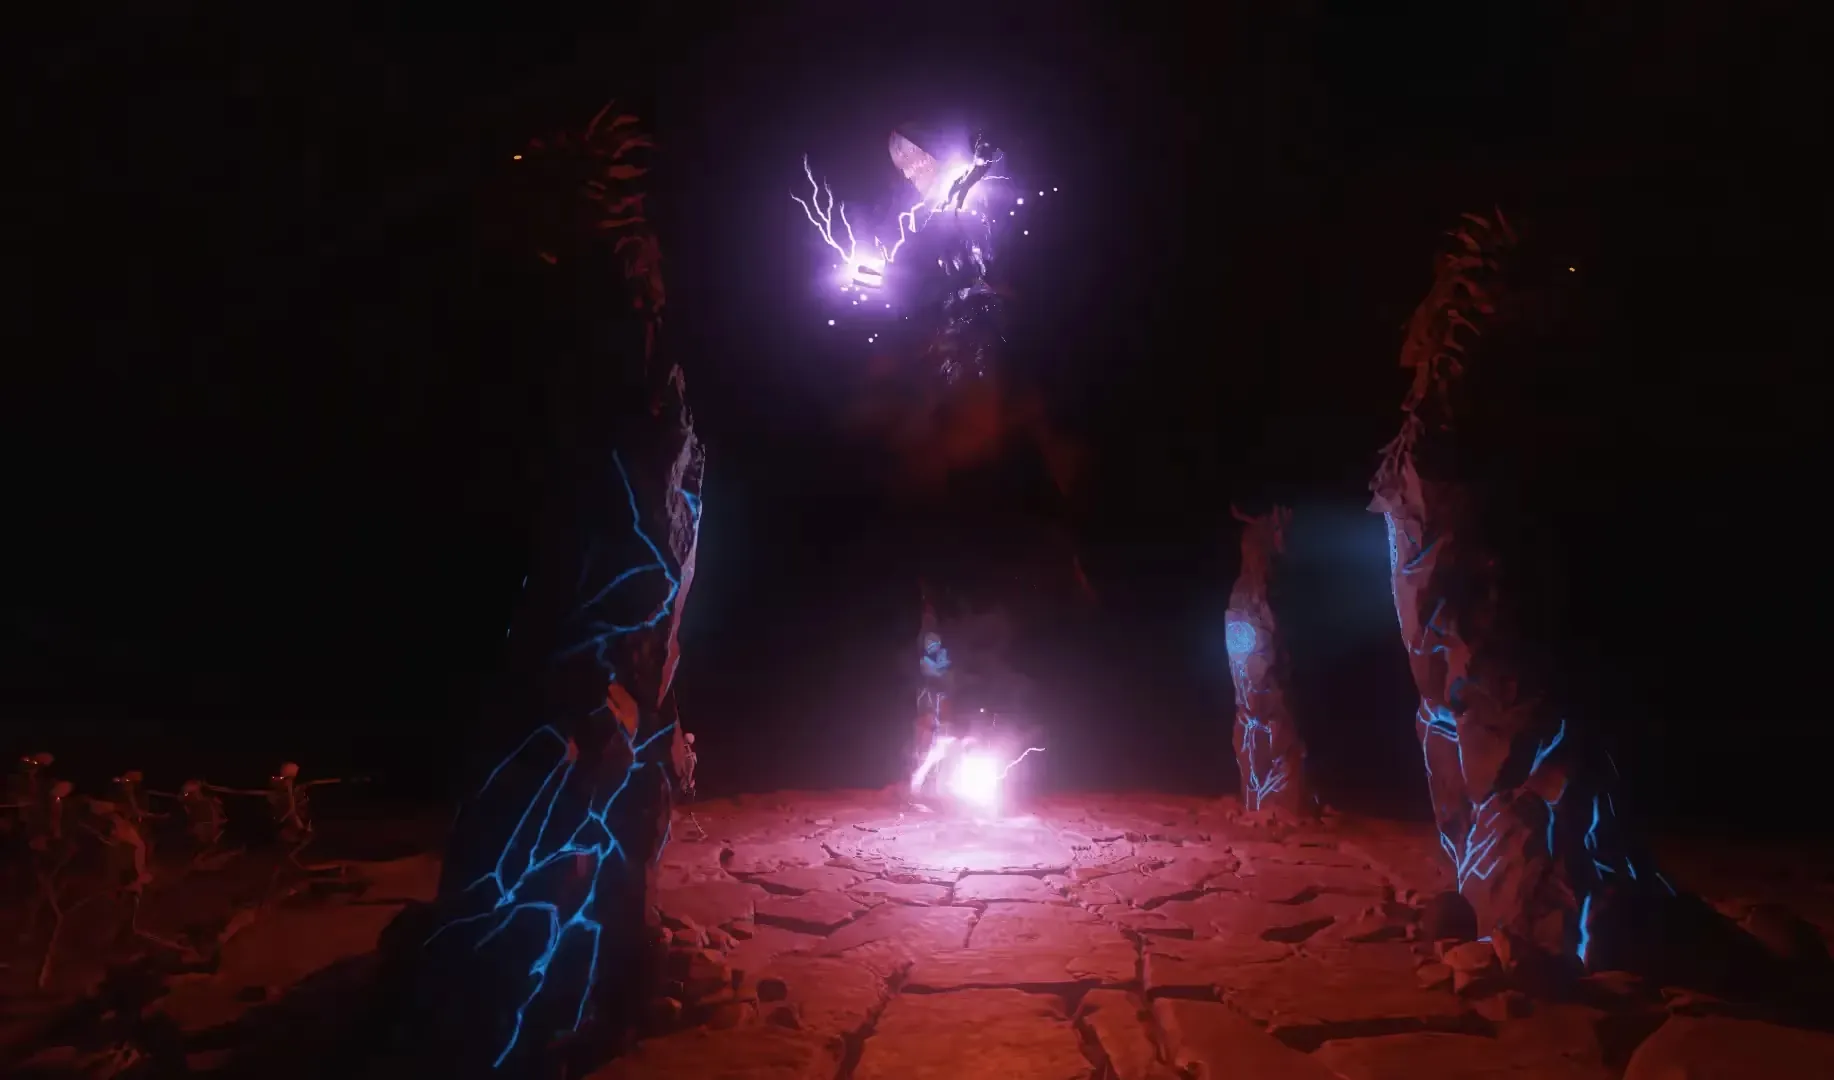
If you cannot prevent this attack from happening, hiding behind one of the pillars in the arena will protect you from the one-shot.
After stunning the boss, the symbol on his chest will be glowing indicating that you have entered the damage phase and must pump as much damage as possible into his chest. Use the XM-53 or Ray Gun ideally to do massive amounts of damage to the boss, upgraded bows do little damage to the boss and should be a last resort if you don't have the ideal weapons.
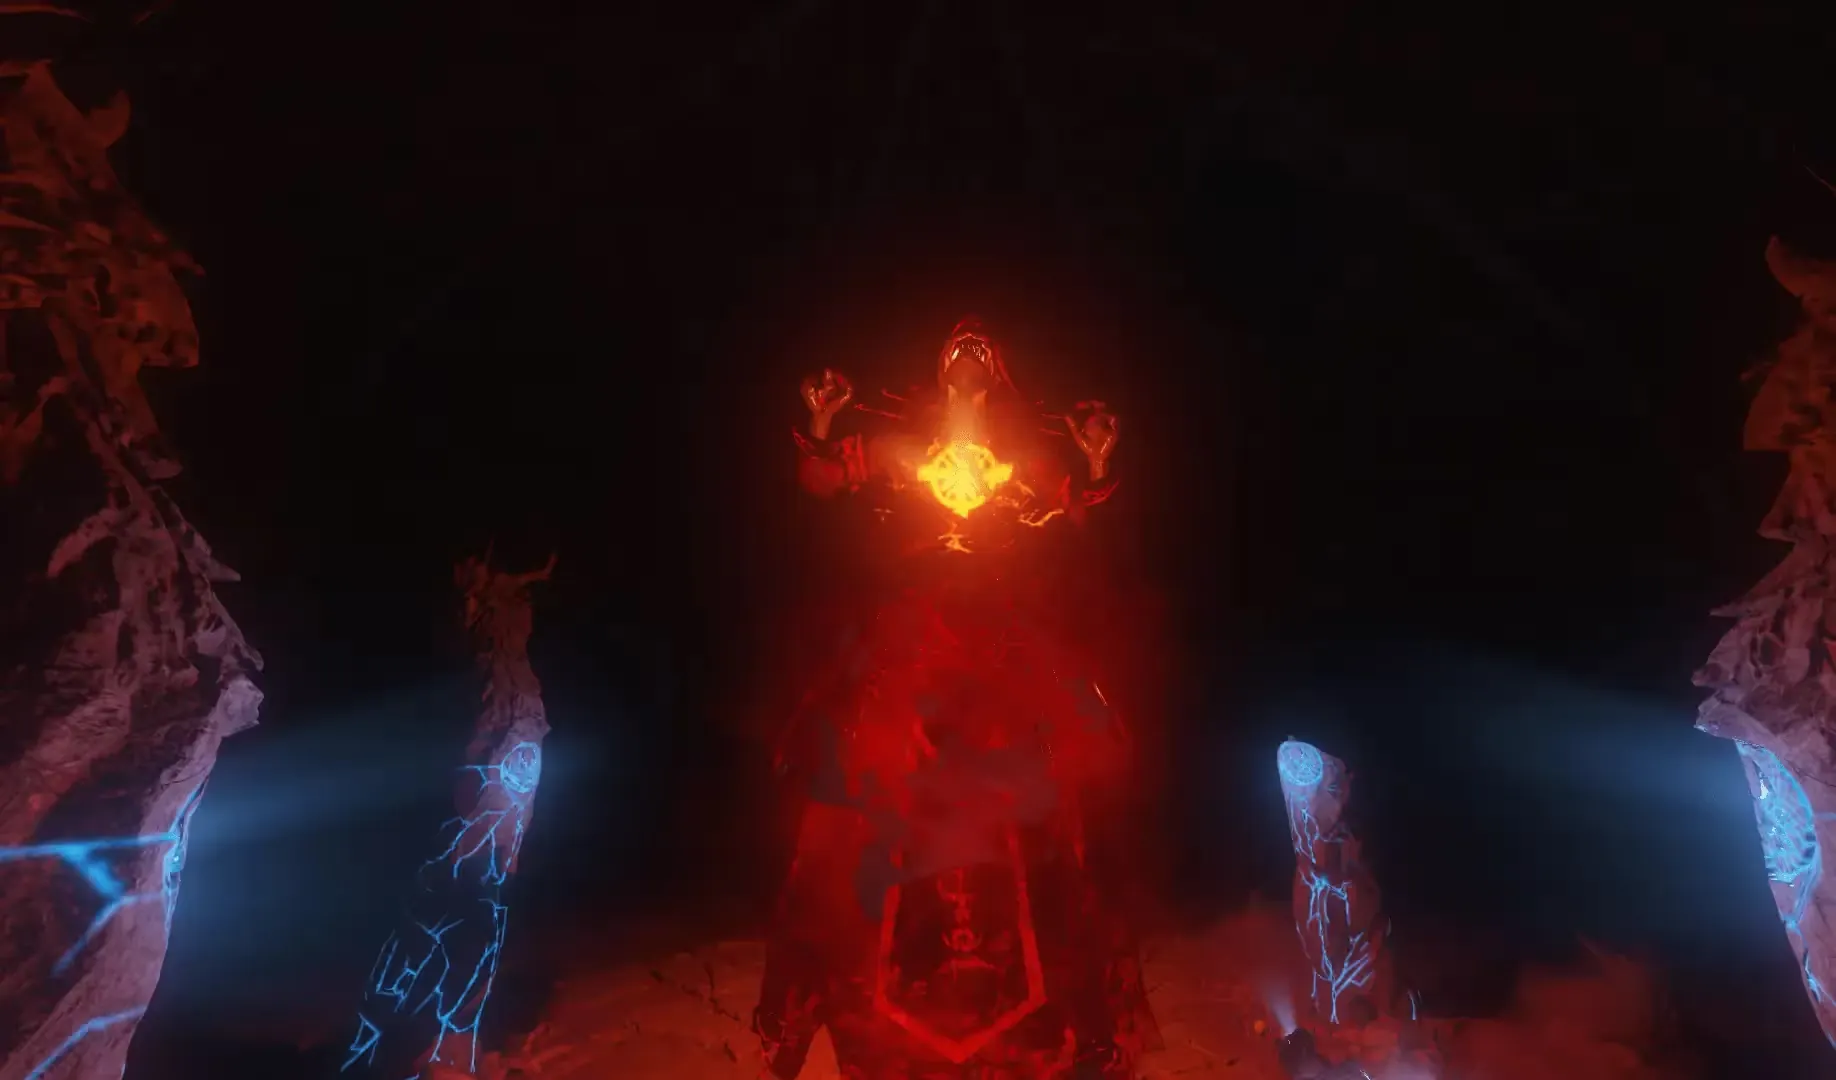
If you are using the bows to do damage to the boss, do not use charged shots and just spawn regular shots as you will output more damage.
After a damage phase, waves of Panzersoldat will spawn that you must kill, each wave granting you a Max Ammo in the middle of the room. Once all Panzersoldat have been killed, the boss fight will repeat like the beginning, with some Hellhound sometimes spawning until you do enough damage to kill the boss.
Make sure to ALWAYS pick up your Ragnarok DG-4s after the damage phase so that you can charge them by killing zombies for the next one-shot attack by the boss.
Step 8: Moon's Destruction
After defeating The Corrupted Keeper boss, you will be teleported back to the Undercroft in front of the M.P.D. Interact with the Vril Interface (blue circular plate) in the front of the pyramid revealing the Summoning Key which you must pick up by interacting again.
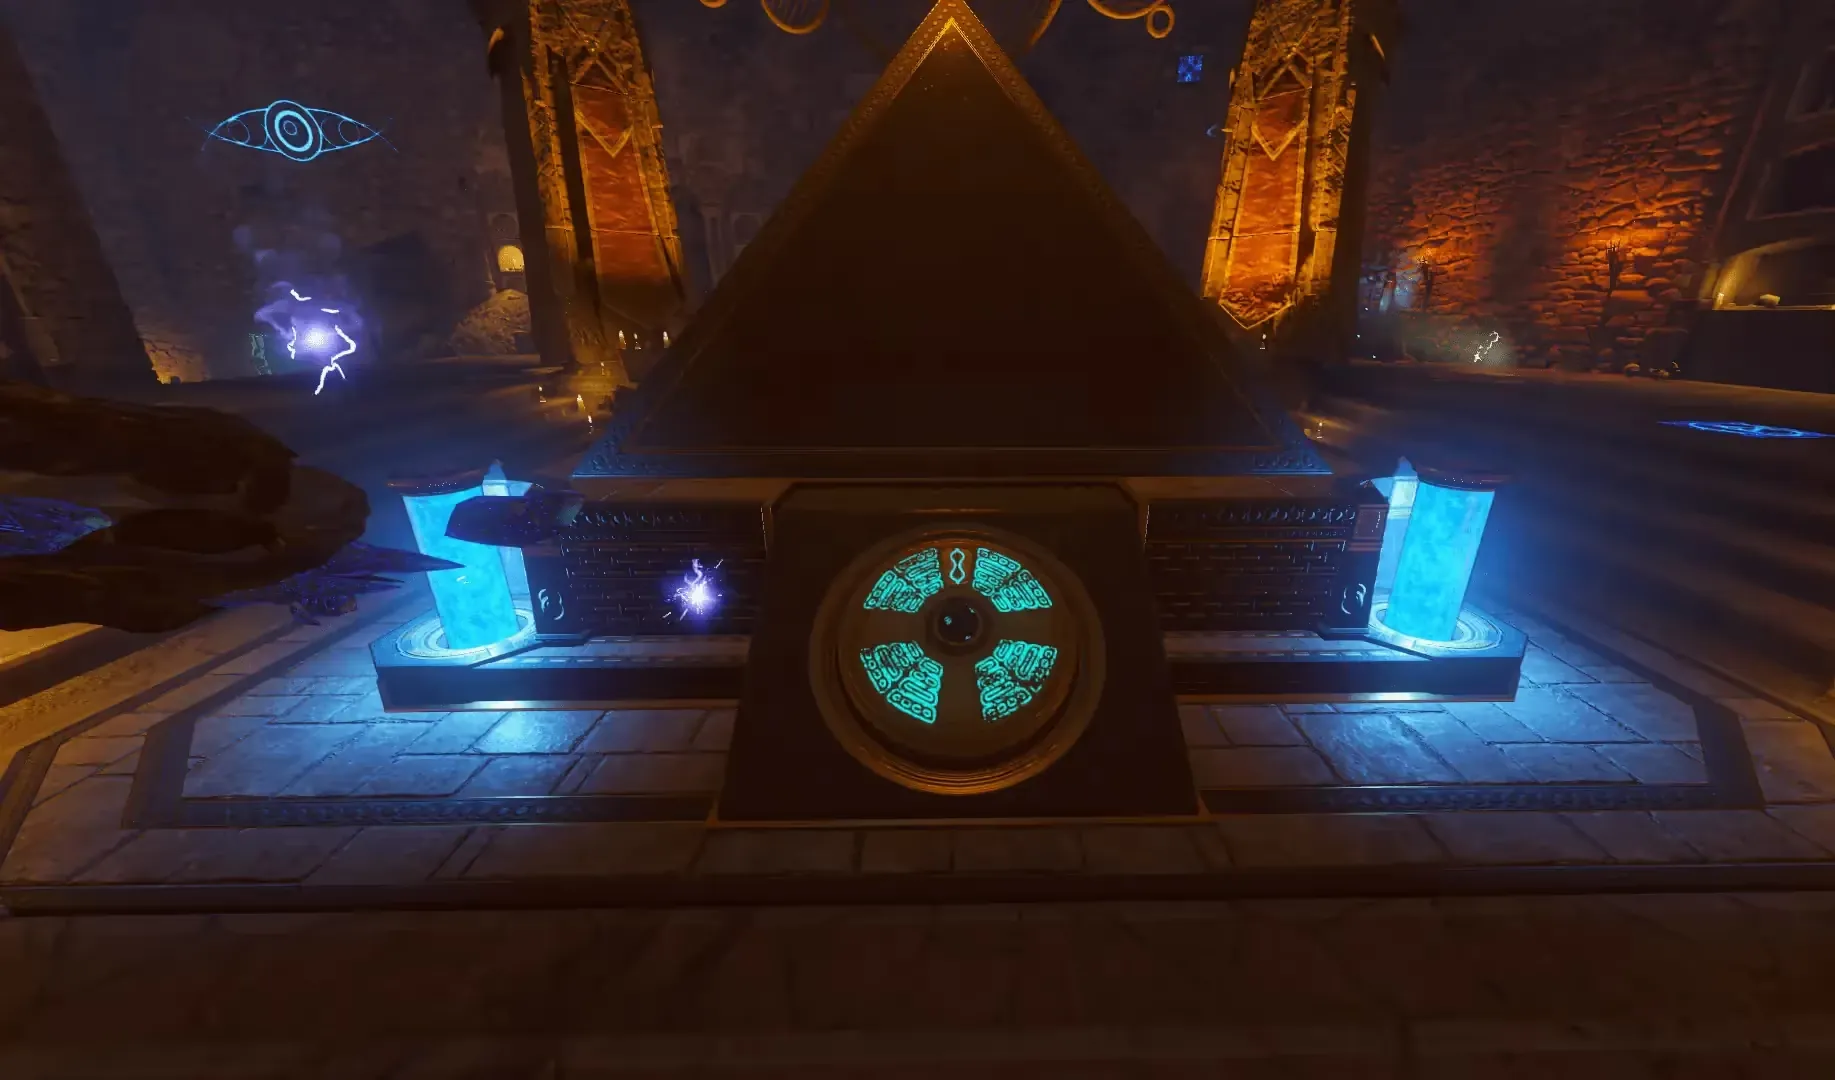
Pick up the Summoning Key and bring it to the terminal near the Clock Tower. Interact with this terminal to place the Summoning Key down causing the Summoning Key to override the system and launch the rockets around the castle at the moon, all zombies will de-spawn and a cutscene will play
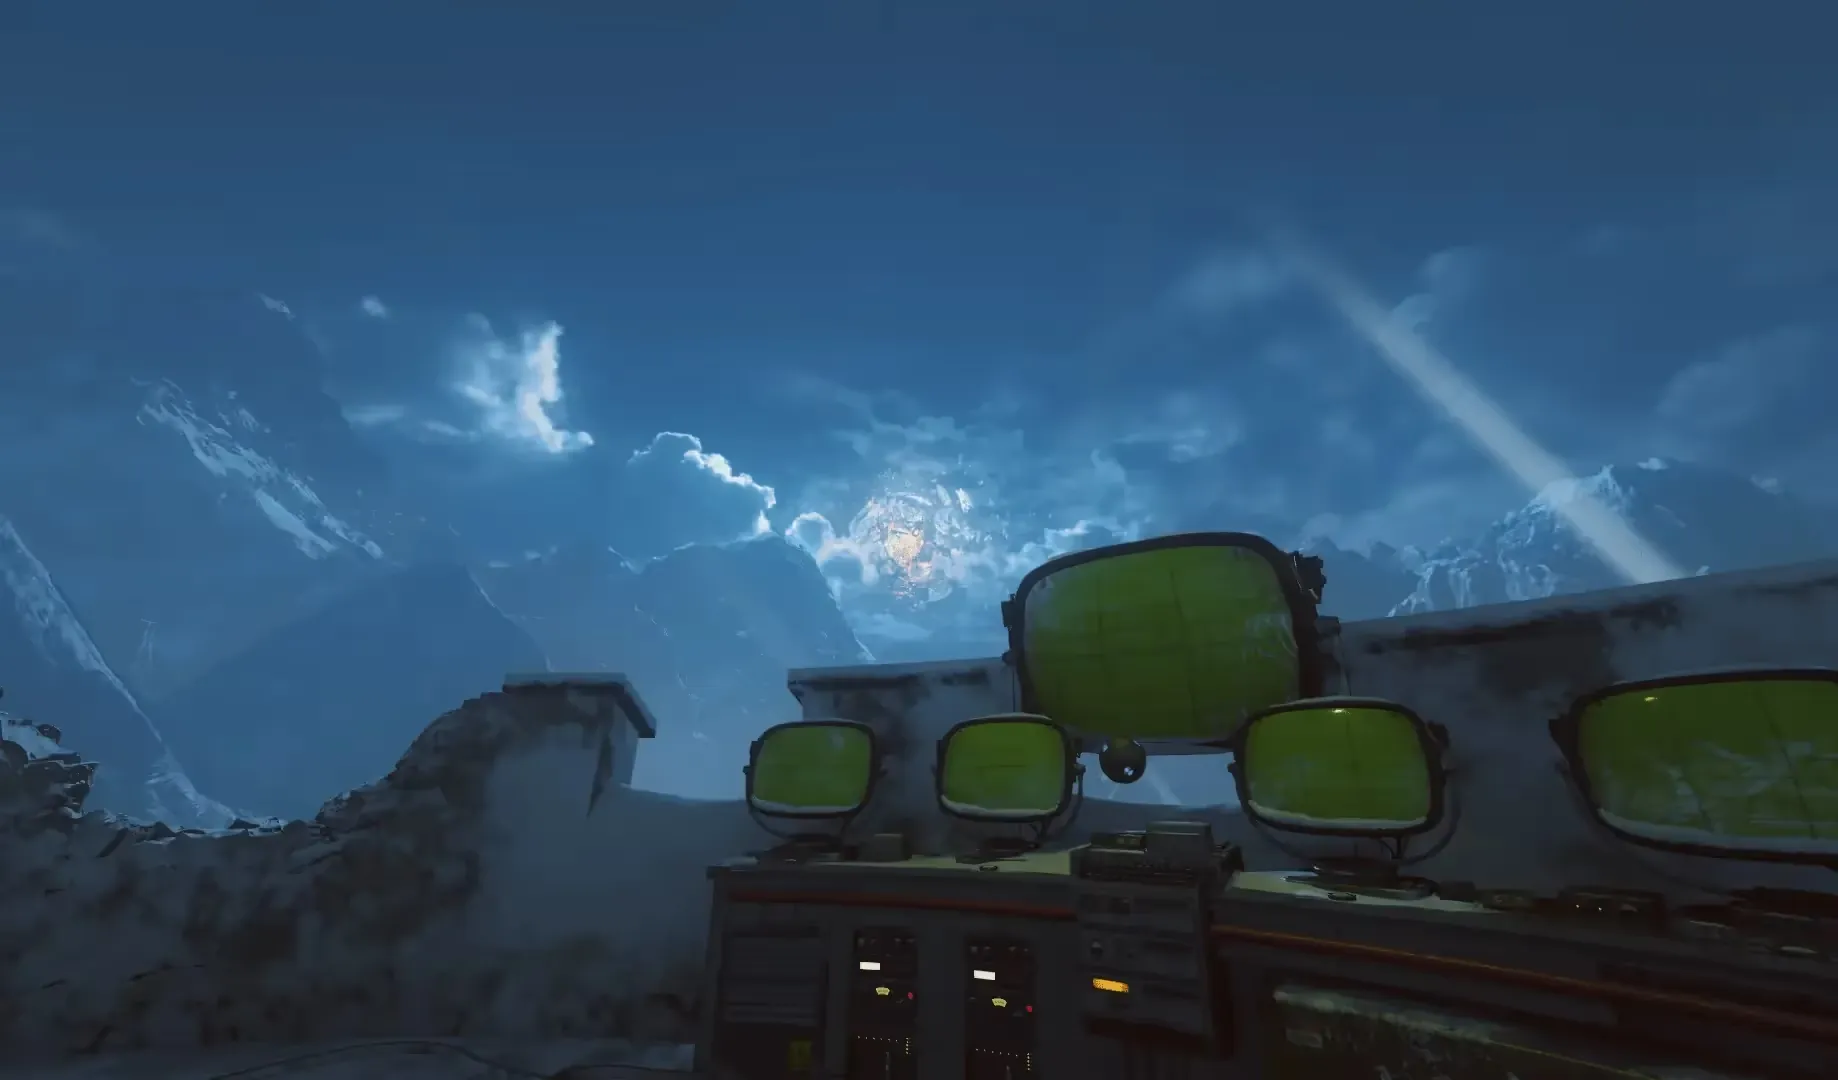
Congratulations! You have completed the Der Eisendrache main quest: My Brother's Keeper
